Counting down to Christmas becomes even more exciting with a homemade advent calendar! For this version, you'll create a cover from kraft cardboard containing 24 personalised boxes. Place a small gift or treat in each box and give the calendar a special spot in your home. With our Christmas crafts, you'll make every day in December a celebration!
1
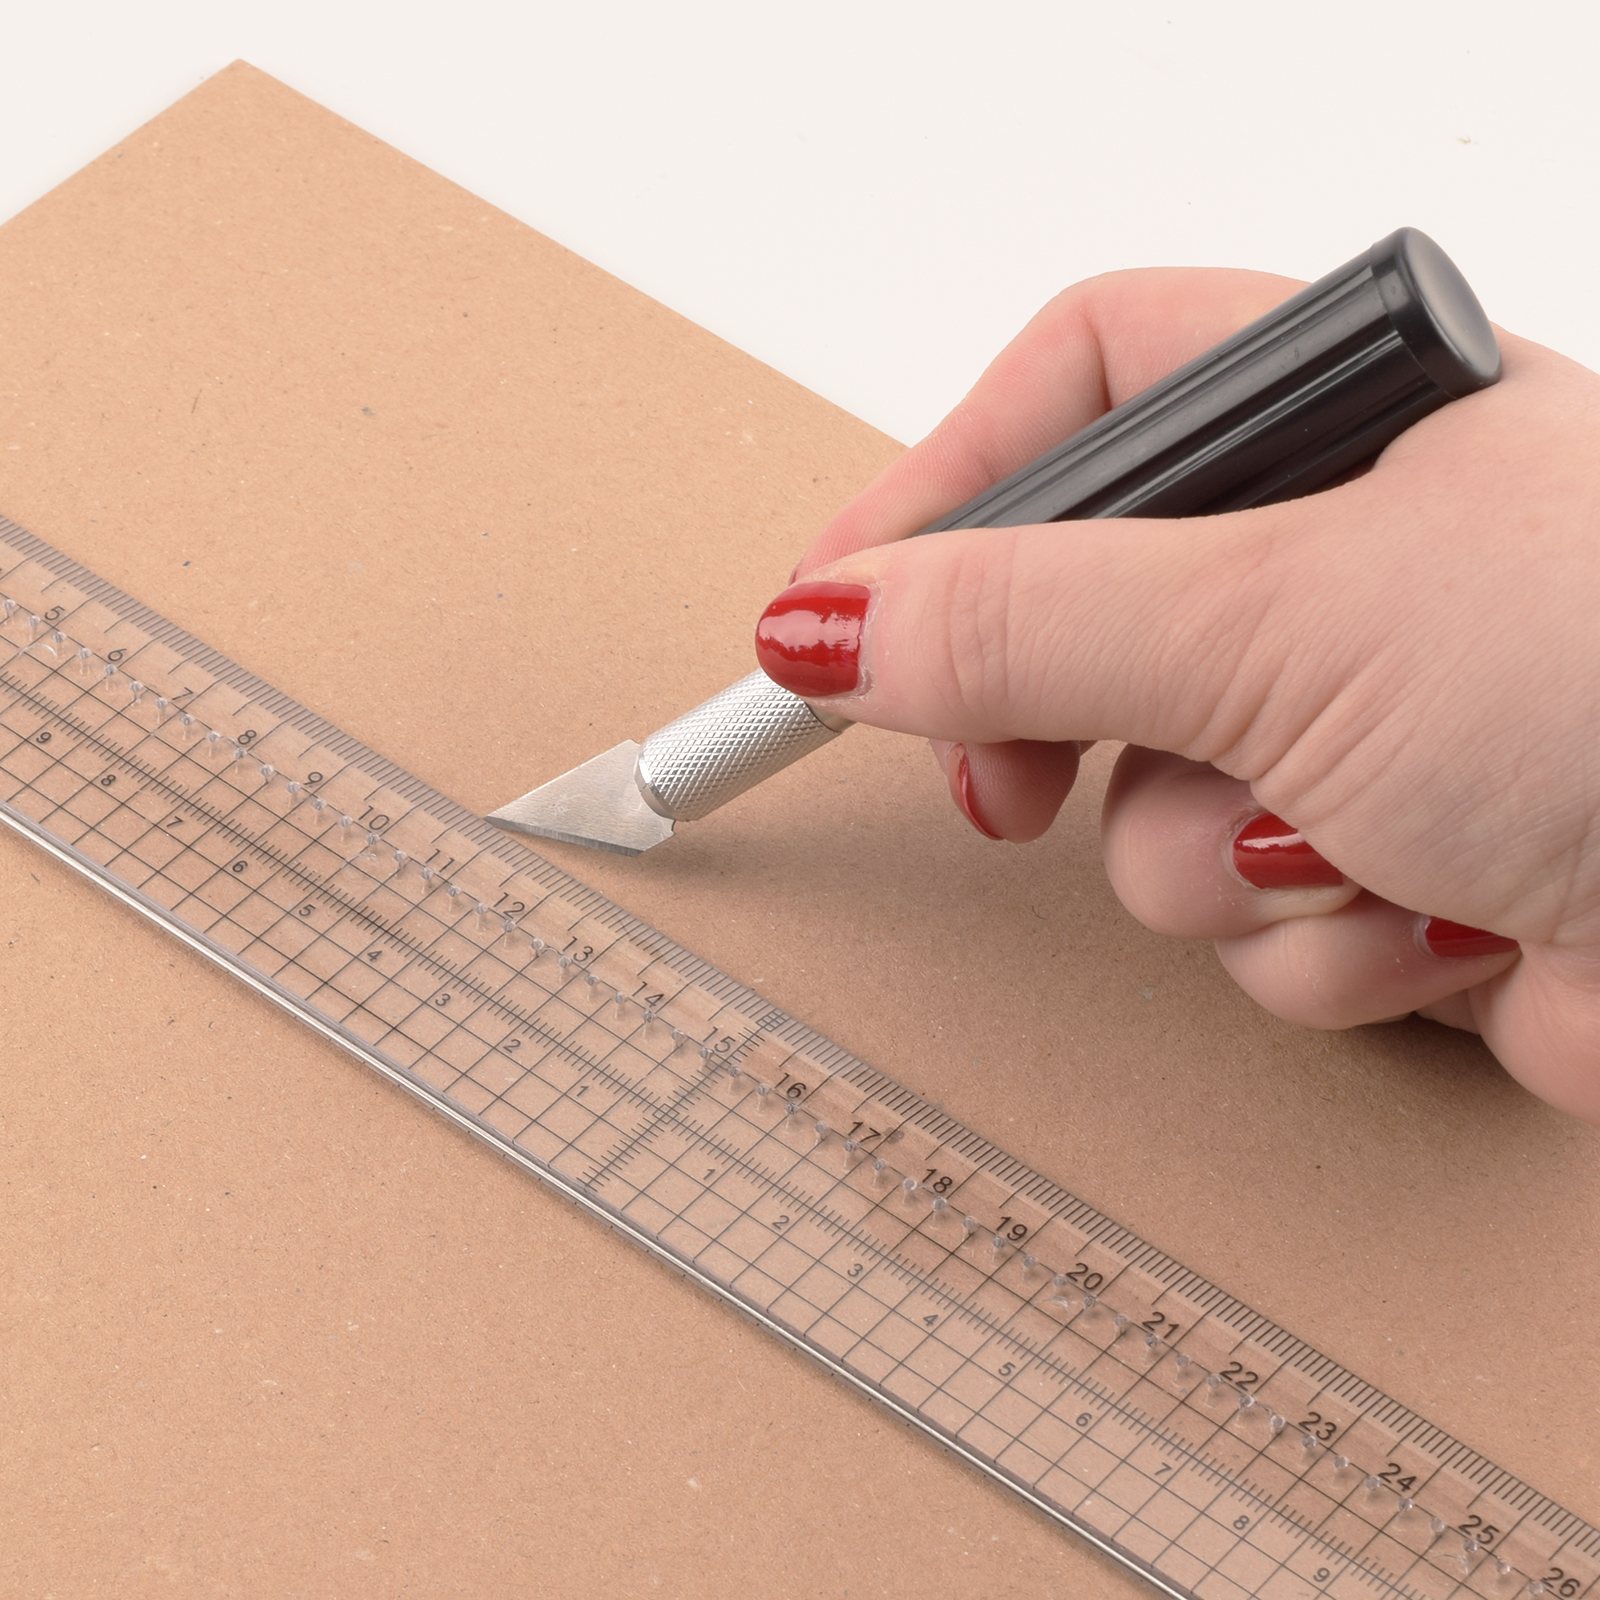
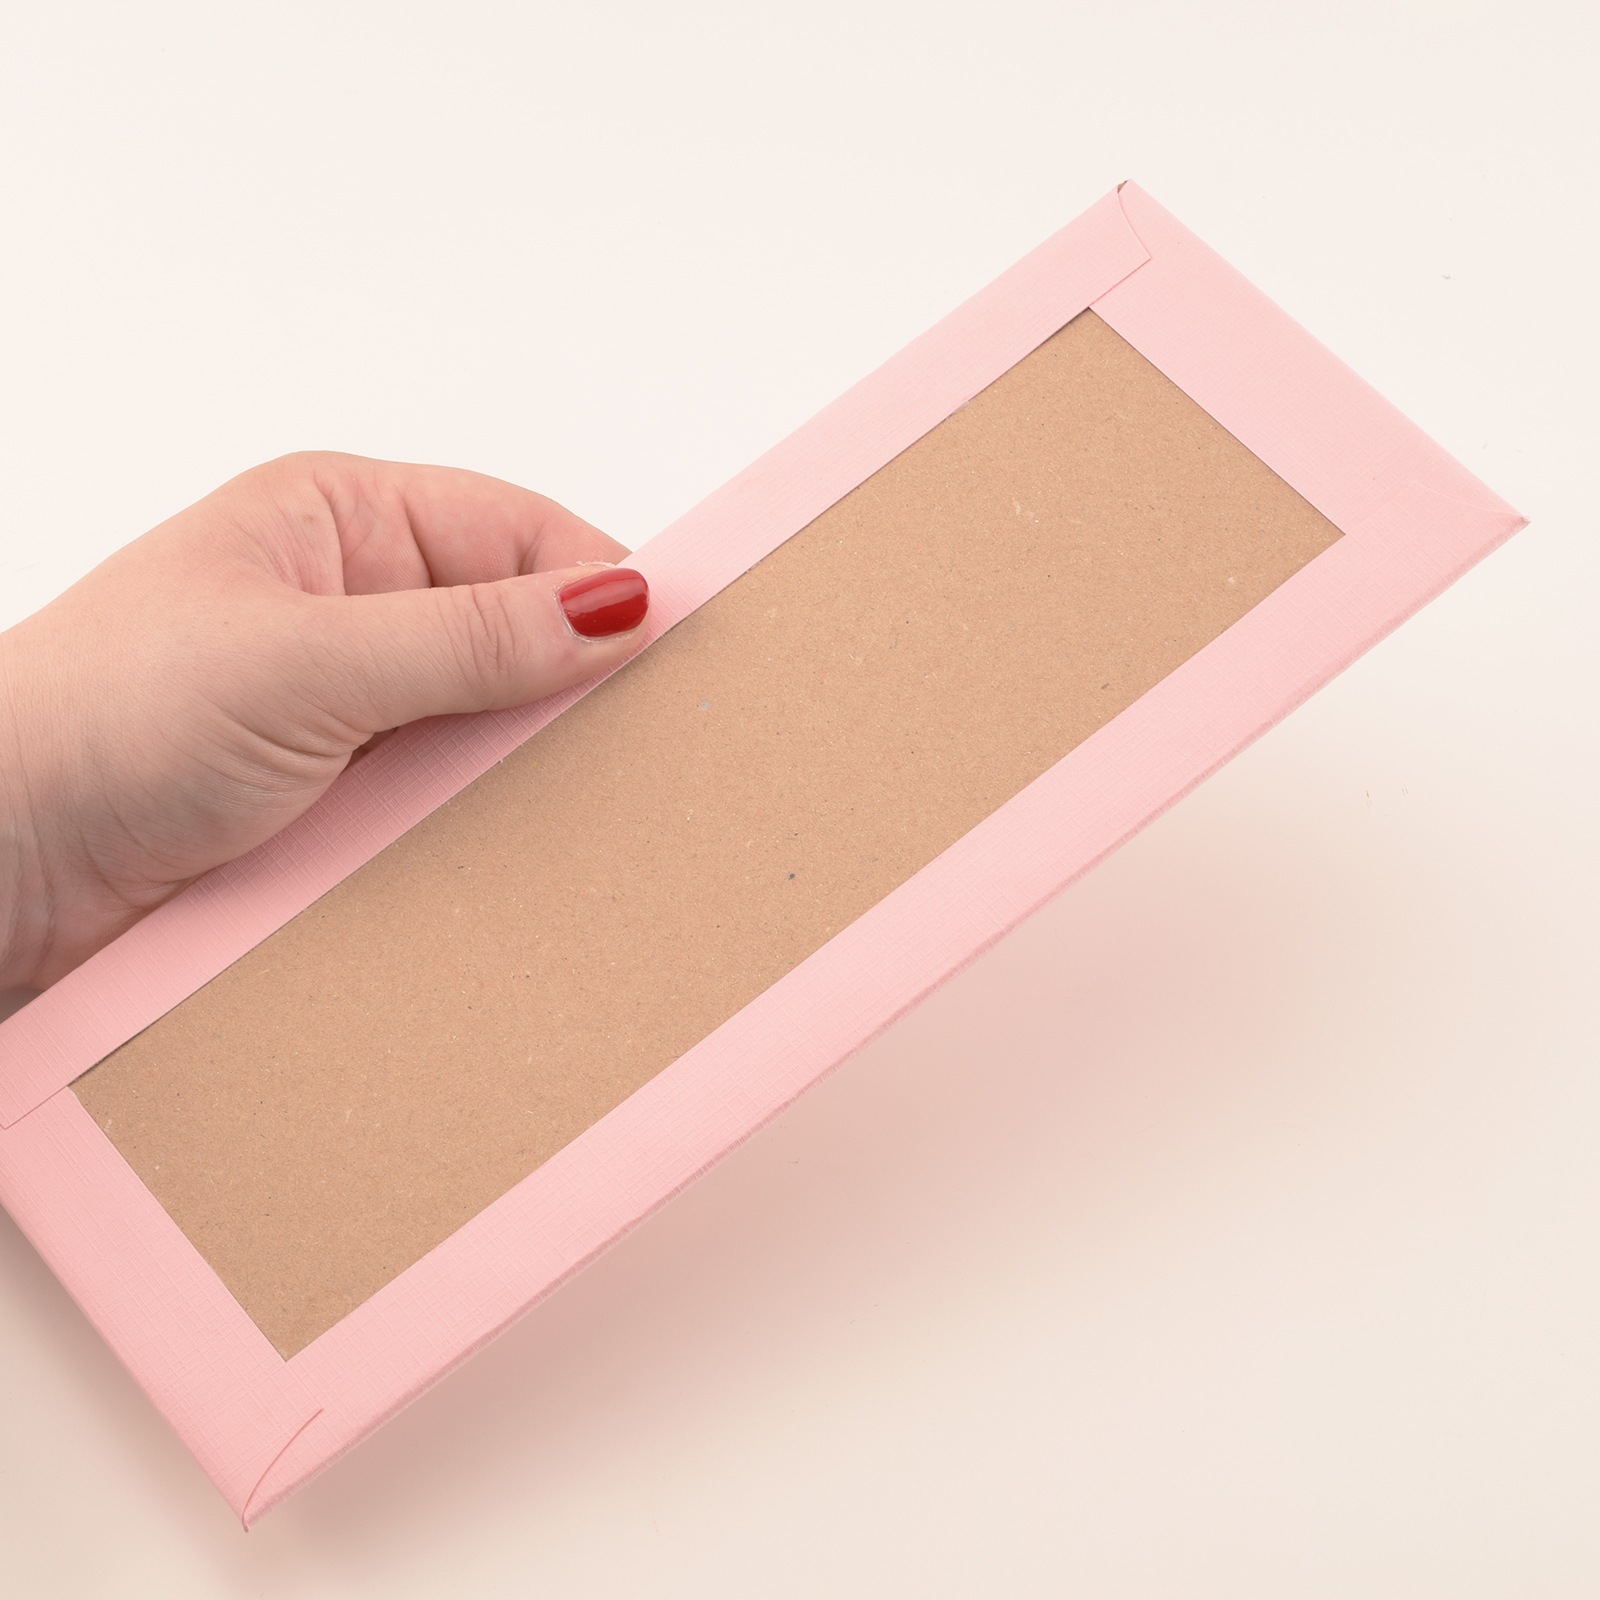
Cut two pieces of kraft cardboard measuring 10.2 x 10.2 inch (26 x 26 cm) and one piece measuring 10.2 x 3.9 inch (26 x 10 cm).
2
Attach two sheets of 12 x 12 inch (30.5 x 30.5 cm) paper to the 10.2 x 10.2 inch (26 x 26 cm) pieces and cut quarter circles from the corners.
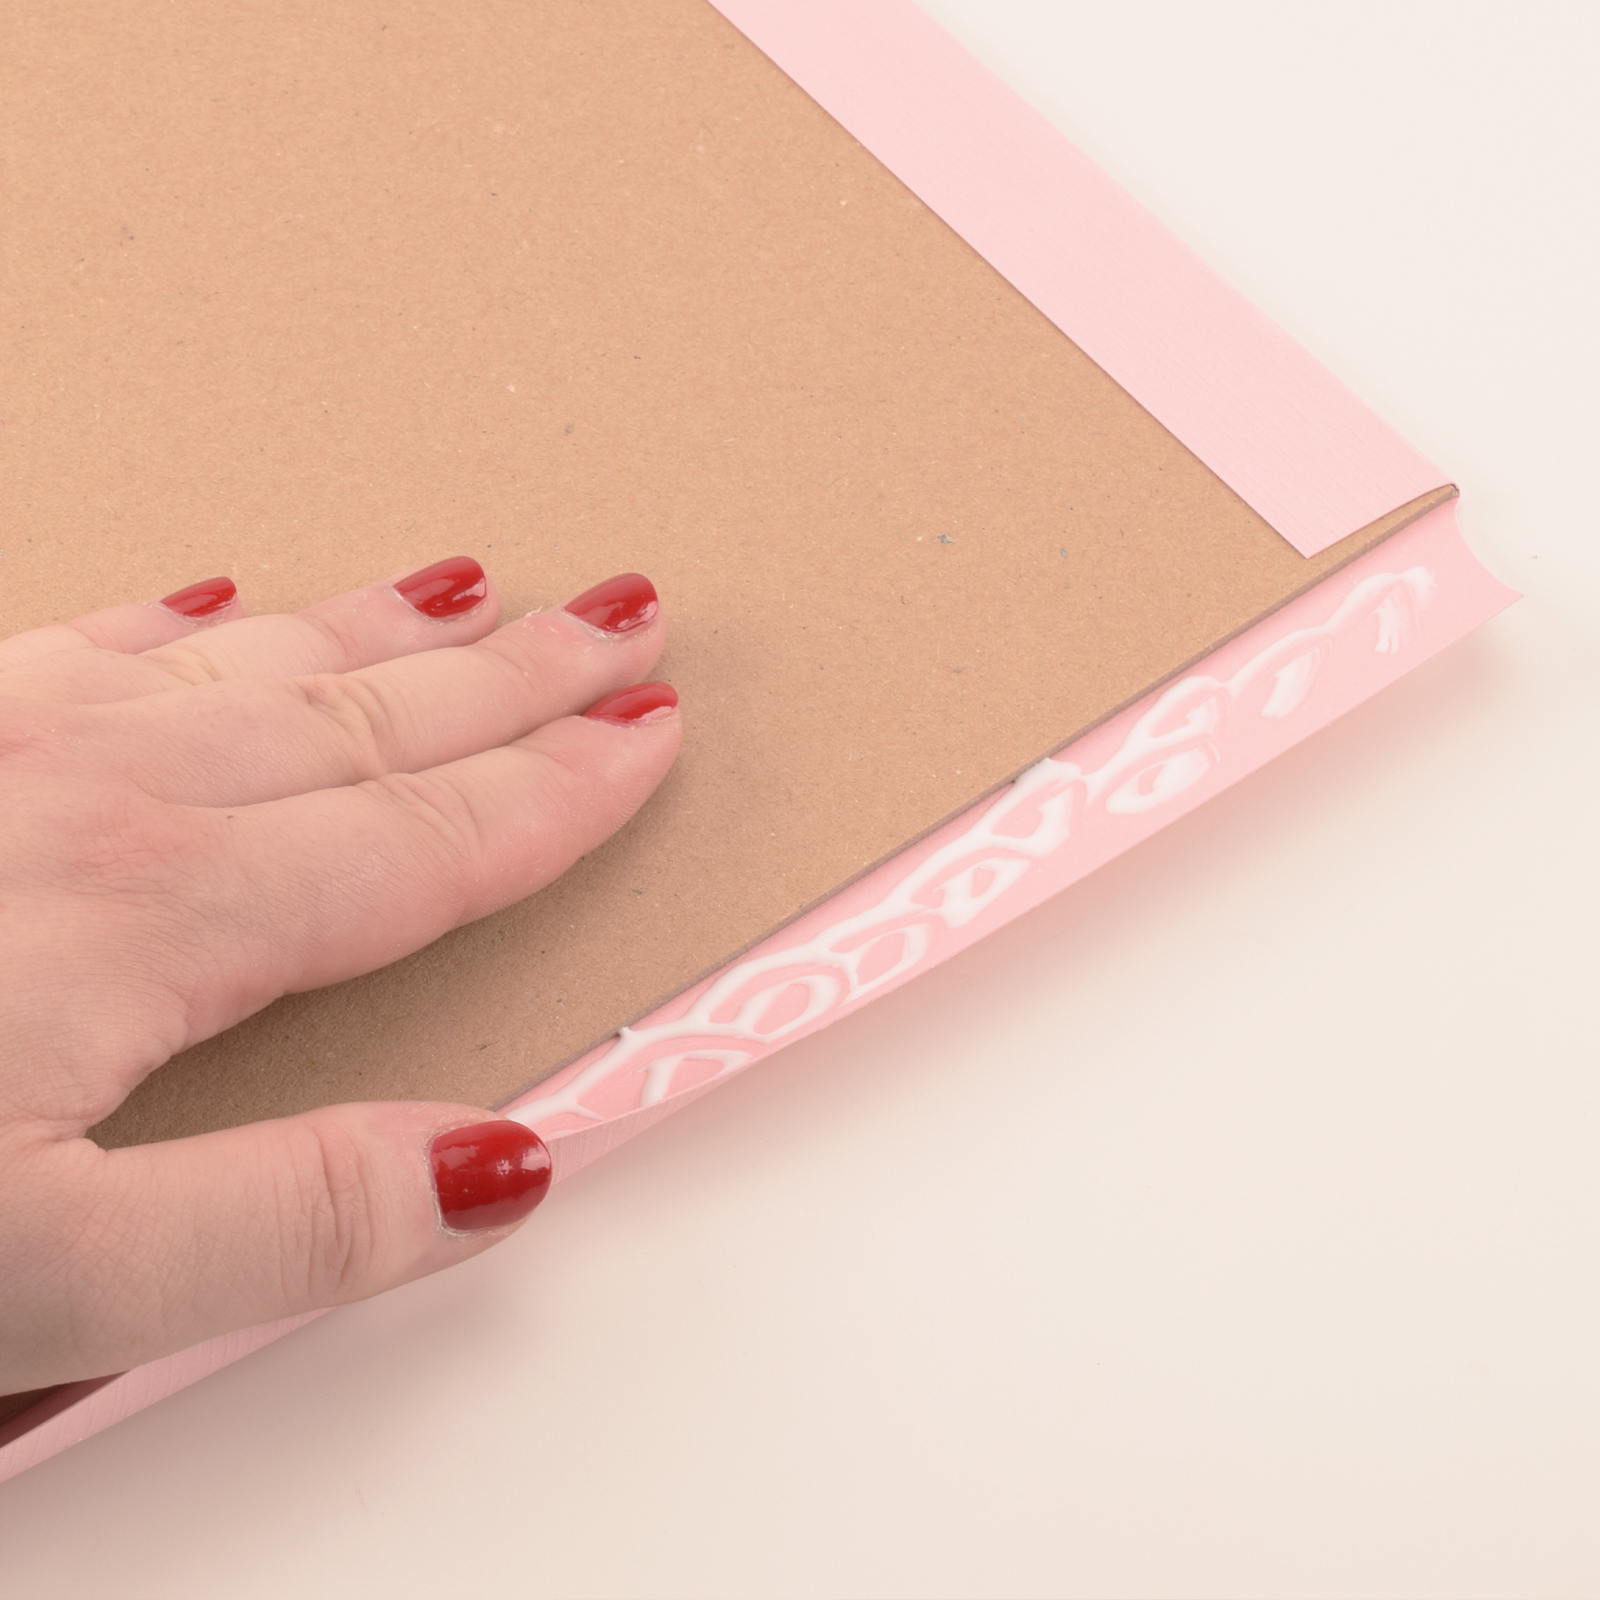
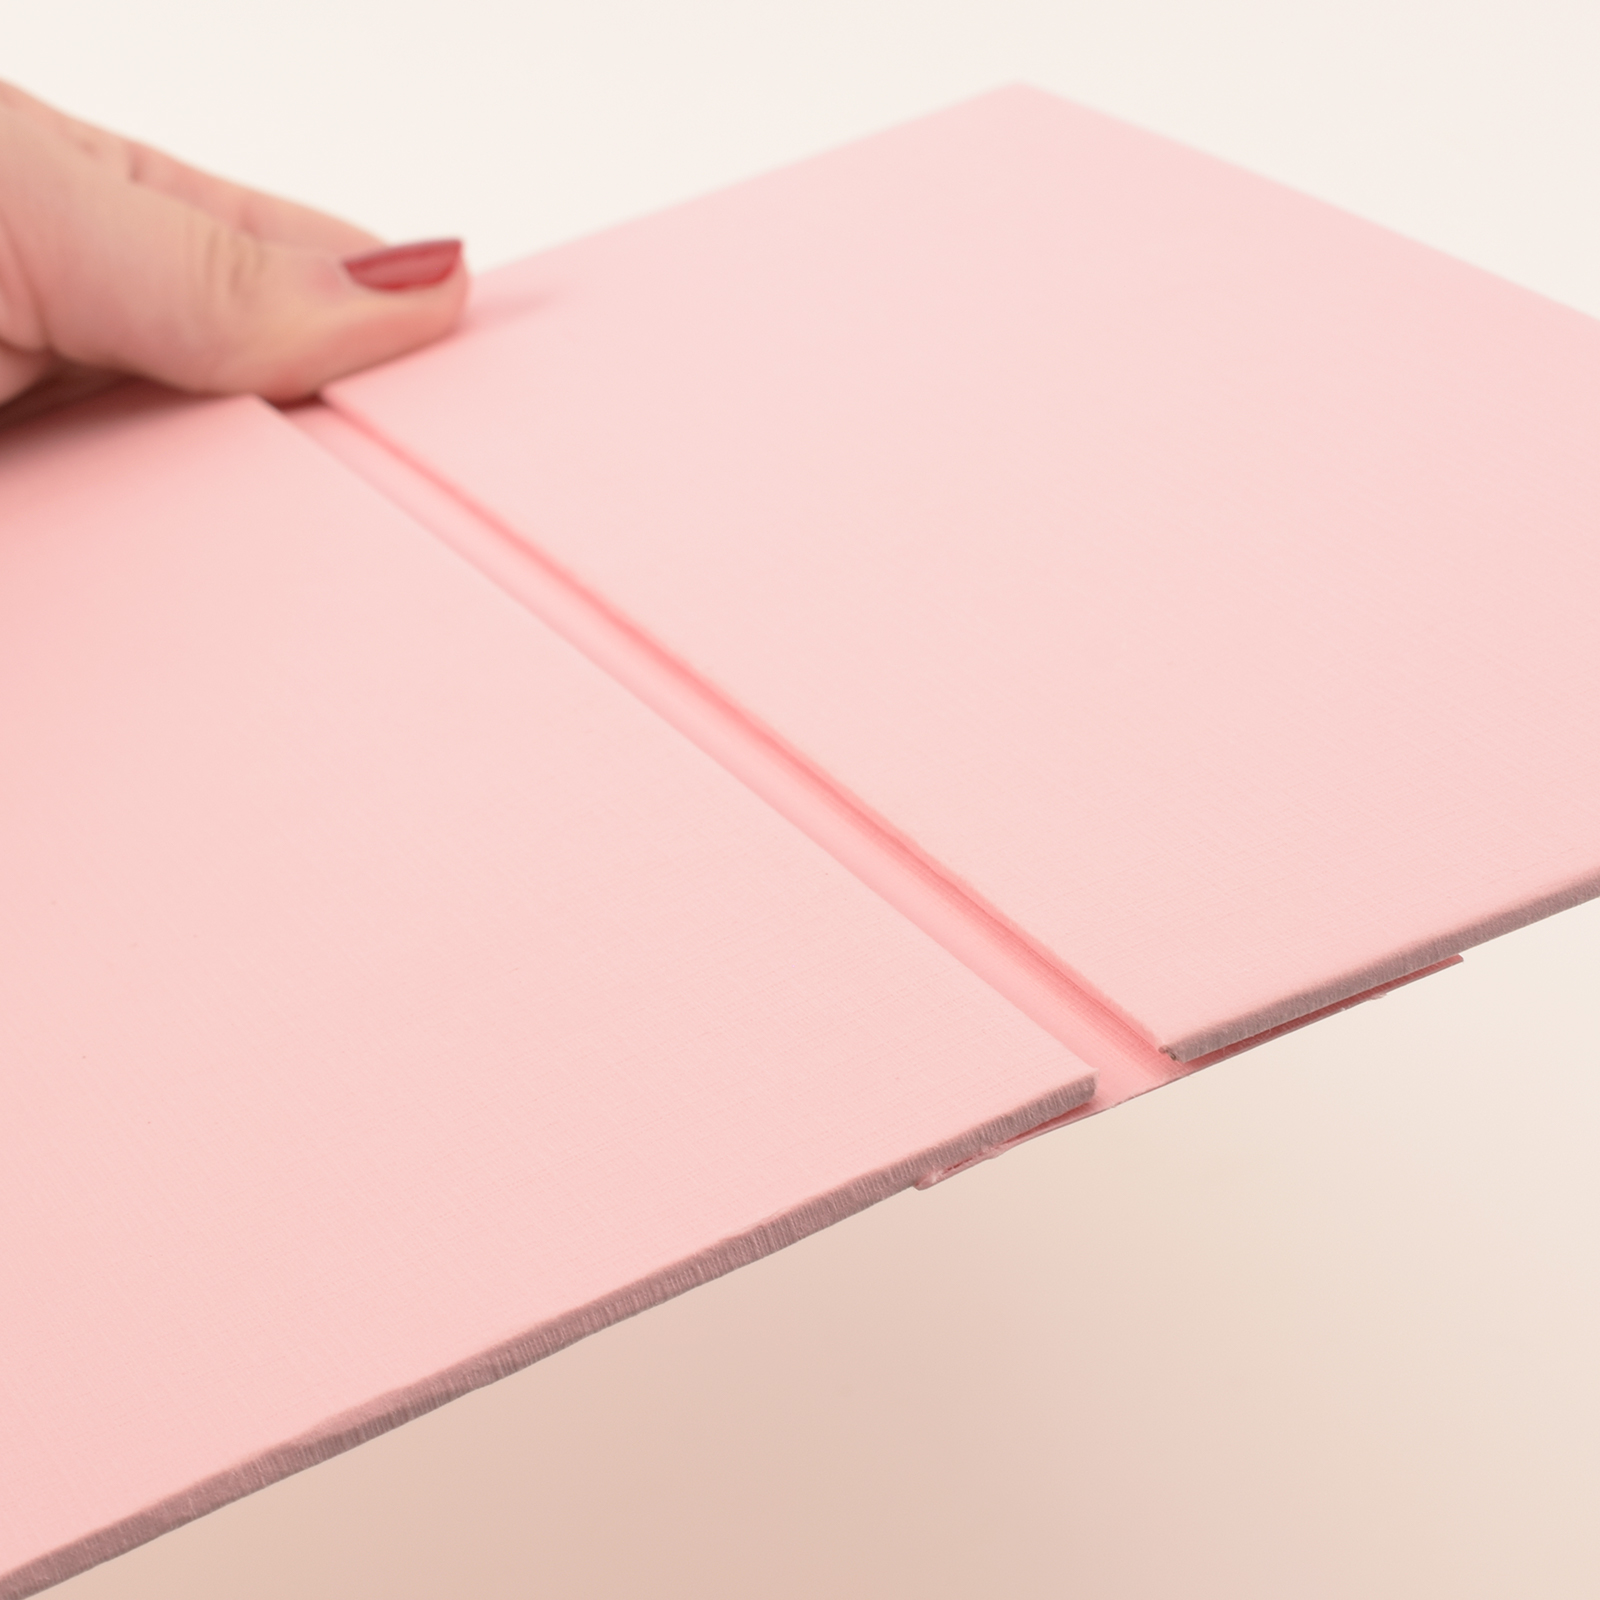
3
Fold and glue the edges inward.
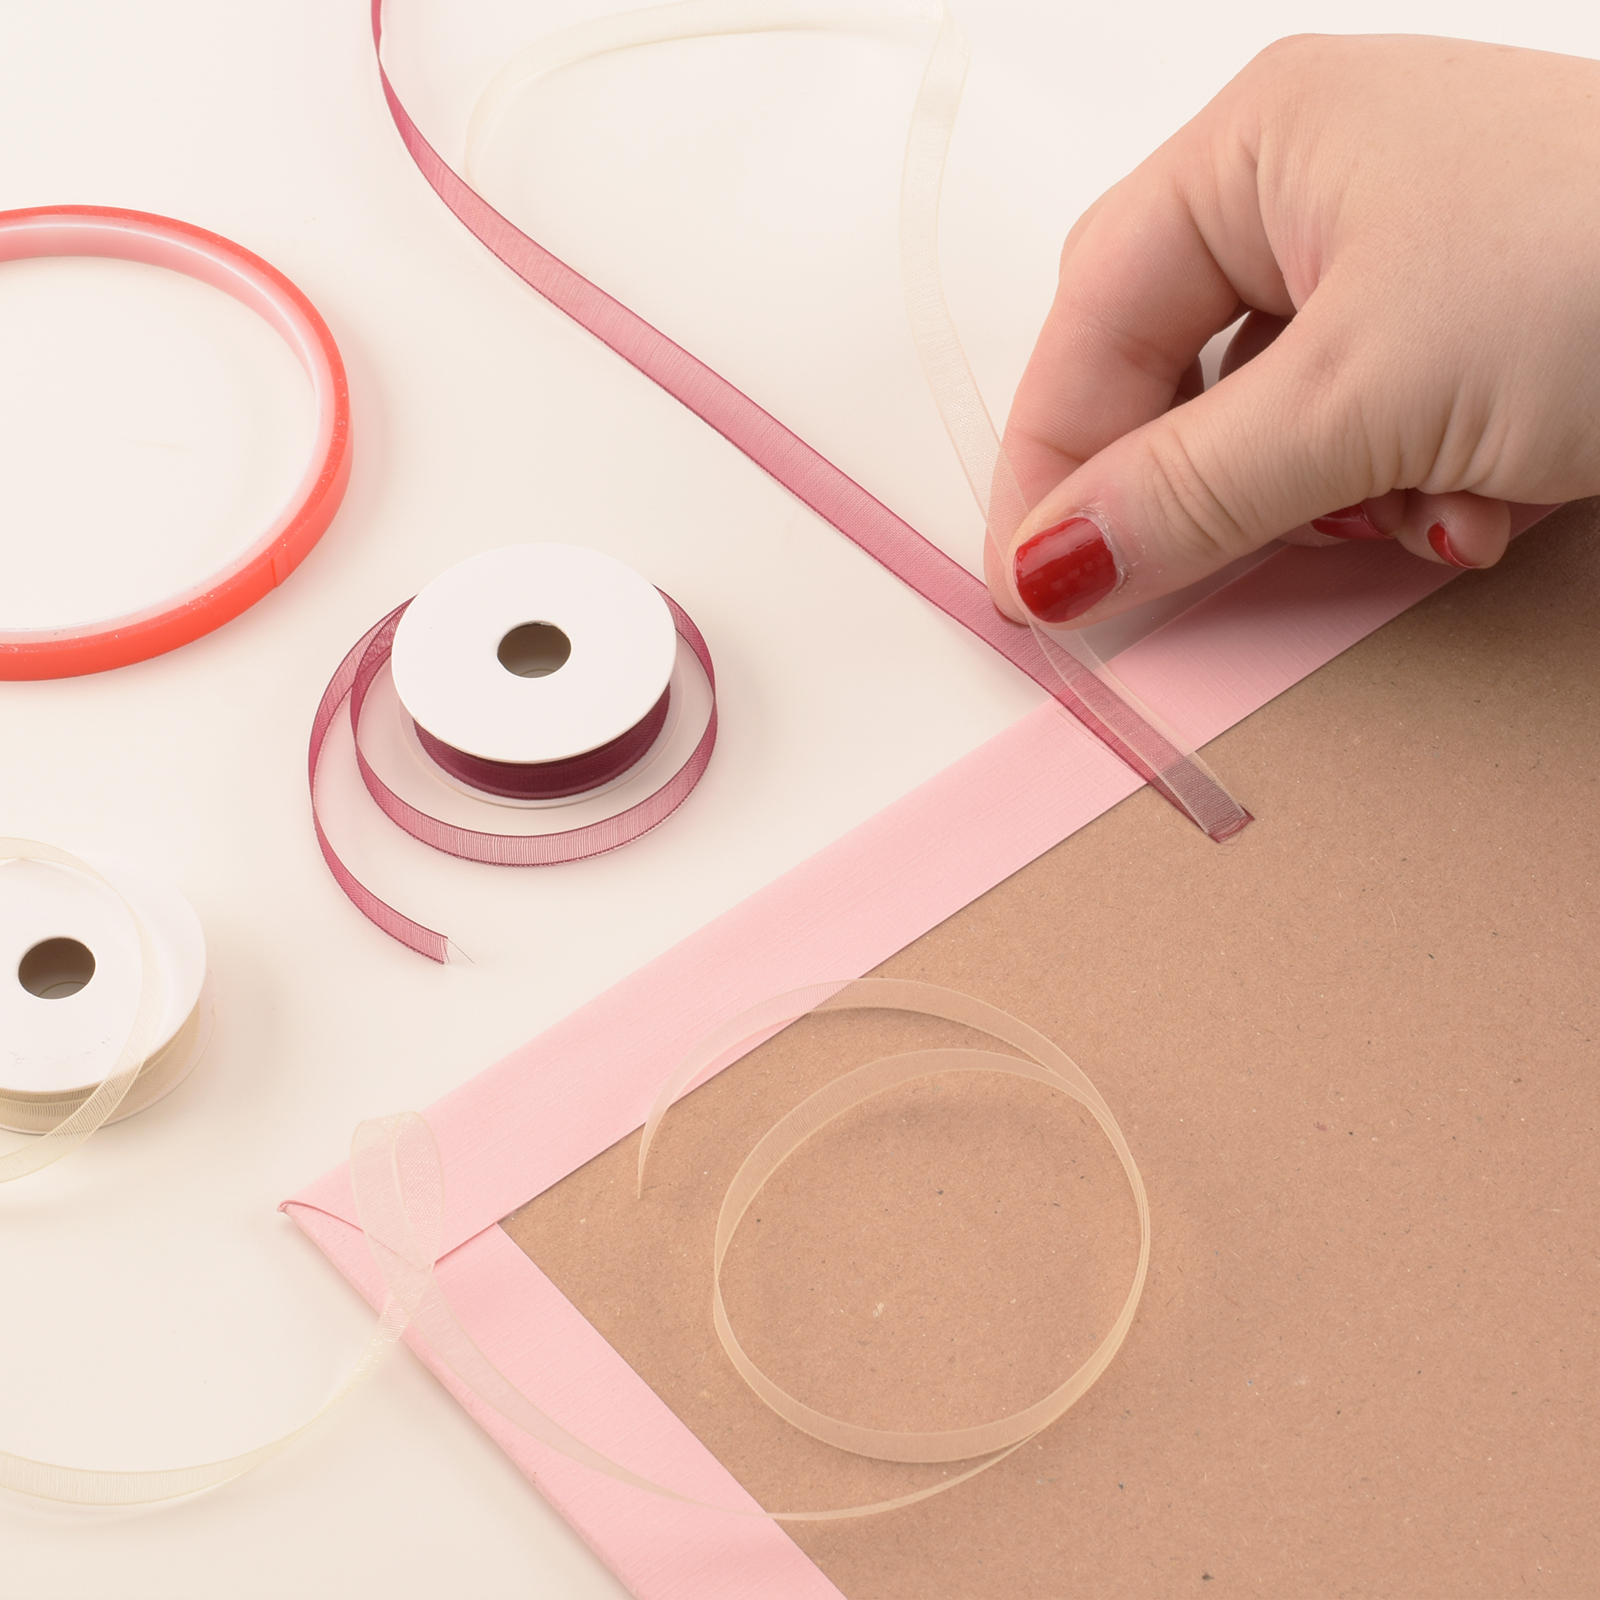
4
Attach a 7.9 inch (20 cm) organza ribbon to the edge of each piece with double-sided tape.
5
To connect the covers to the spine, attach a 10.2 x 1.9 inch (26 x 5 cm) sheet to the opposite side of the organza ribbon. Do this for both pieces.
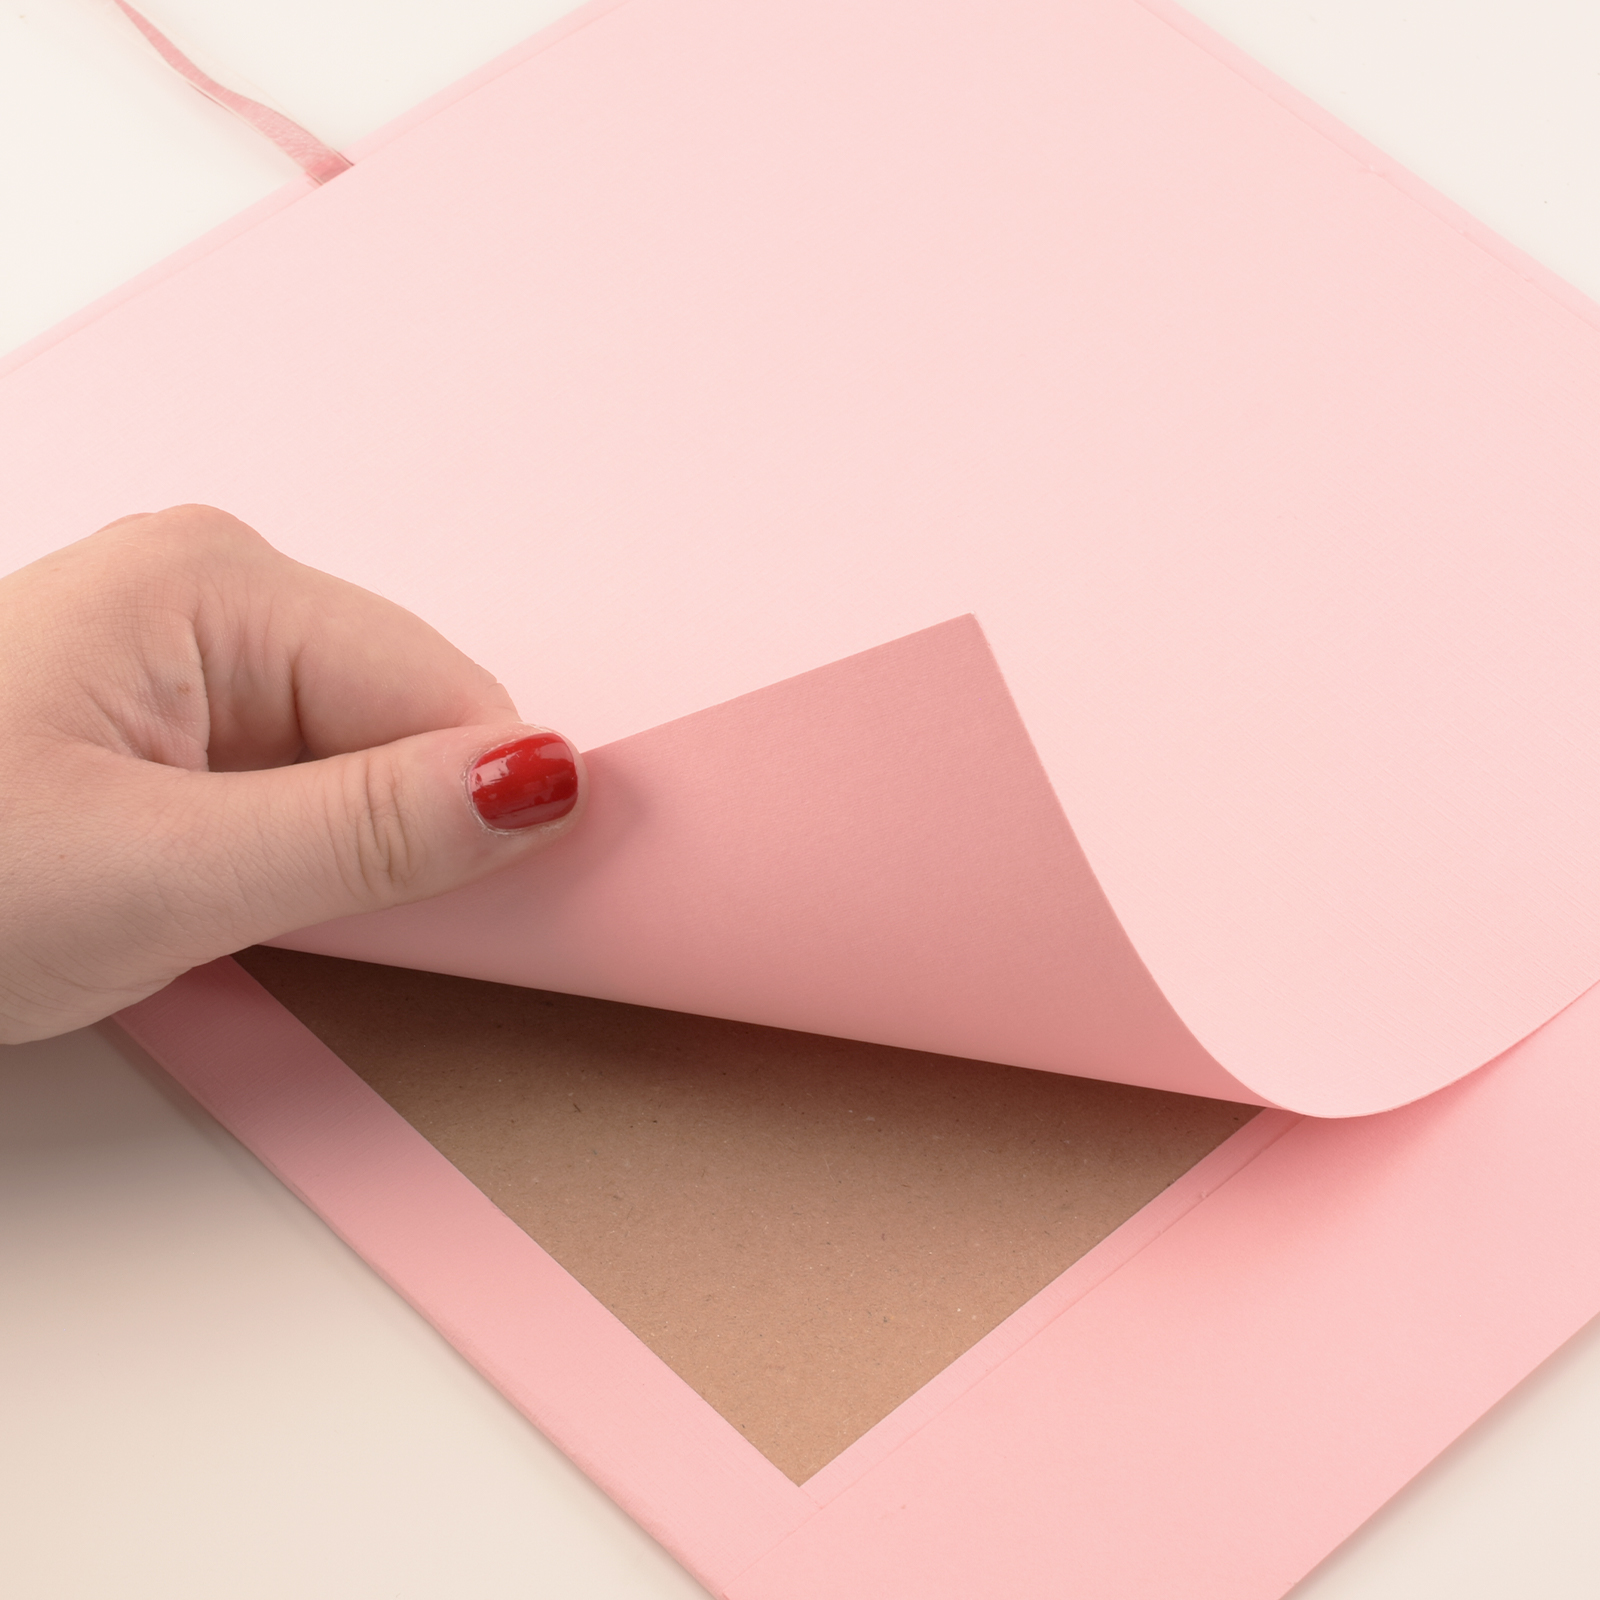
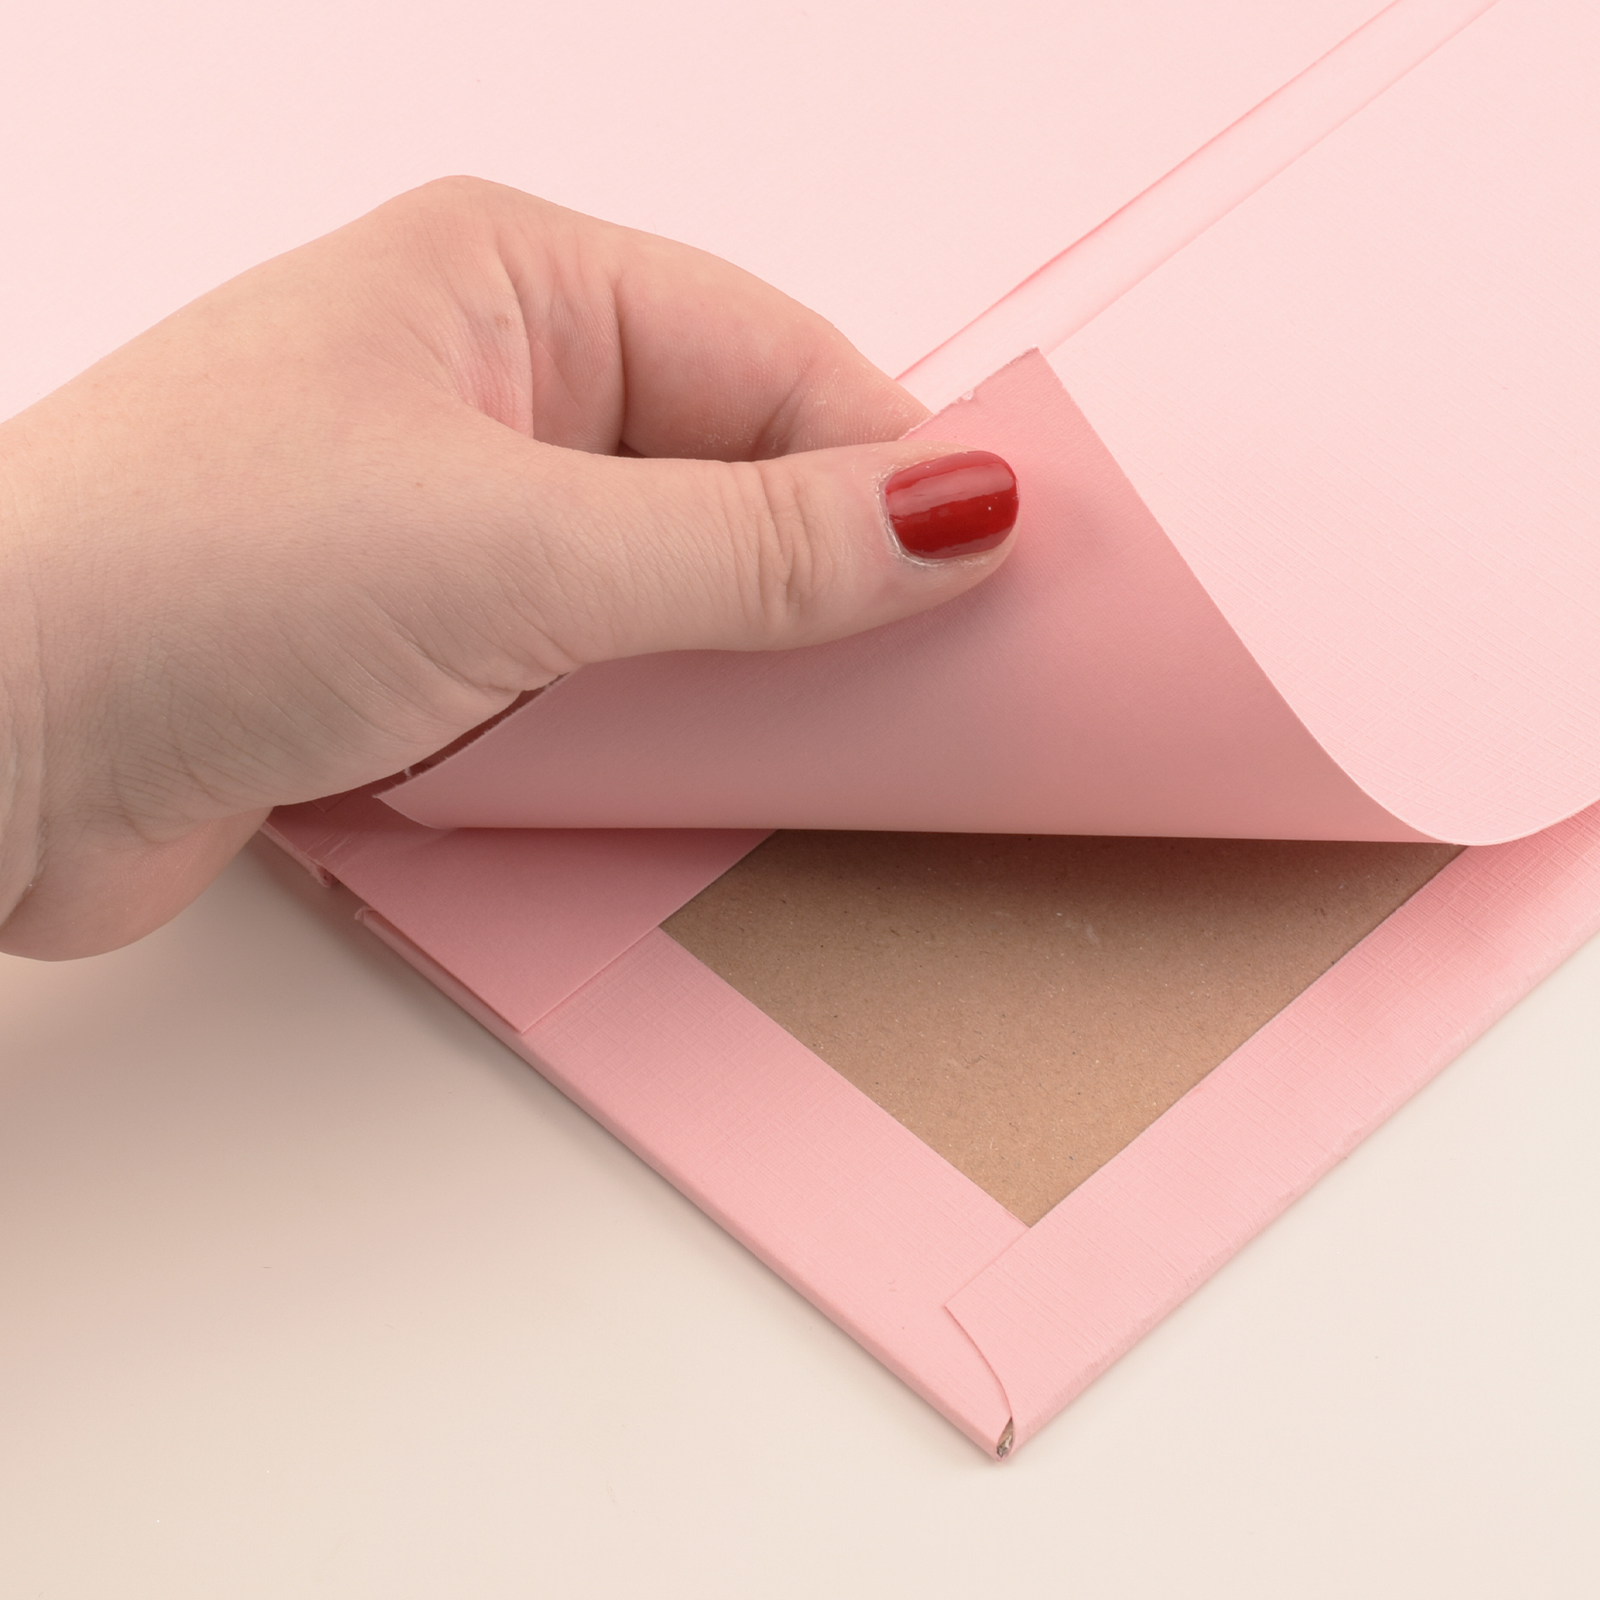
6
Once the organza ribbons and 10.2 x 1.9 inch (26 x 5 cm) sheets are securely attached, adhere a 10 x 10 inch (25.5 x 25.5 cm) sheet to the side still showing kraft cardboard on both pieces.
7
Attach a 12 x 5.5 inch (30.5 x 14 cm) sheet to the 10.2 x 3.9 inch (26 x 10 cm) piece of kraft cardboard and repeat steps 2 and 3 to finish the spine.
8
Connect the spine to the covers by attaching the edges of the pieces to the spine.
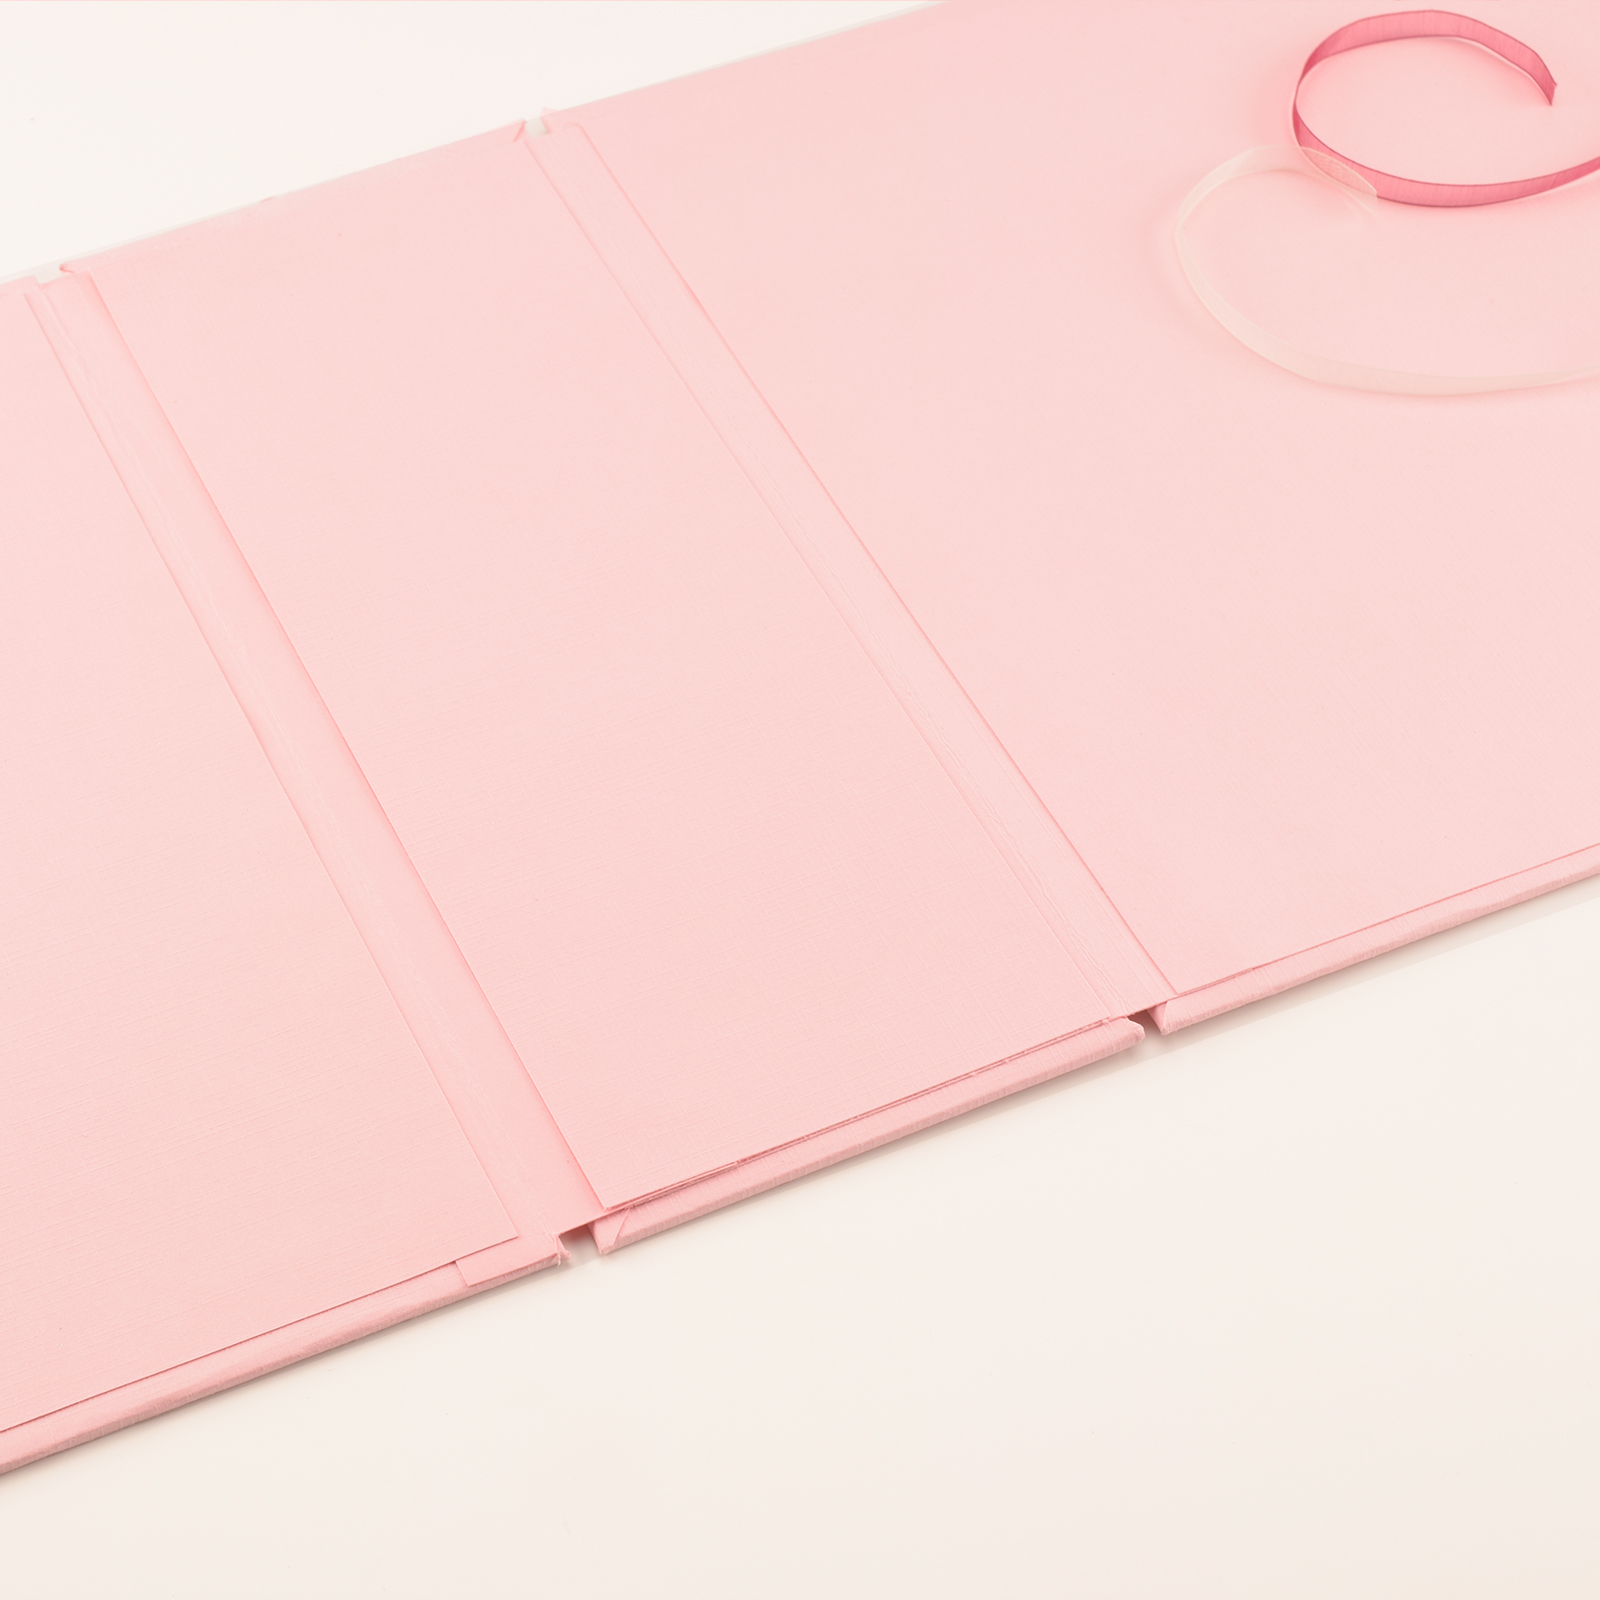
9
Attach a 10 x 3.7 inch (25.5 x 9.5 cm) sheet to the inside of the spine for a neat finish.
10
The base of the advent calendar is now complete.
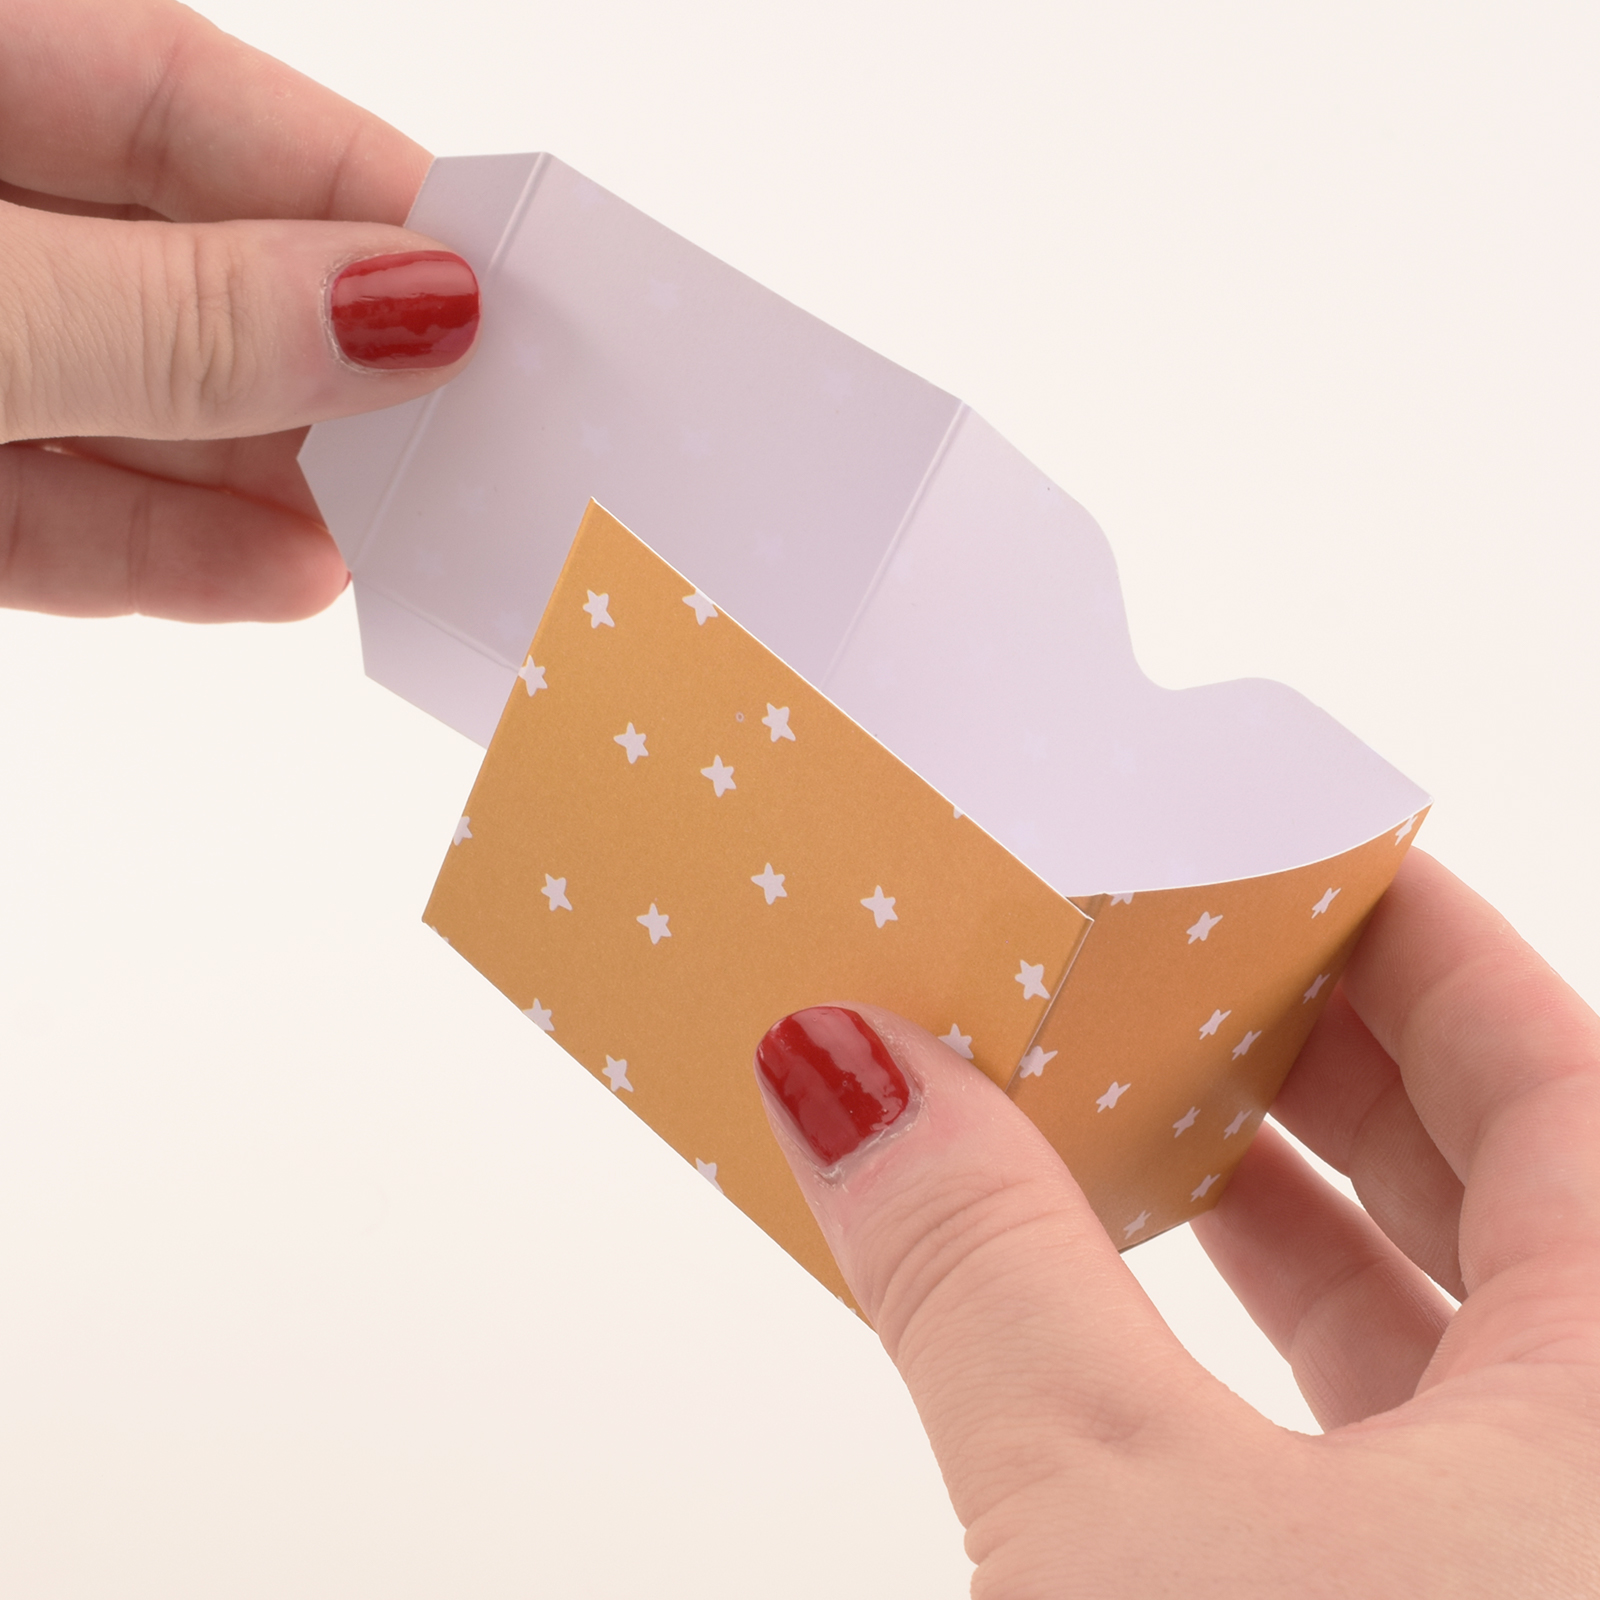
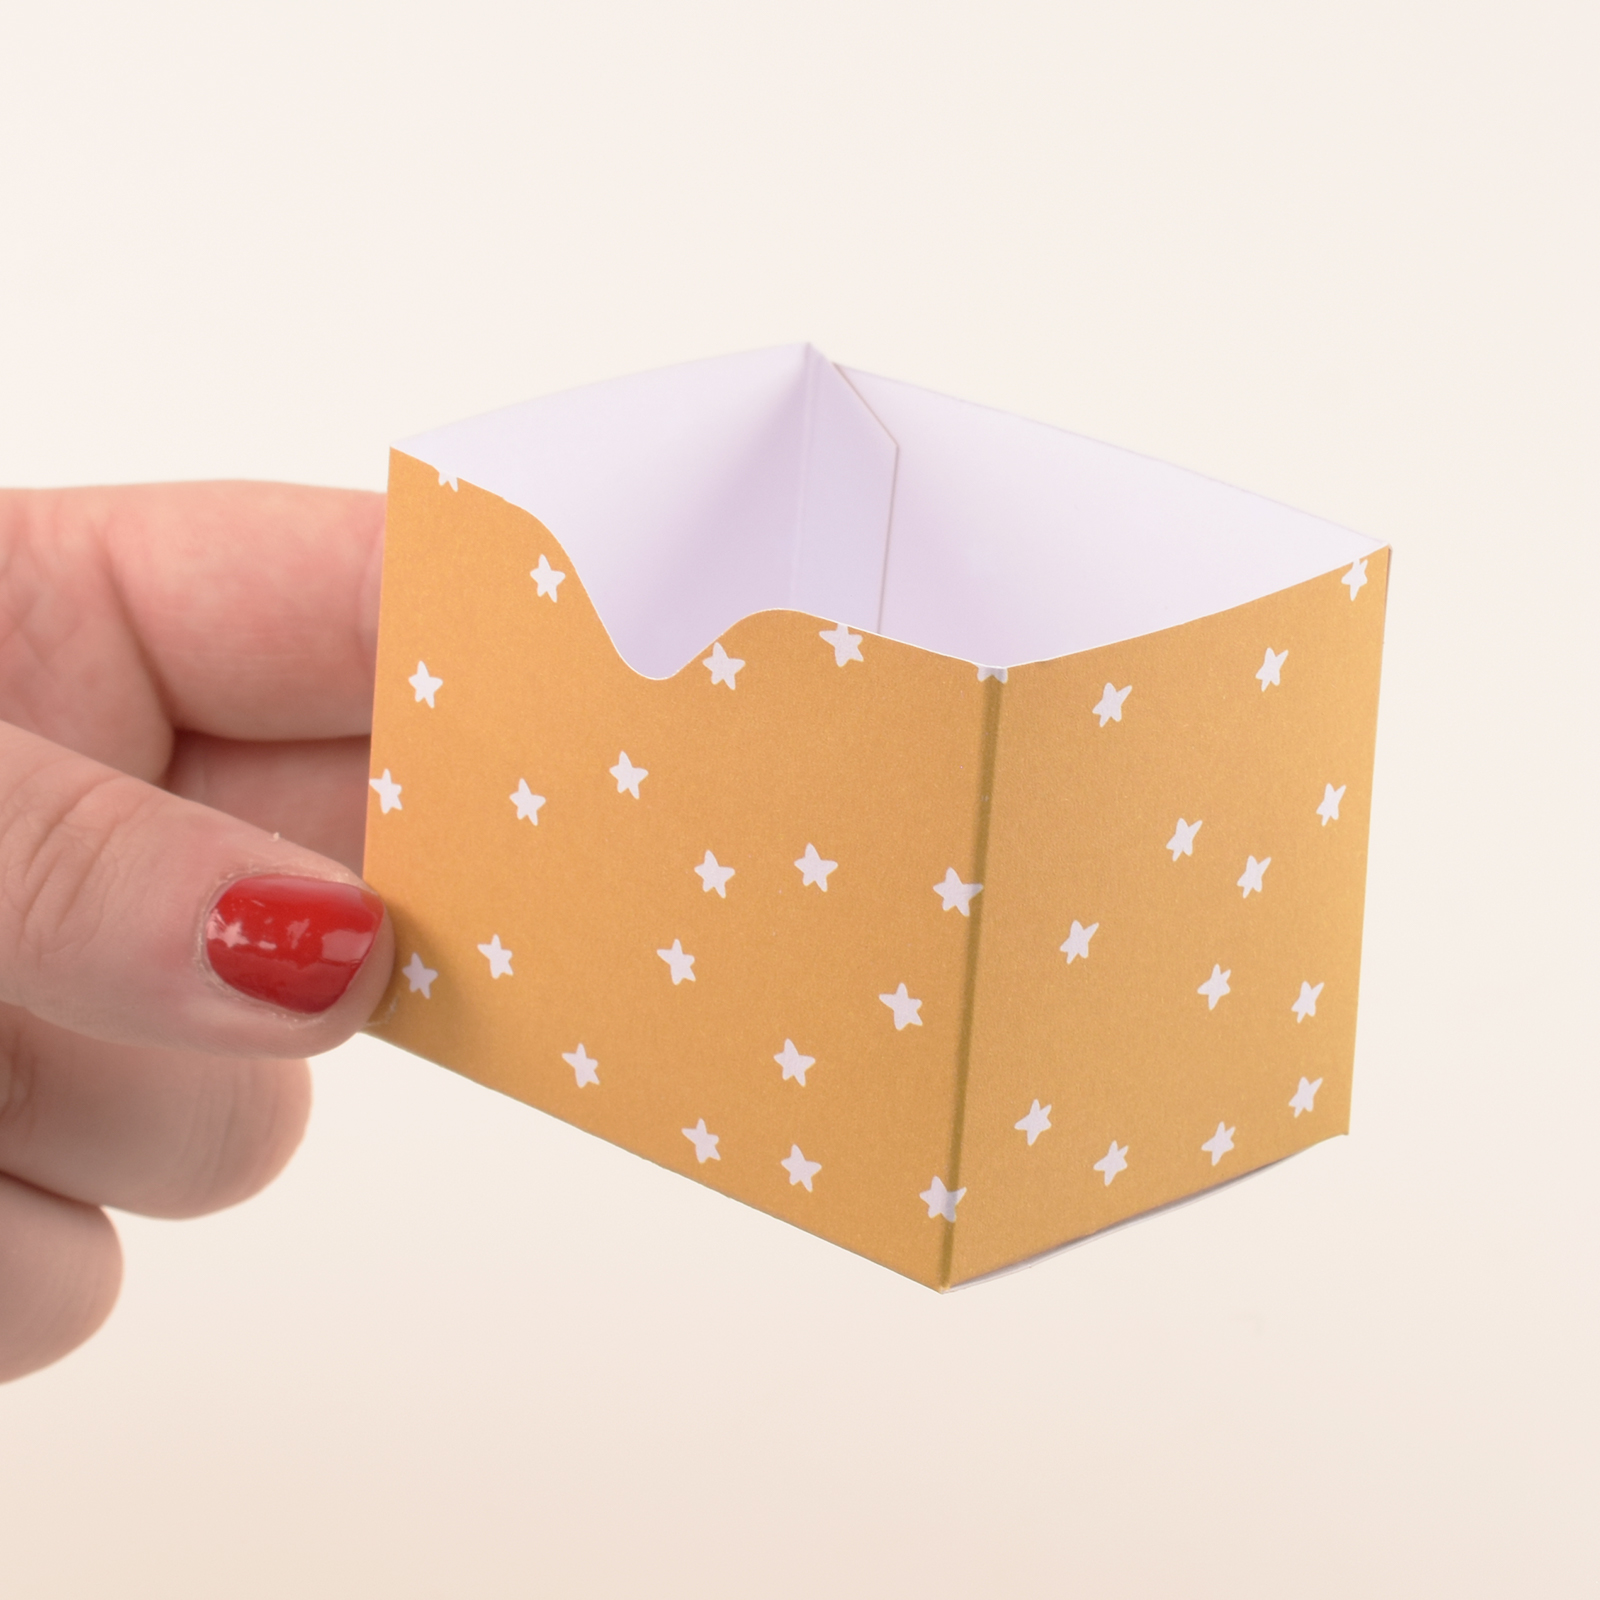
11
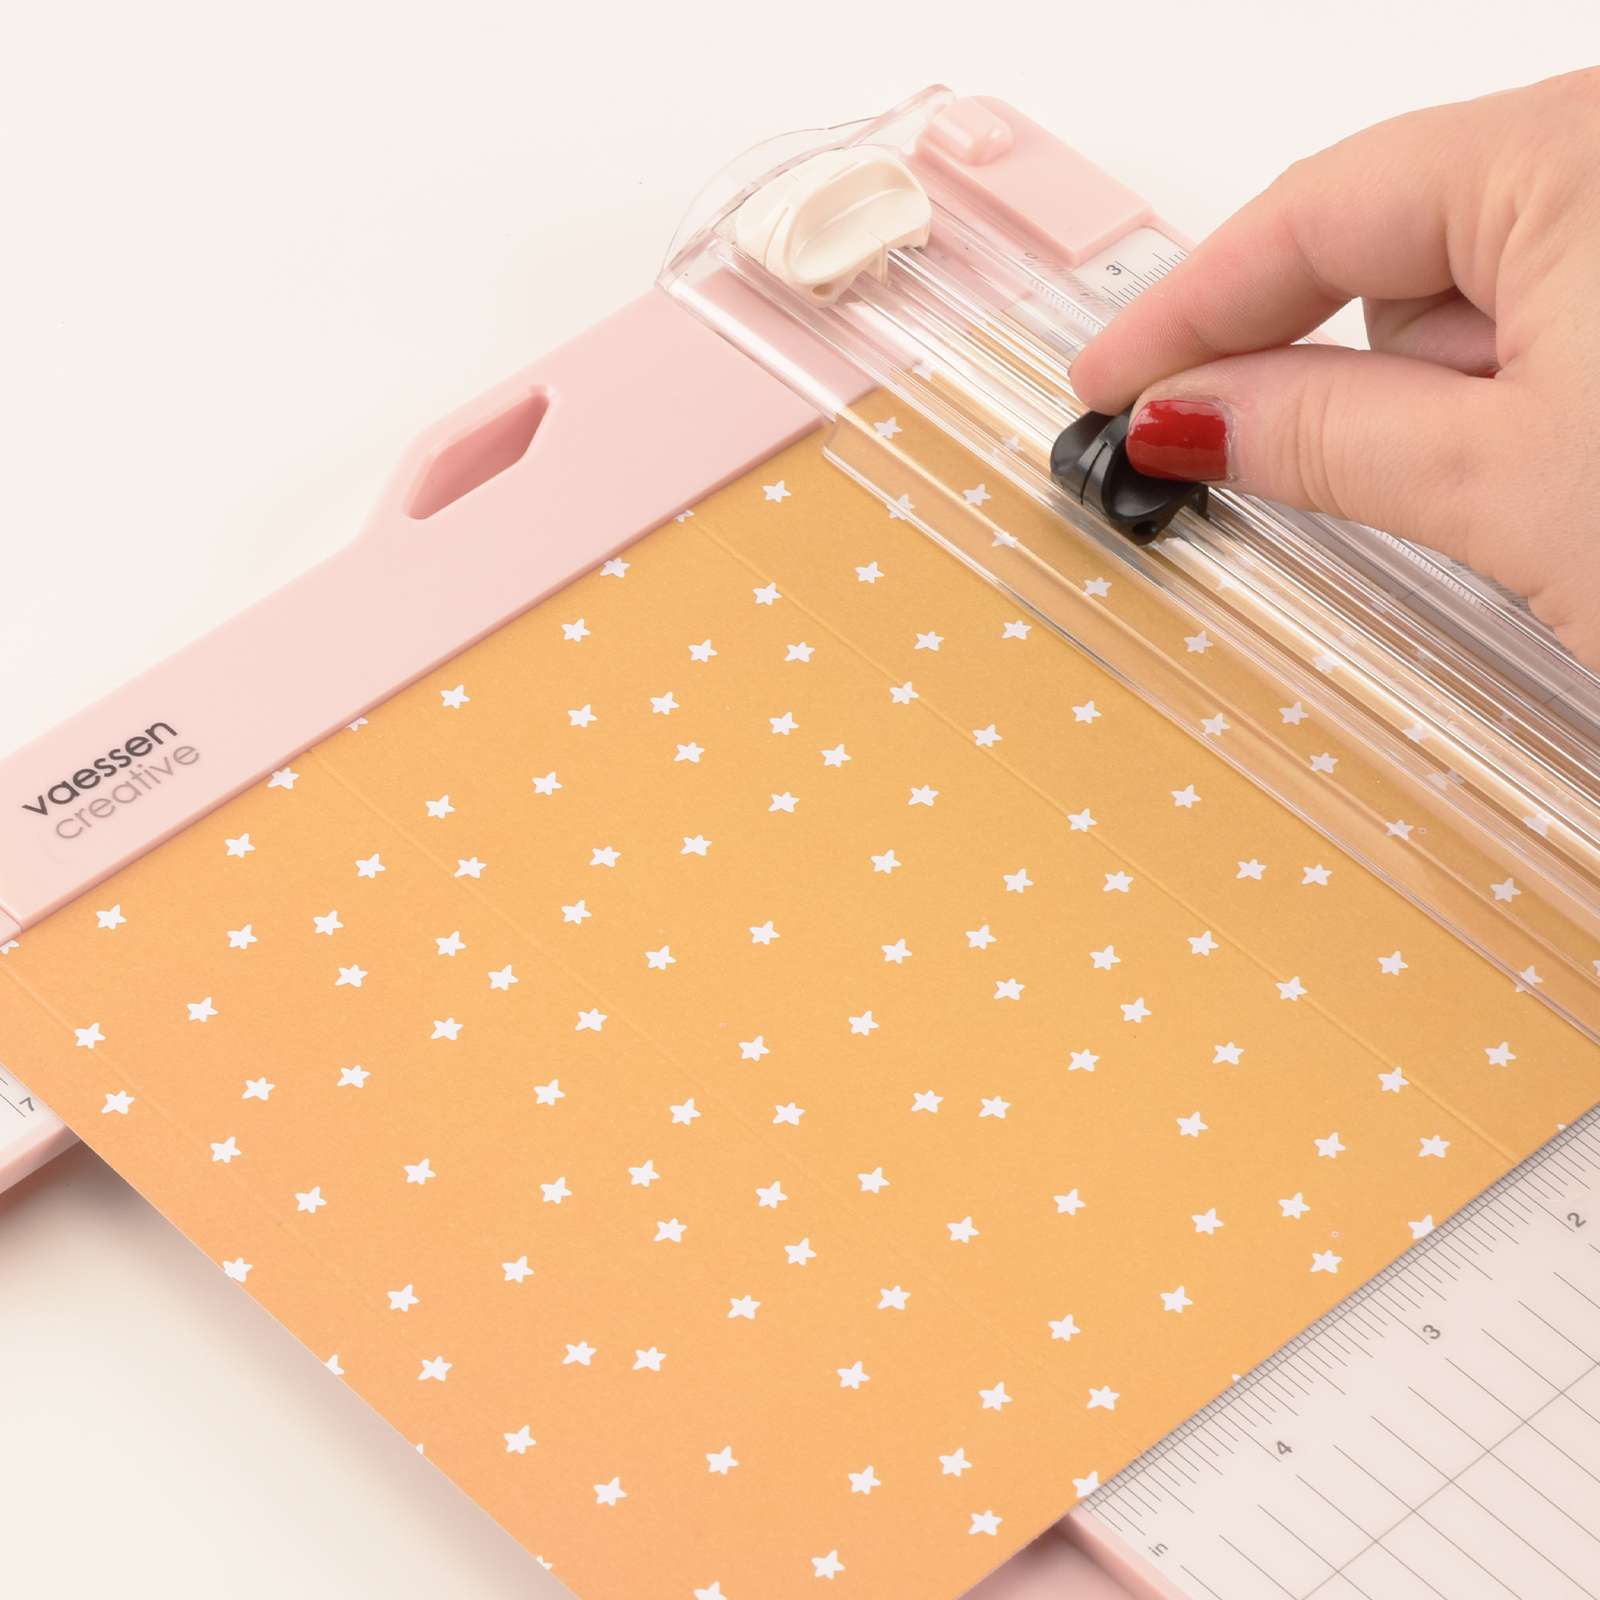
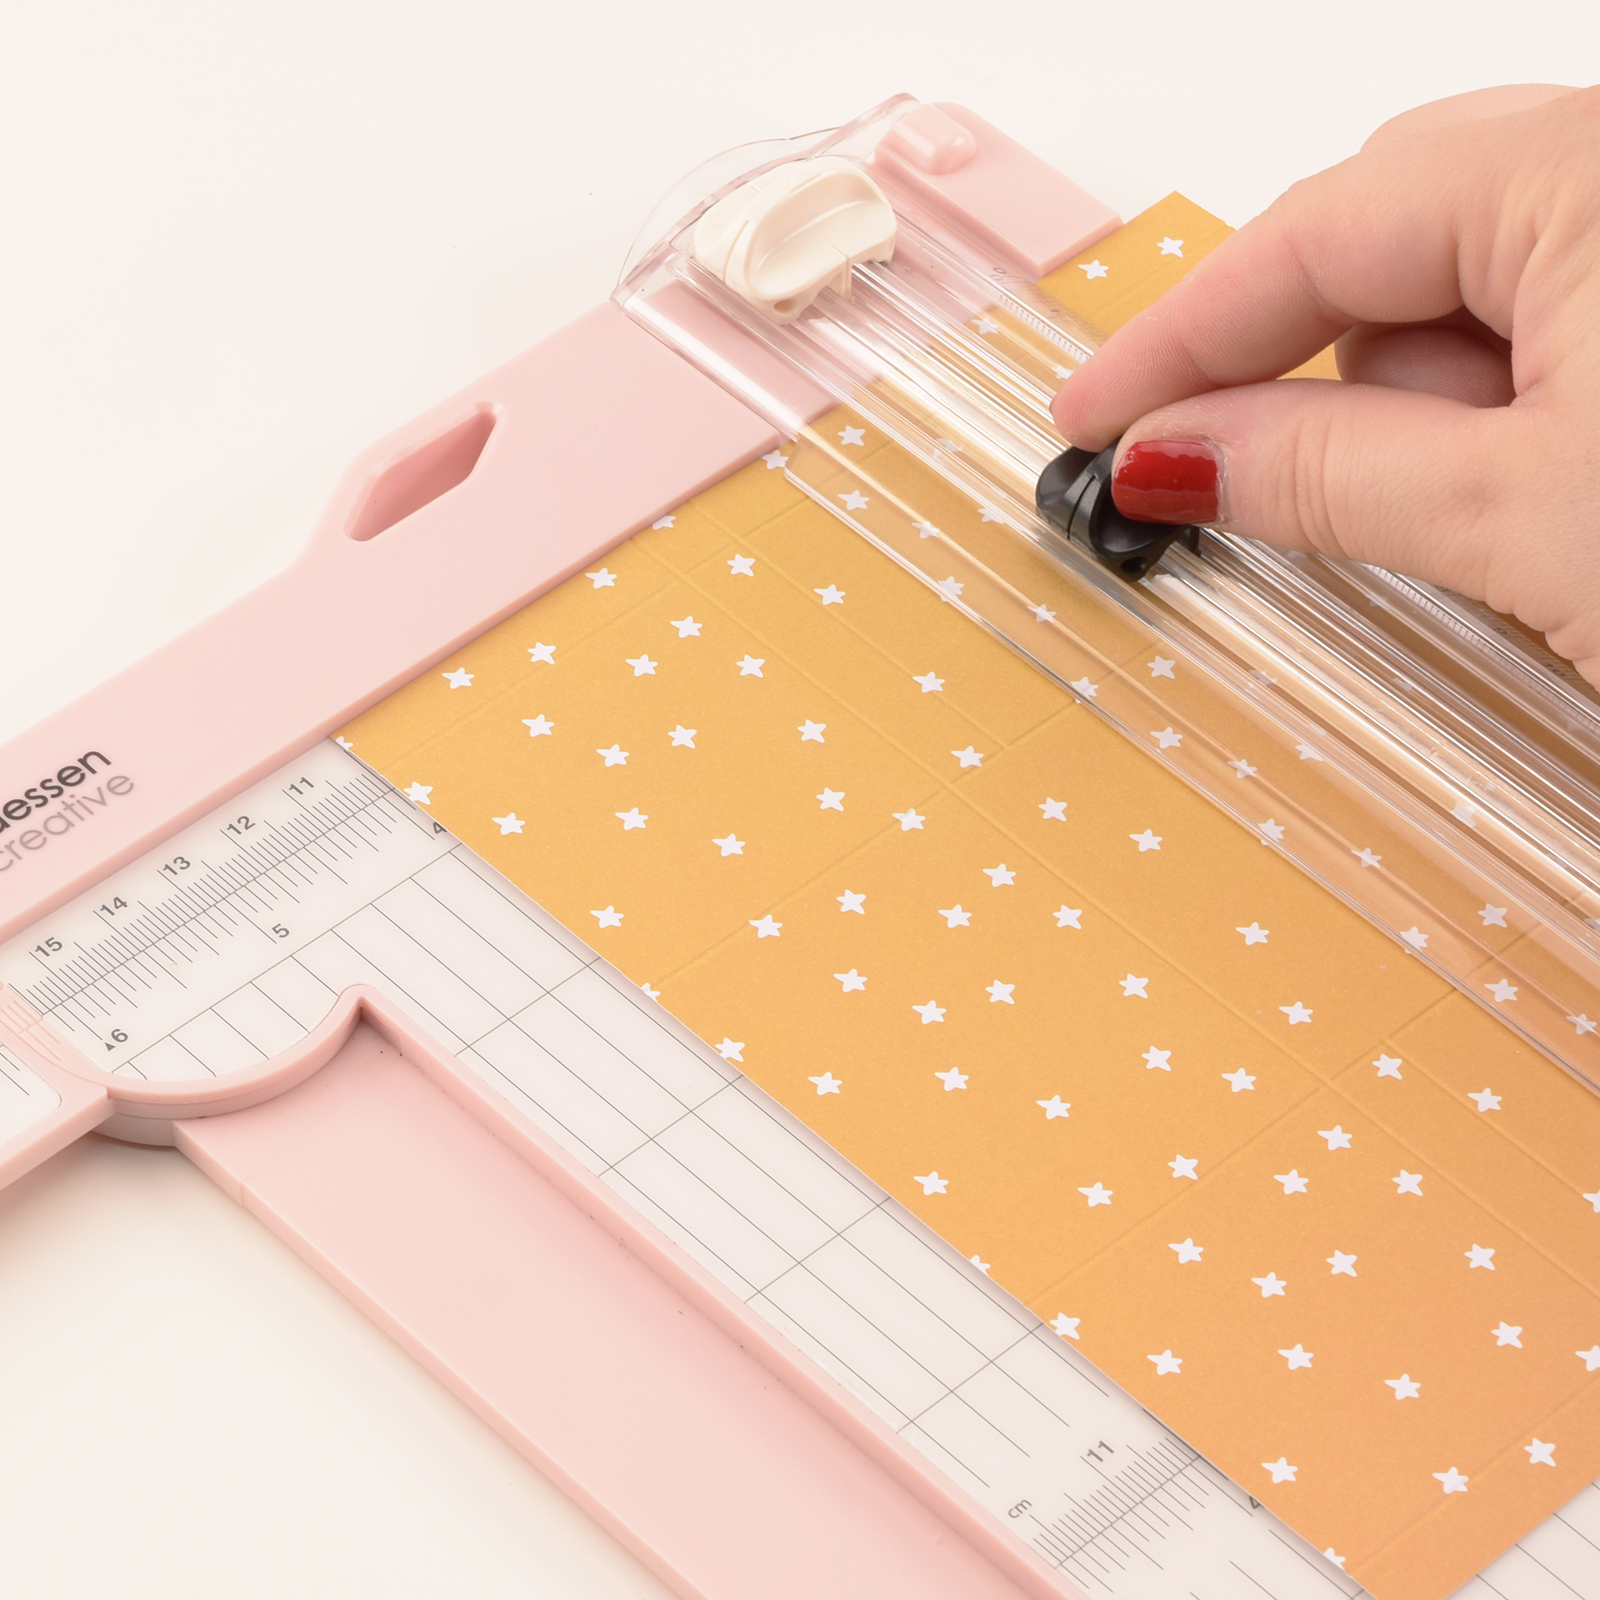
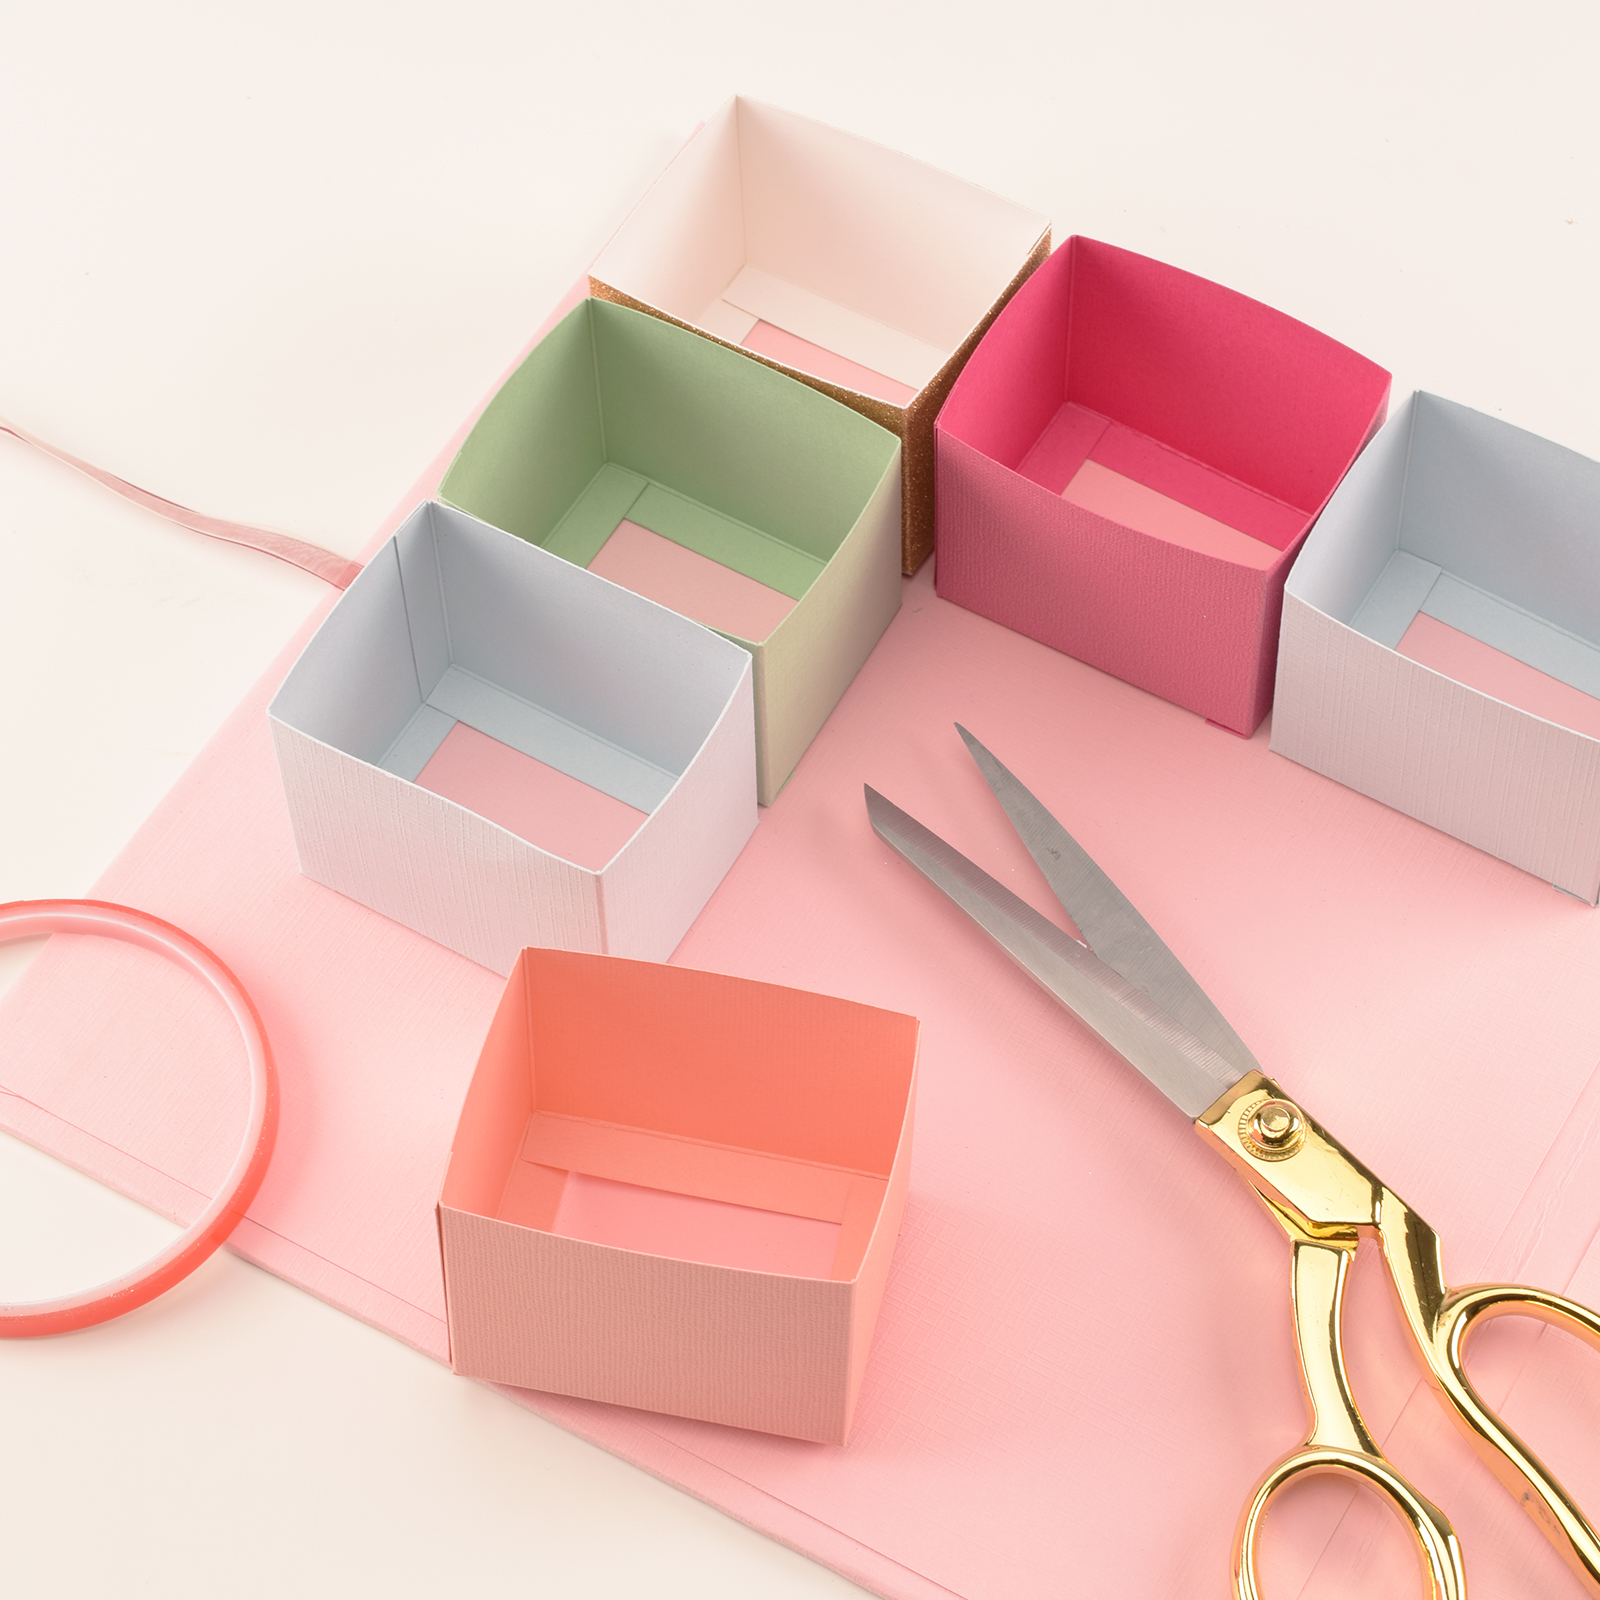
Cut a sheet measuring 7.2 x 5.9 inch (18.5 x 15 cm) to make a box.
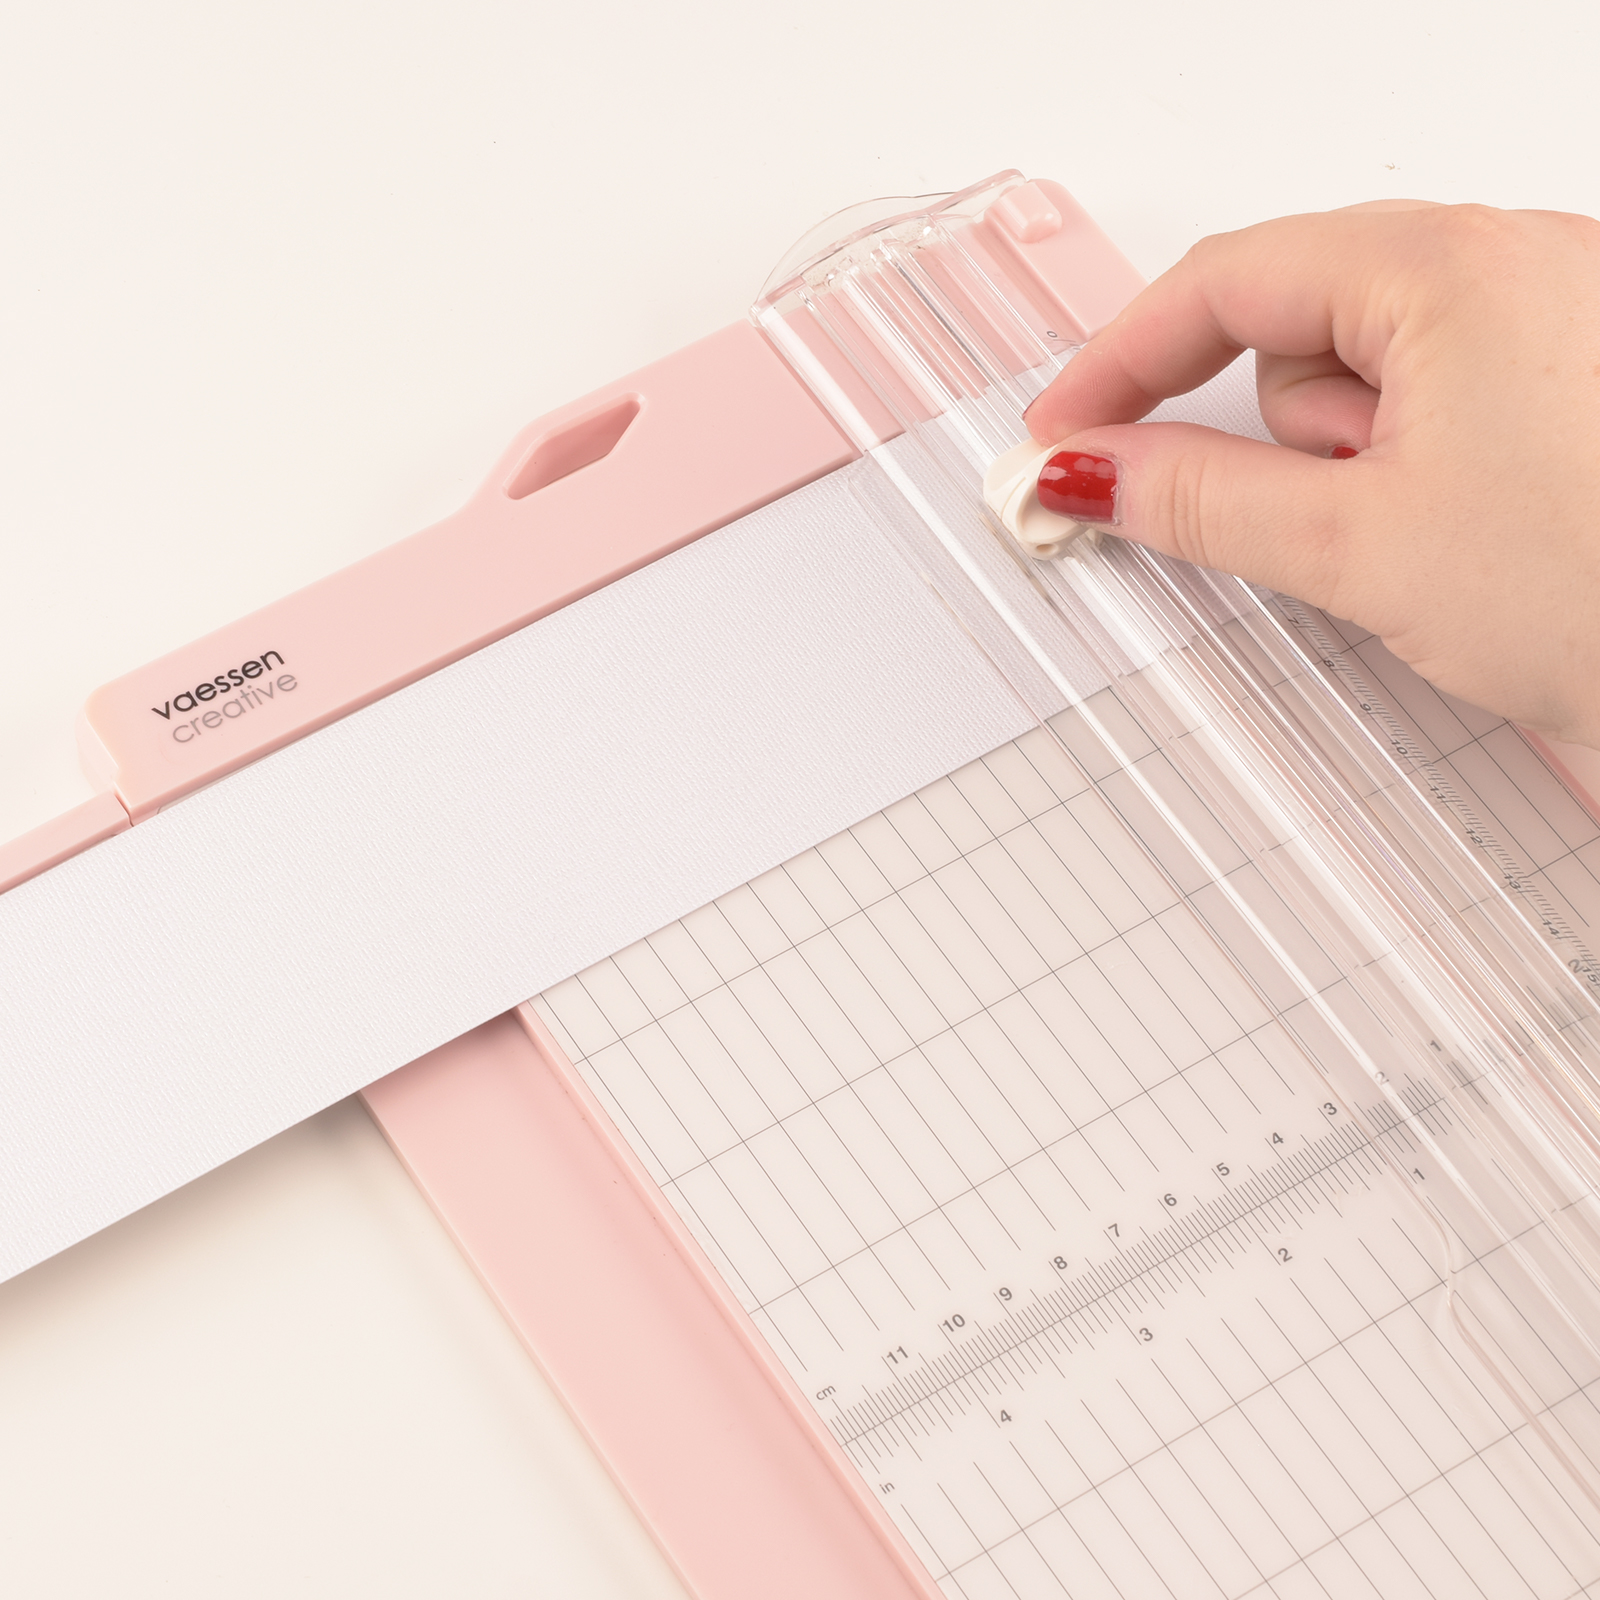
12
Score the long side at 0.4, 2.4, 4.9 and 6.9 inches(1, 6, 12.5, and 17.5 cm).
13
Score the short side at 1.9 and 2.3 inch (5 and 6 cm) -only to the outer score lines- and at 3.9 inch (10 cm).
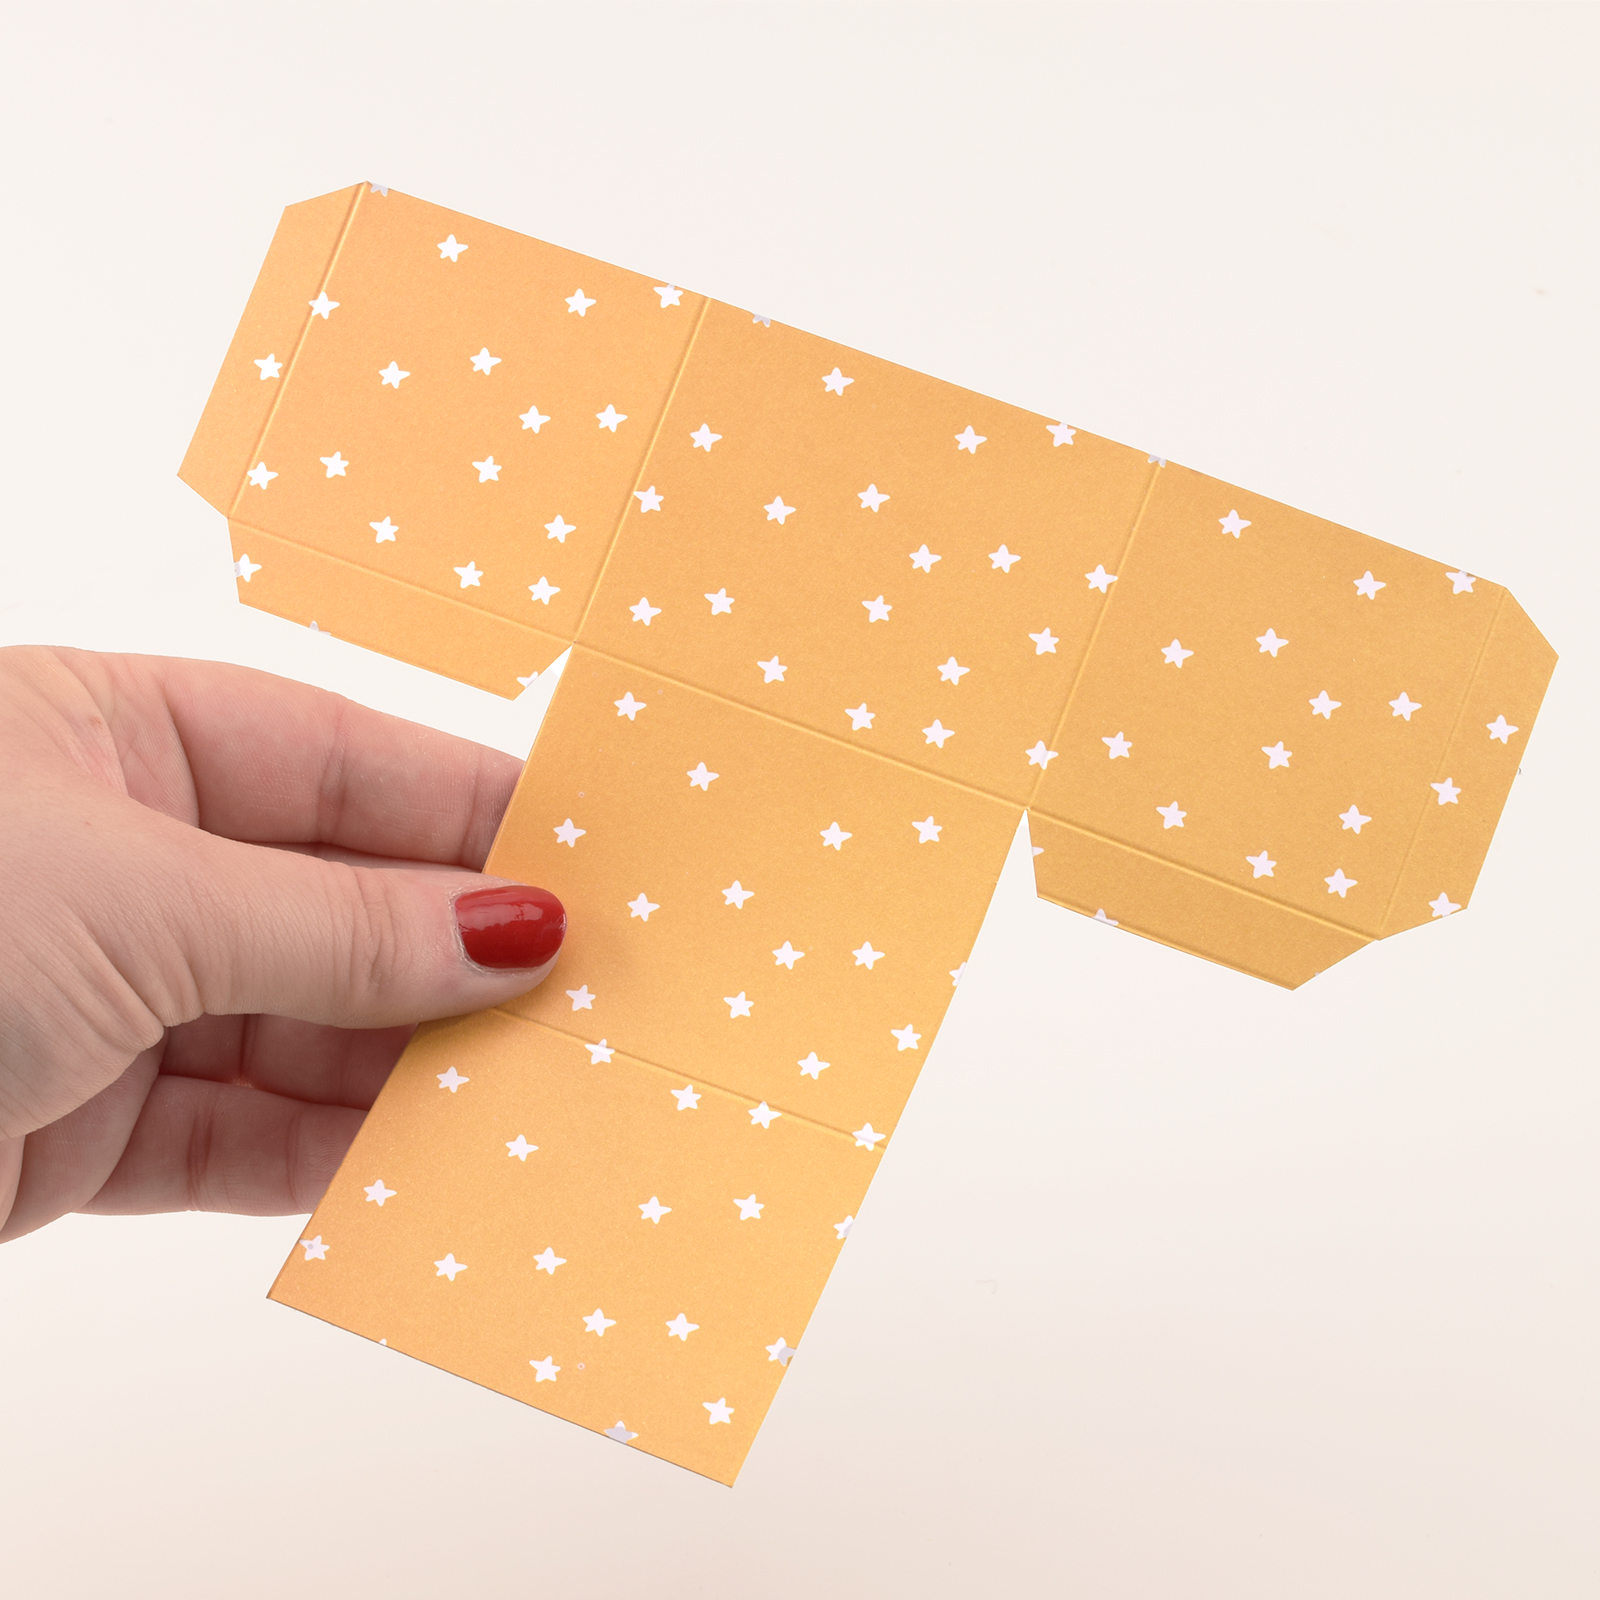
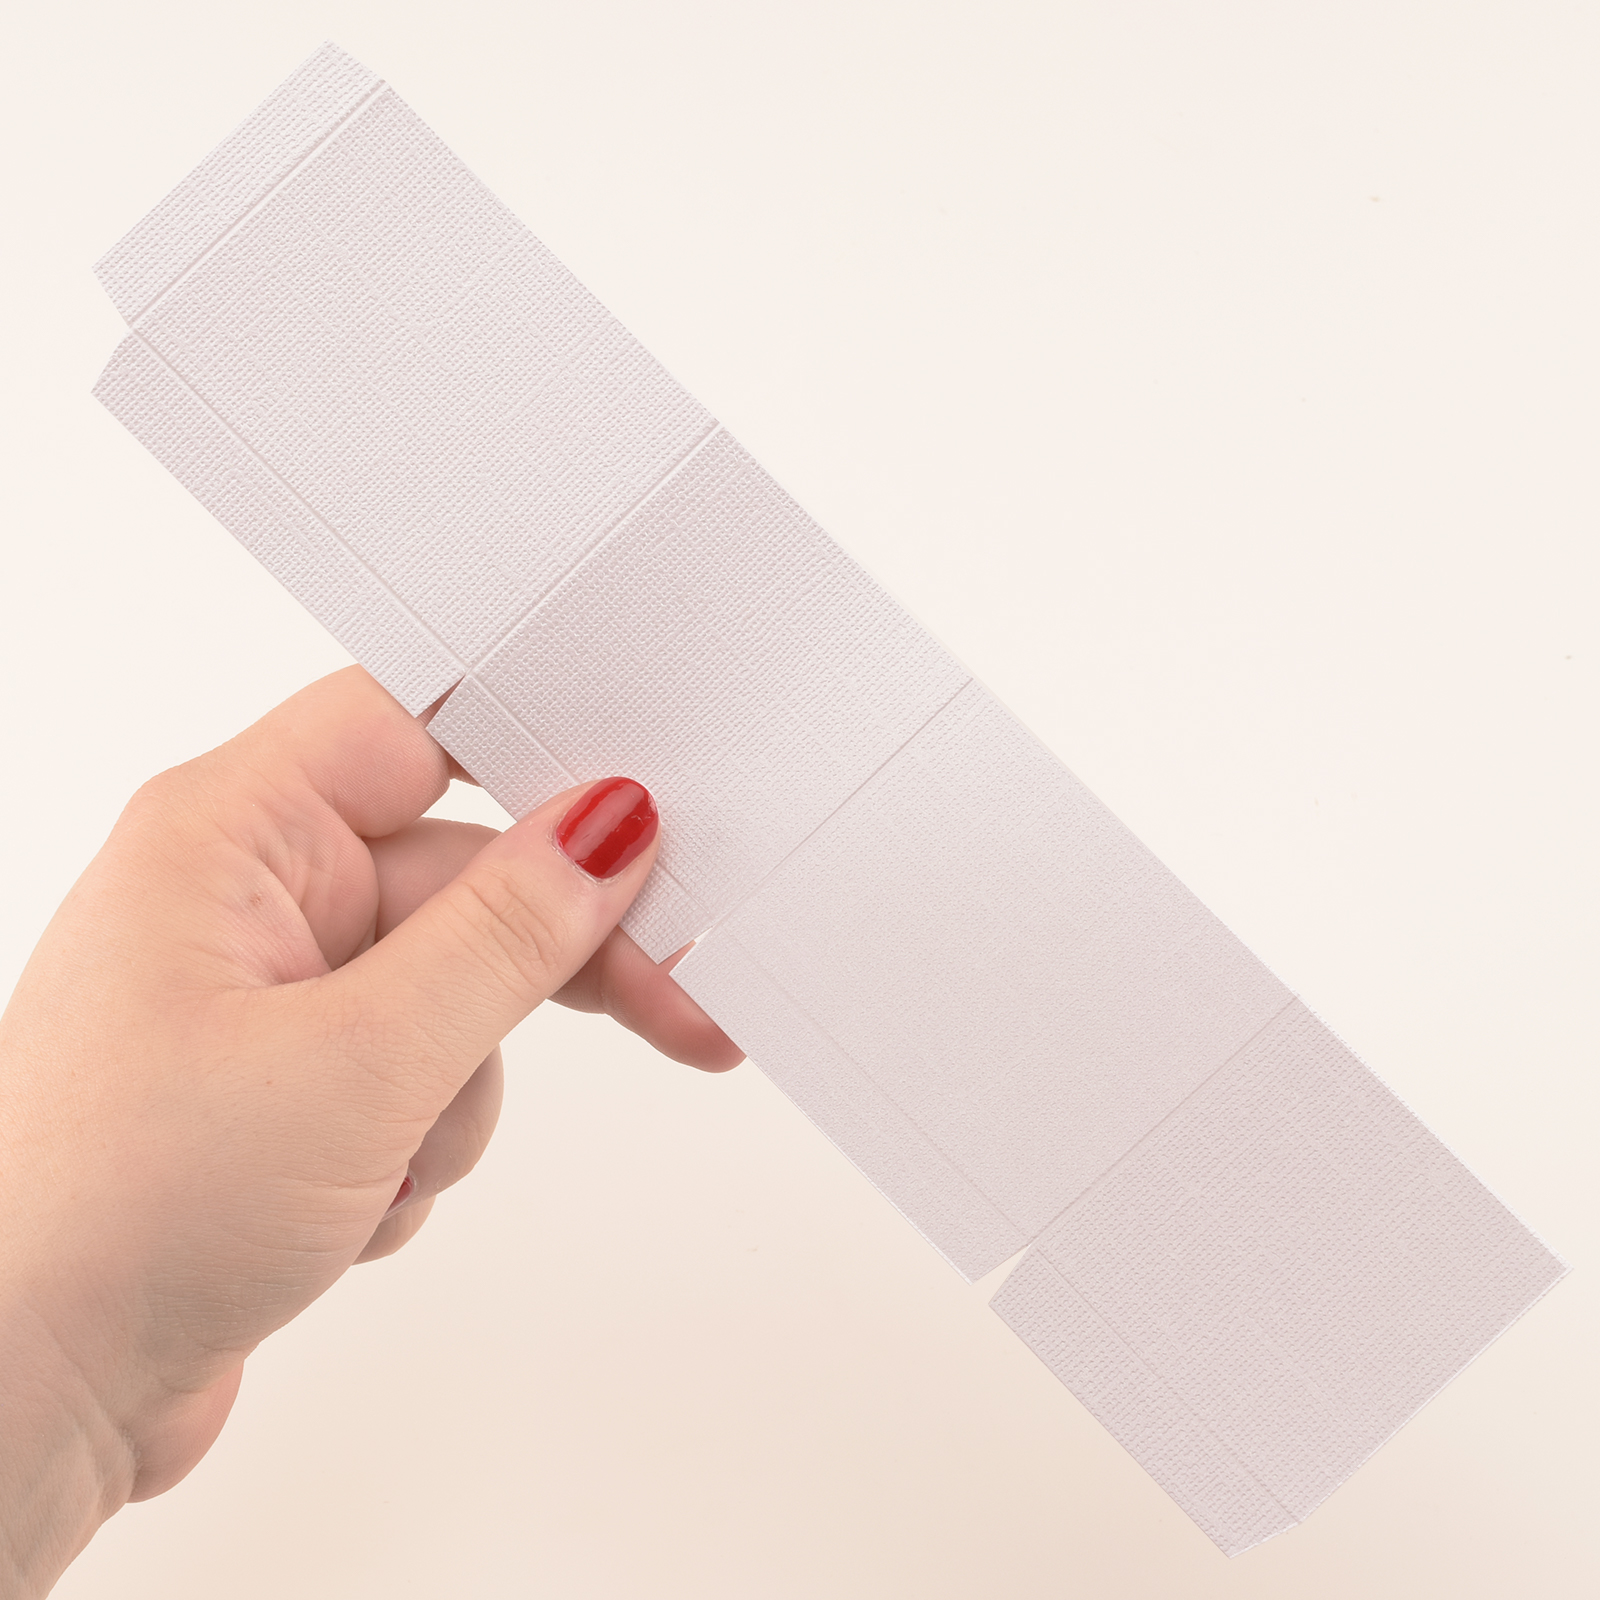
14
Cut the sheet as shown in the image above.
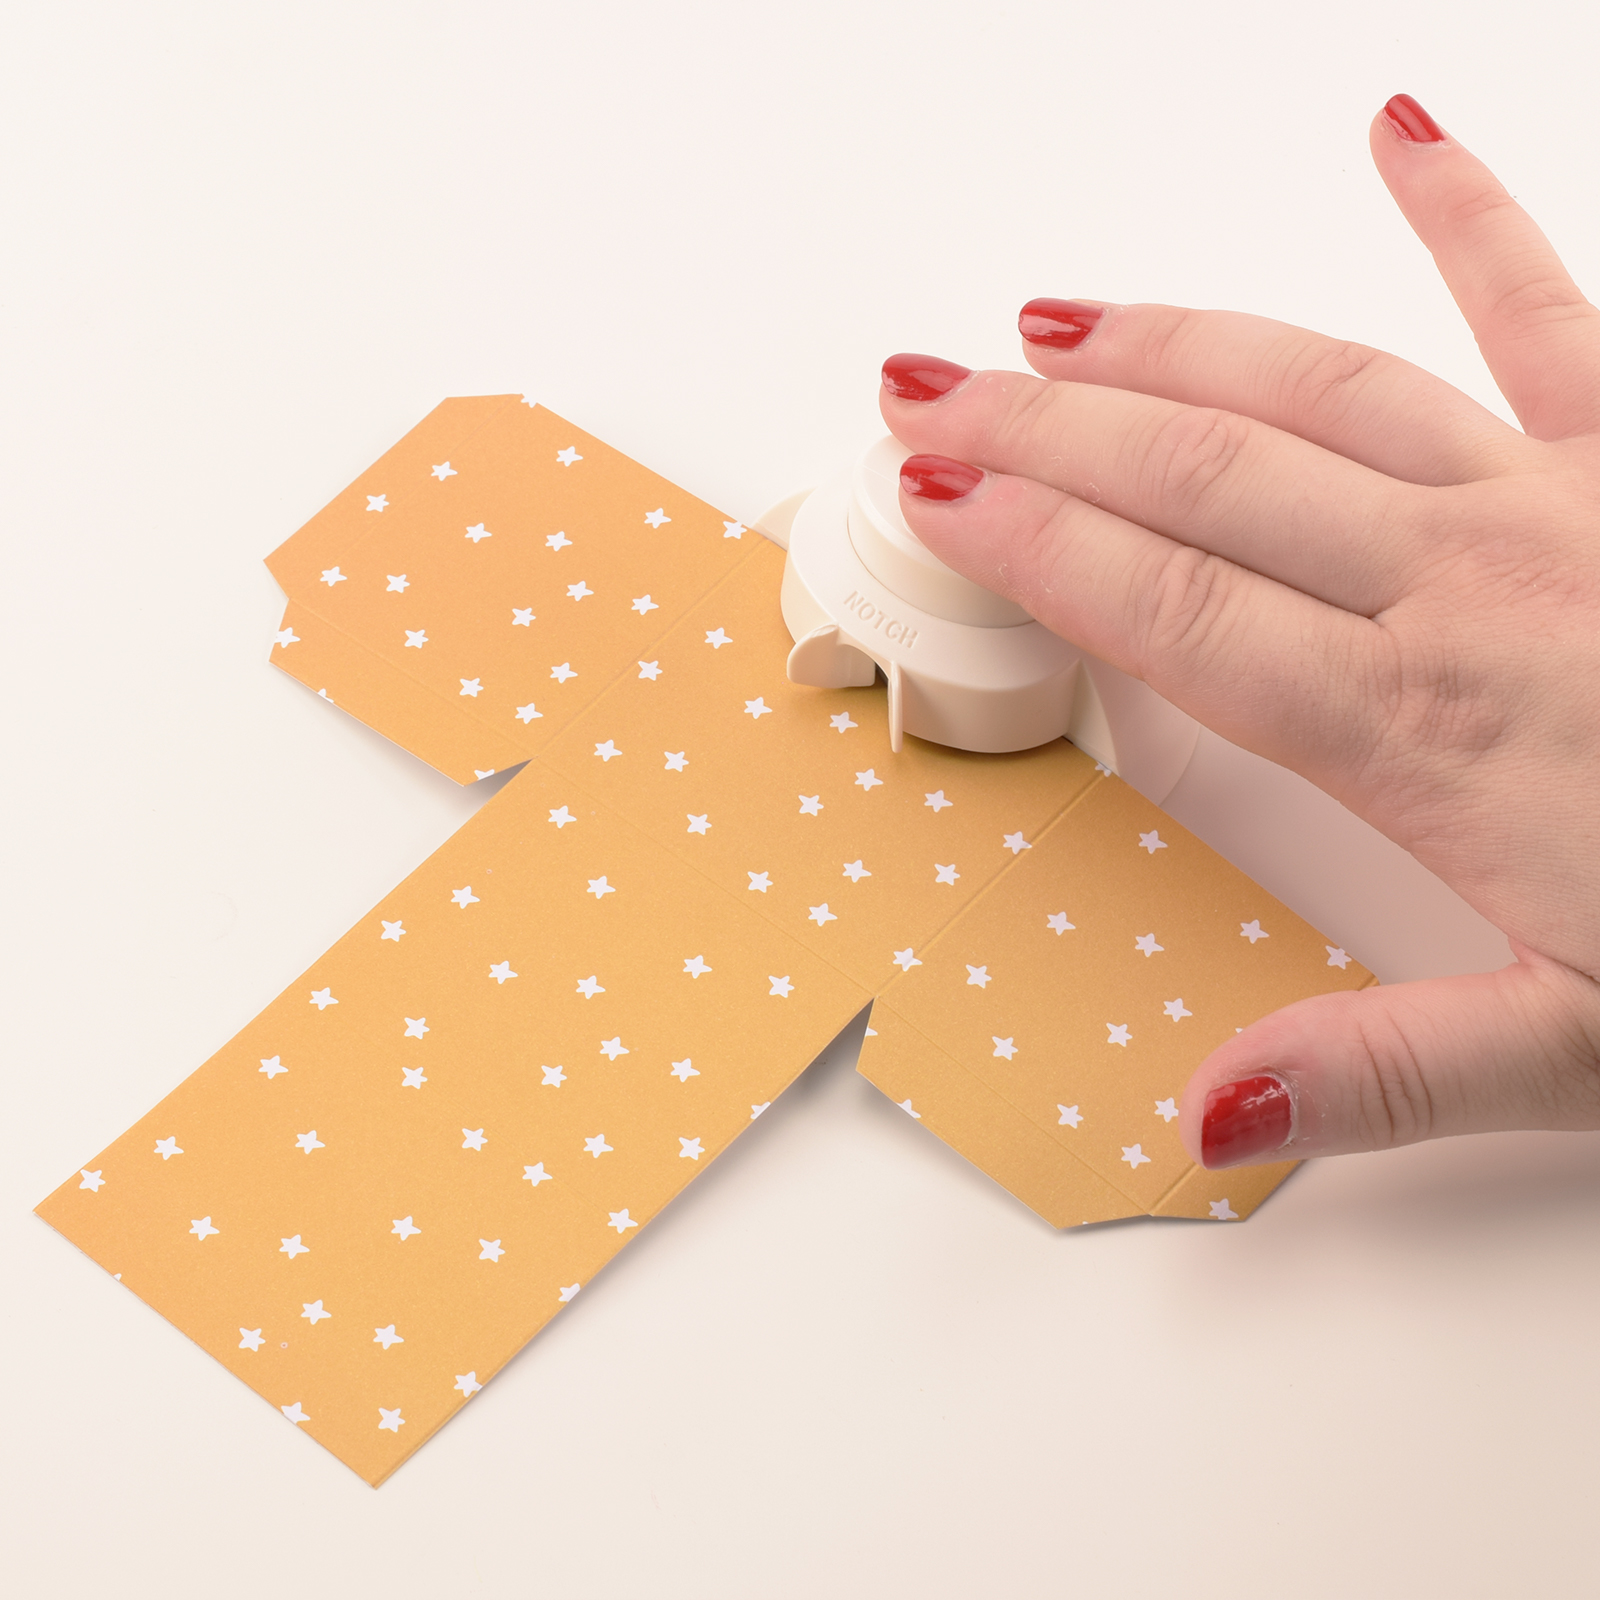
15
Use a punch to neatly finish the box.
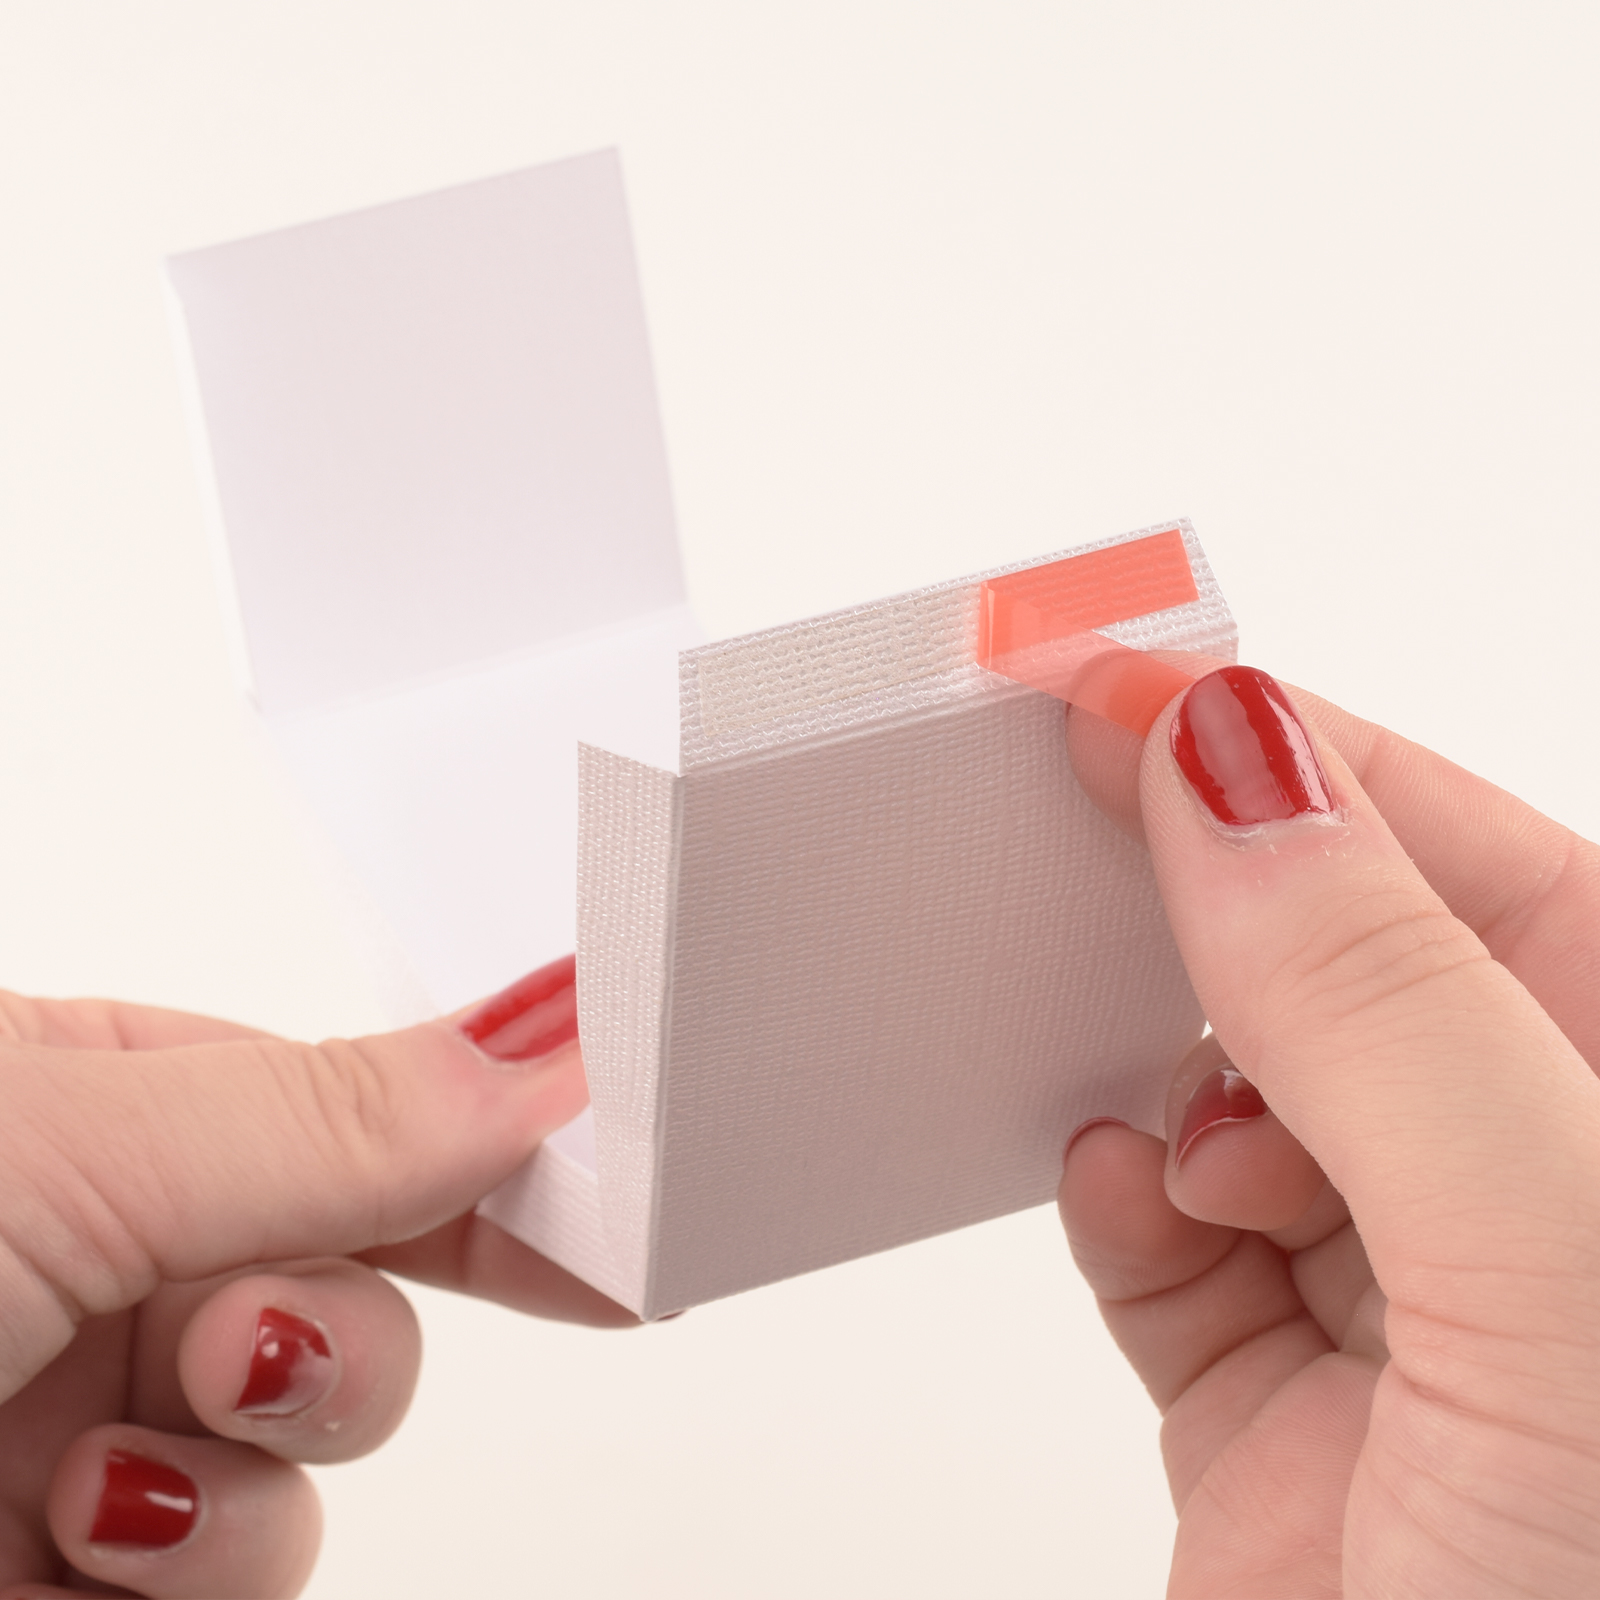
16
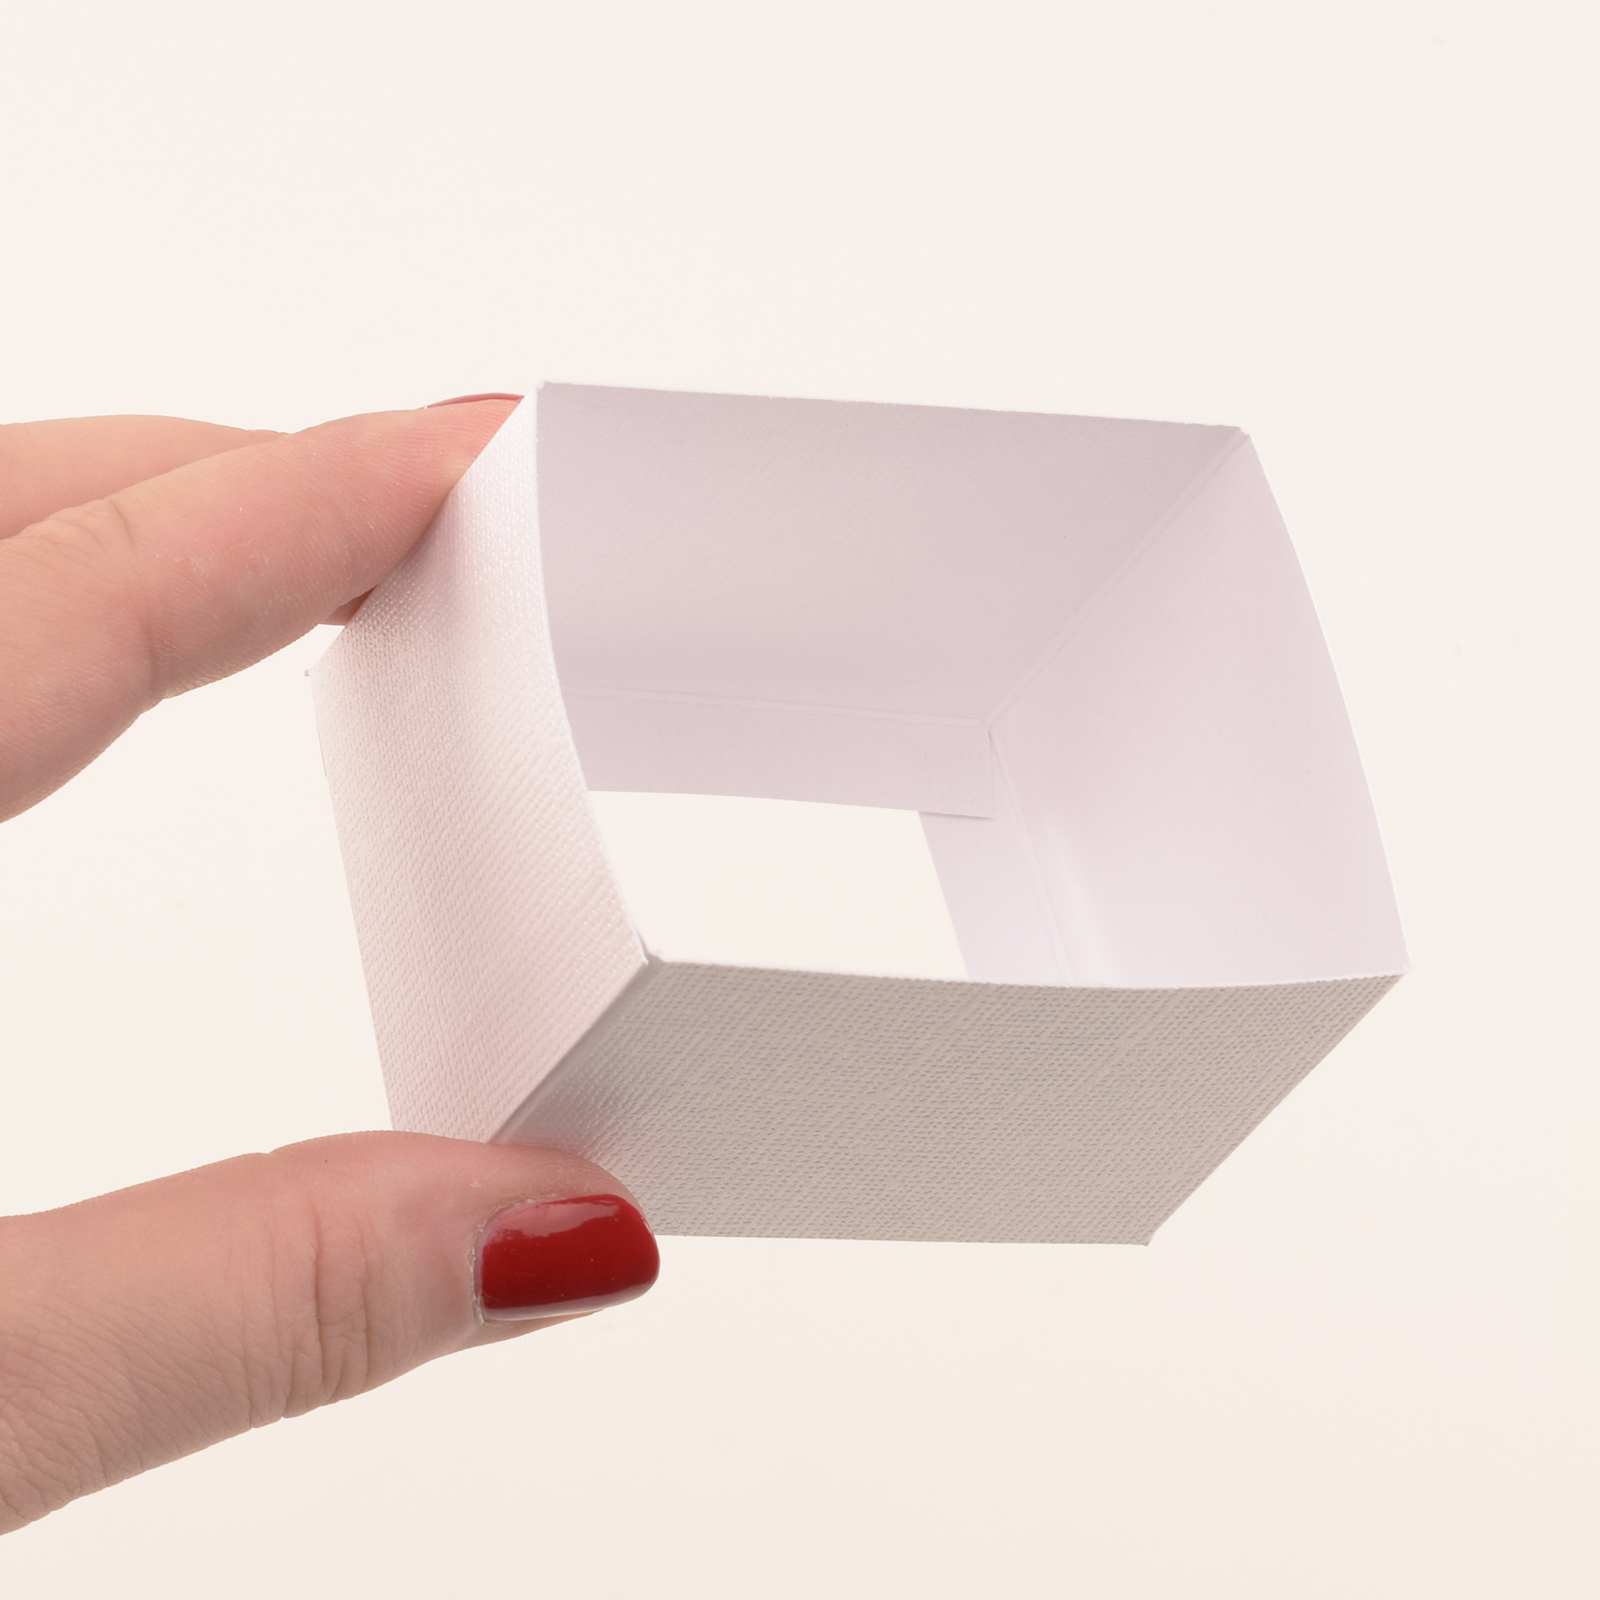
Use double-sided tape to close the box.
17
Repeat steps 11 to 16 to make a total of 24 boxes.
18
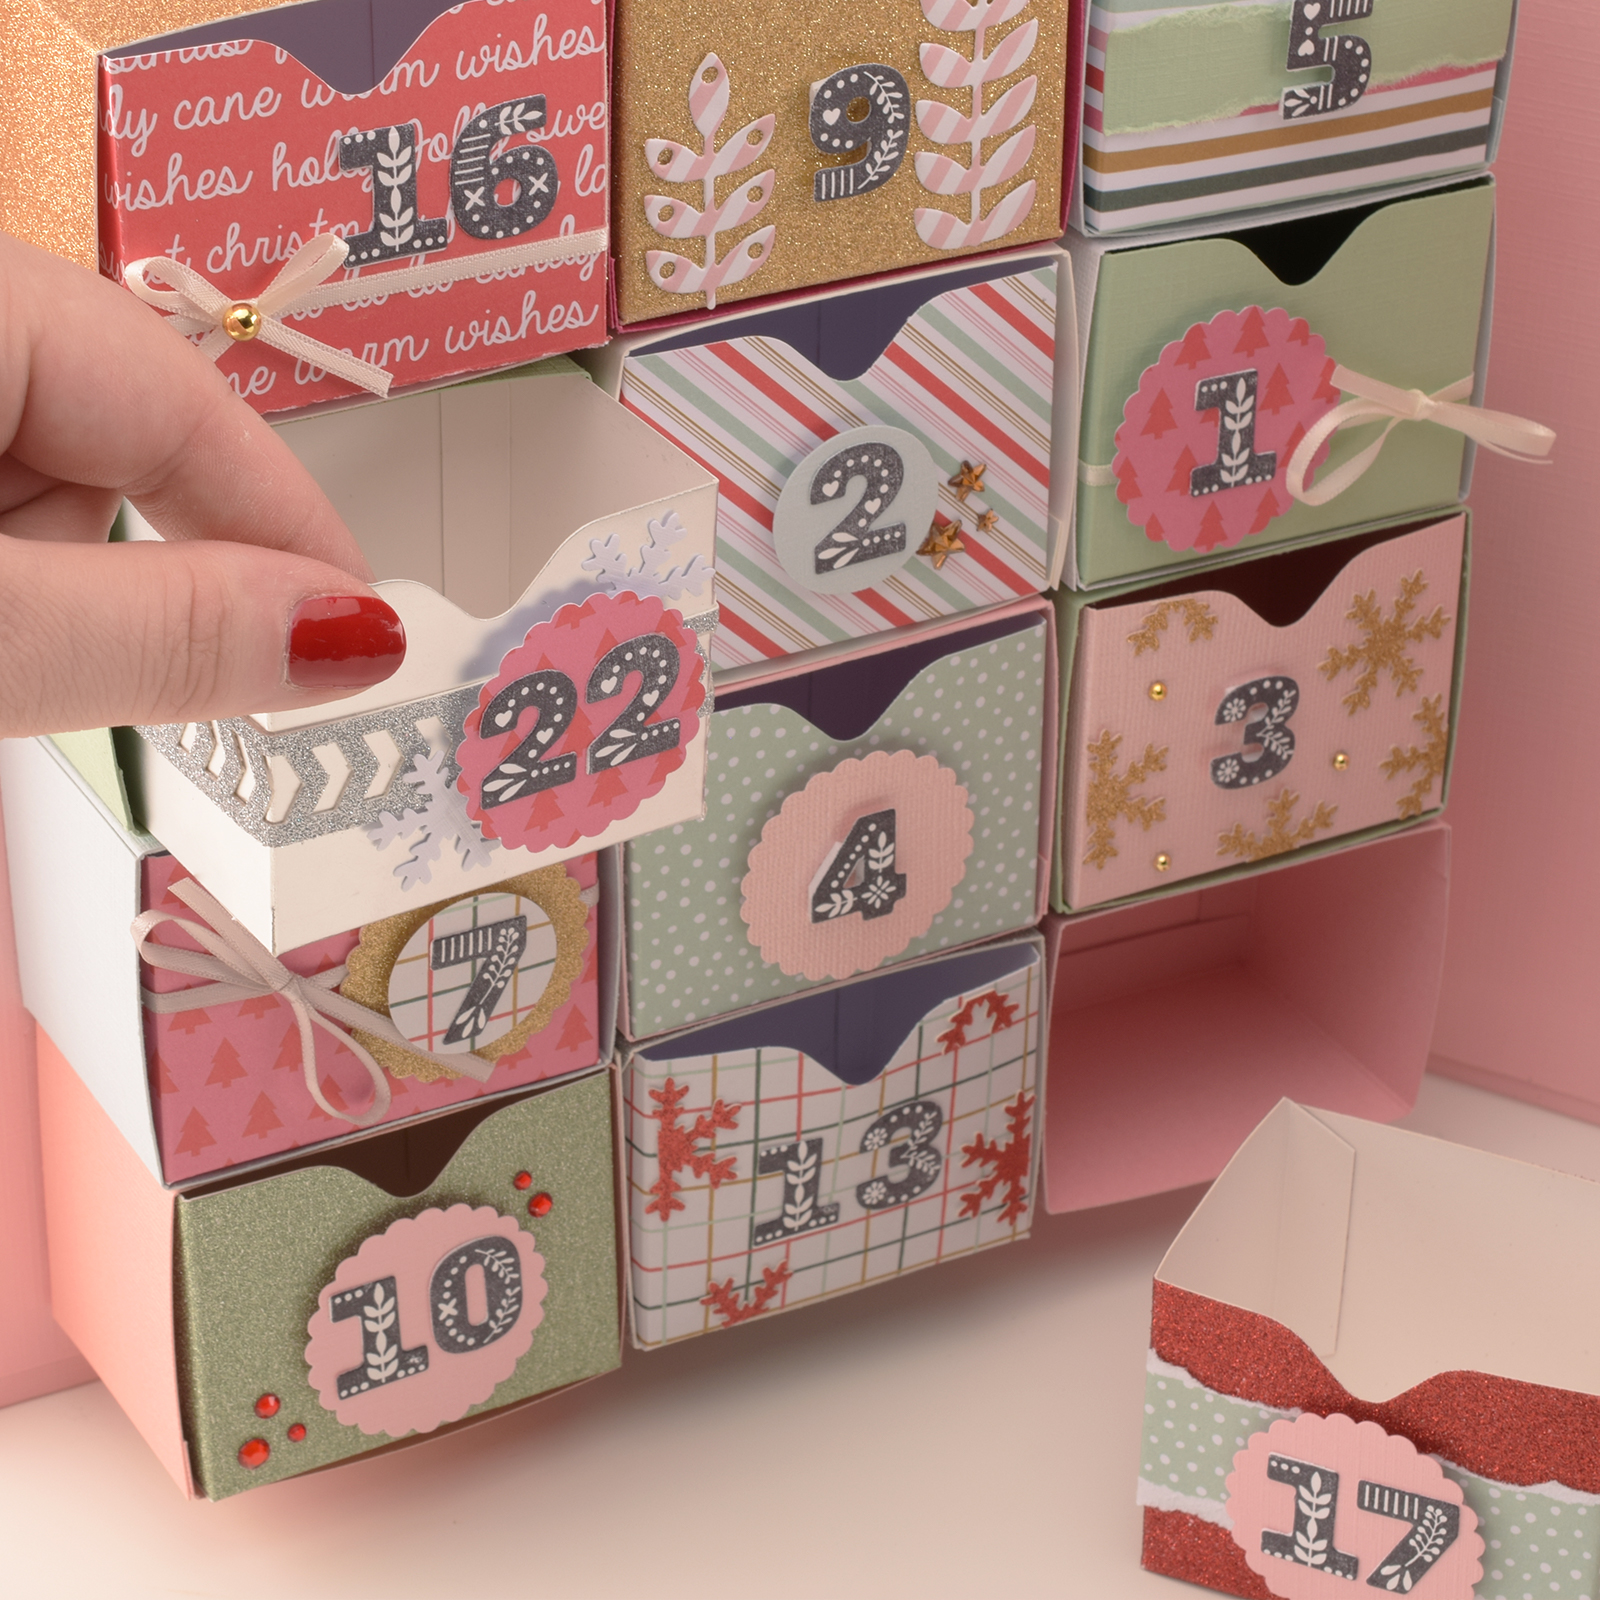
Stamp and die-cut the numbers 1 to 24.
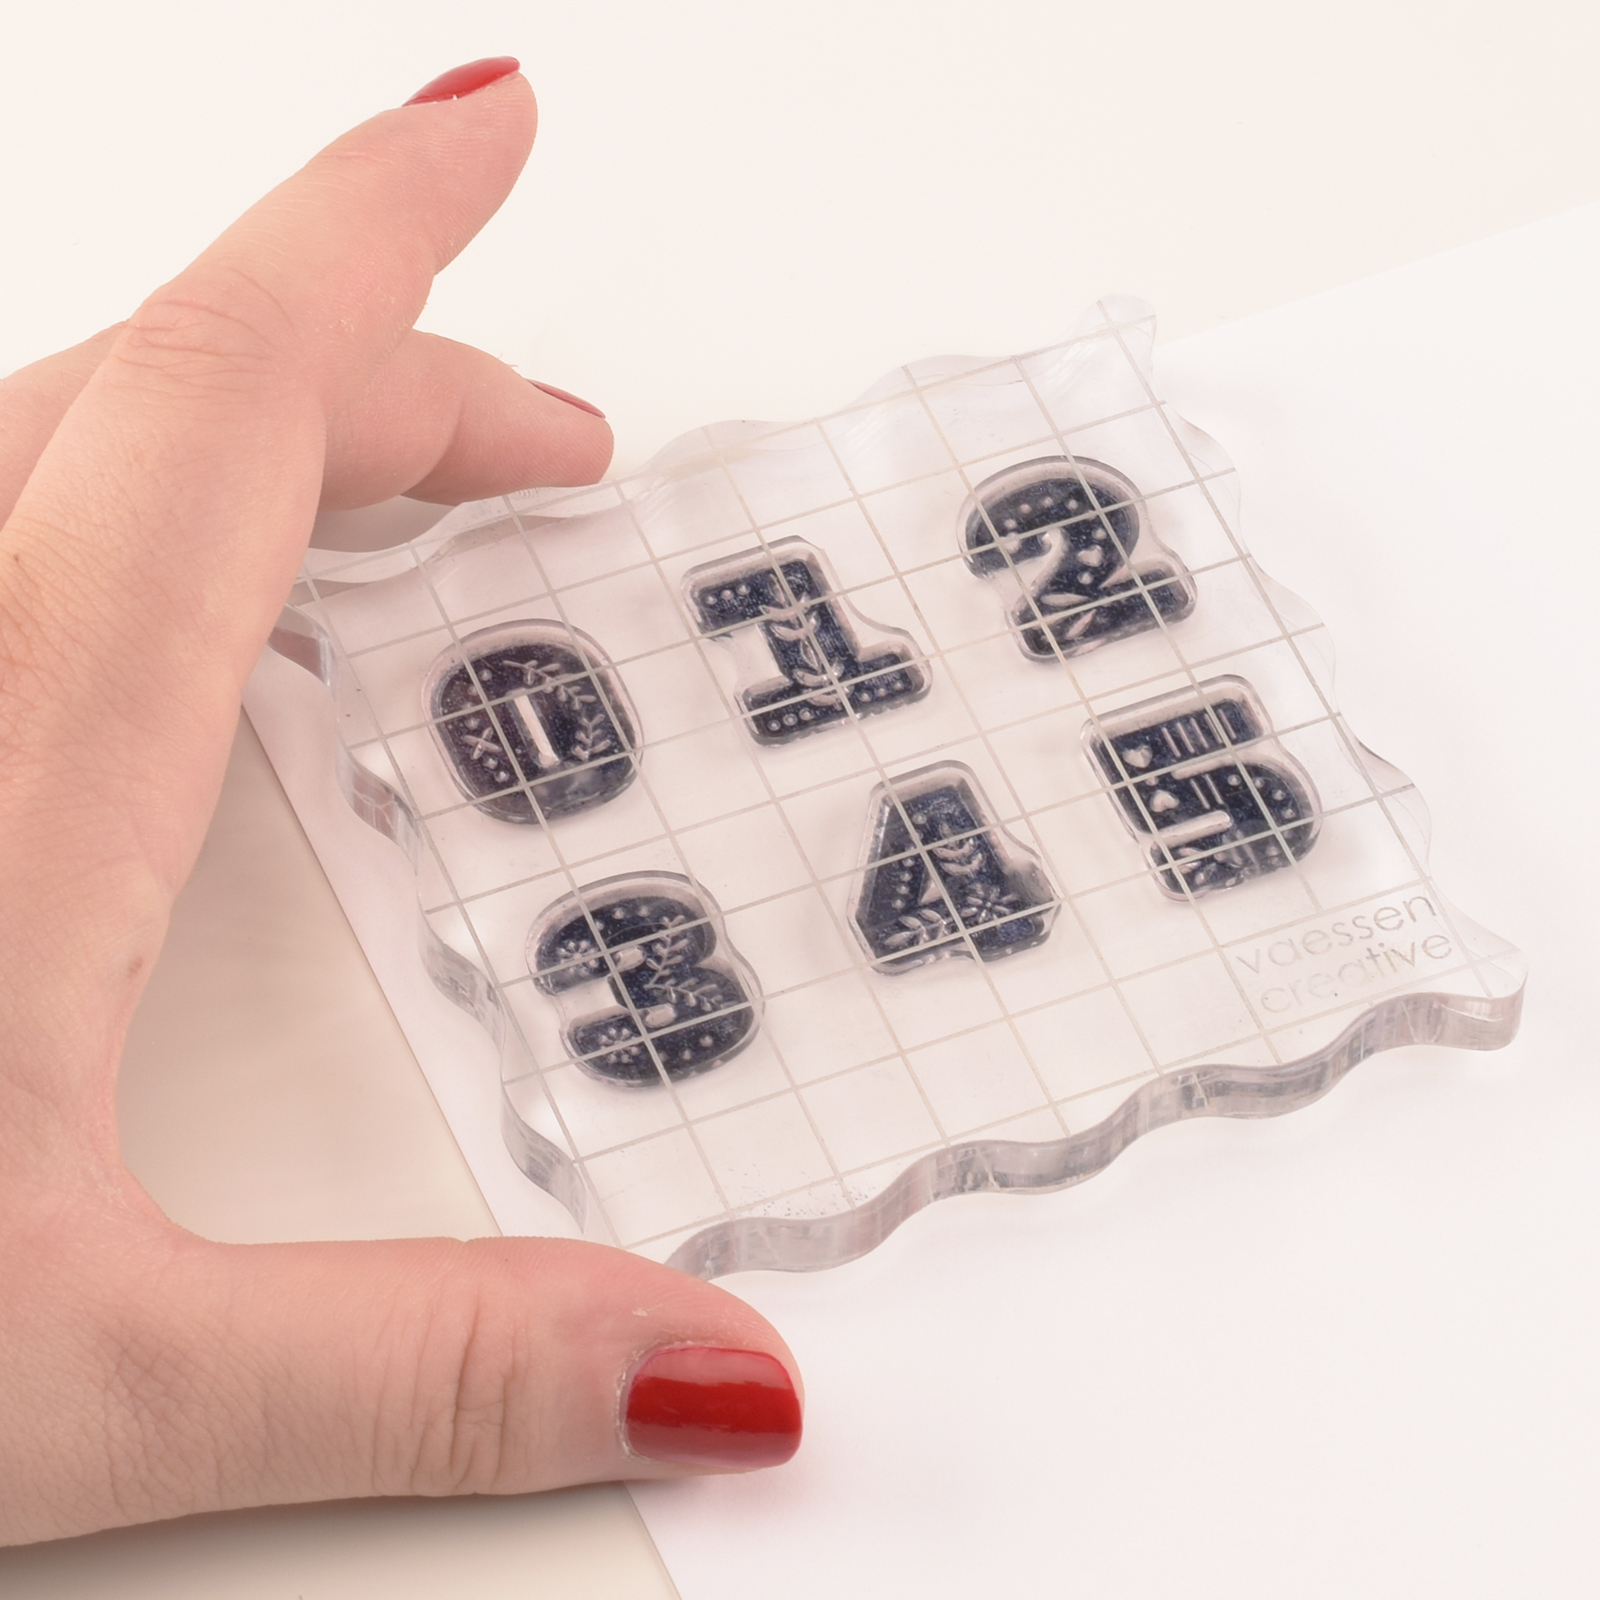
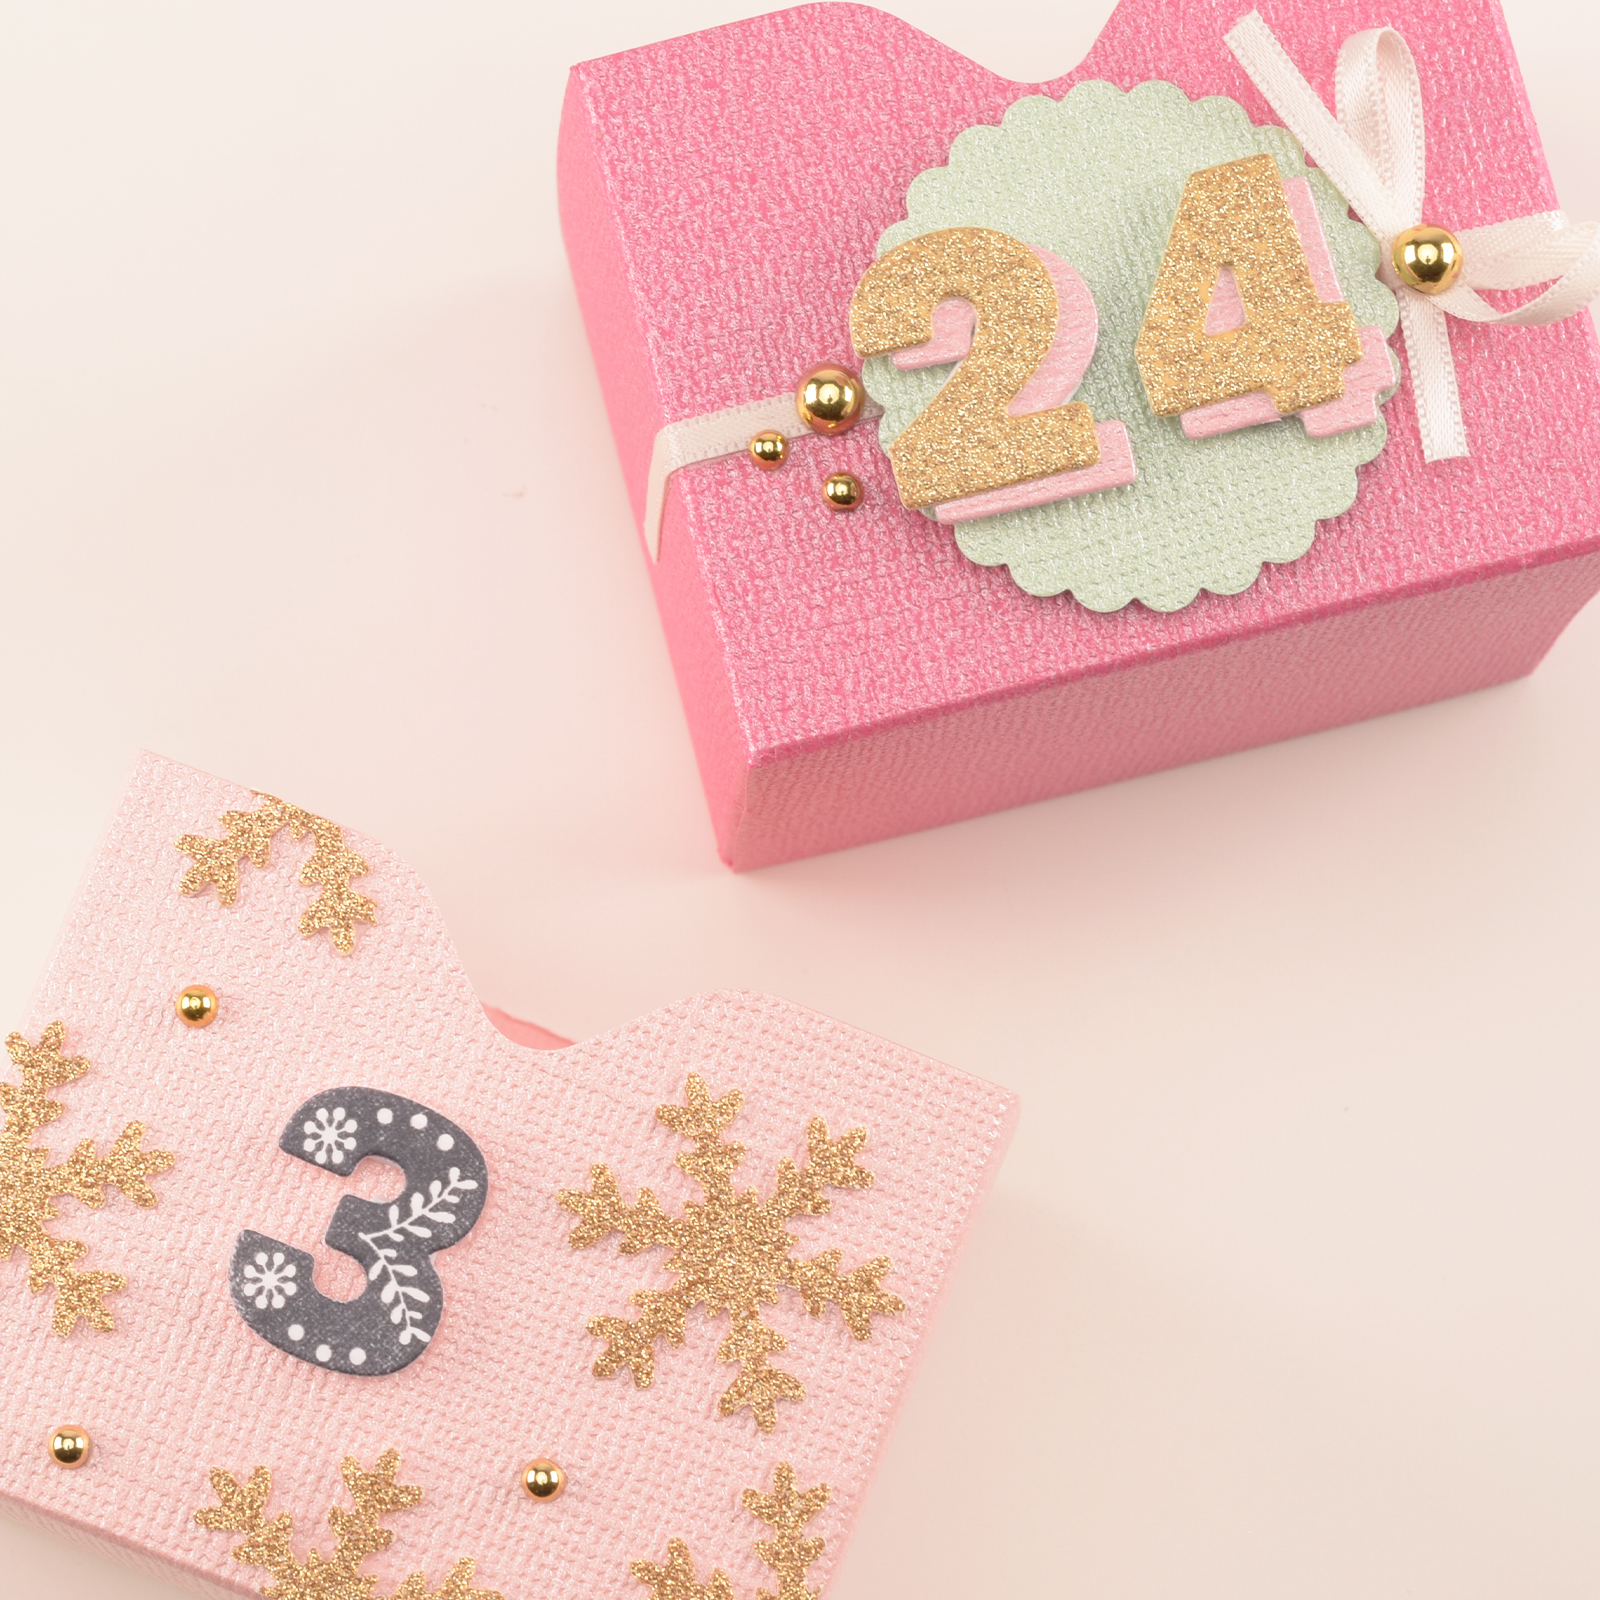
19
Decorate the boxes with the die-cut numbers, stamps, punches, patterned paper, satin ribbon, and rhinestones.
20
Cut a sheet measuring 2.3 x 9.7 inch (6 x 24.8 cm) to make a sleeve for each box.
21
Score the short side at 1 cm and the long side at 0.4, 3, 5 and 7.7 inch (1, 7.7, 12.9, and 19.6 cm).
22
Cut the sheet as shown in the image above.
23
Use double-sided tape to close the sleeve.
24
Repeat steps 20 to 23 to make a total of 24 sleeves.
25
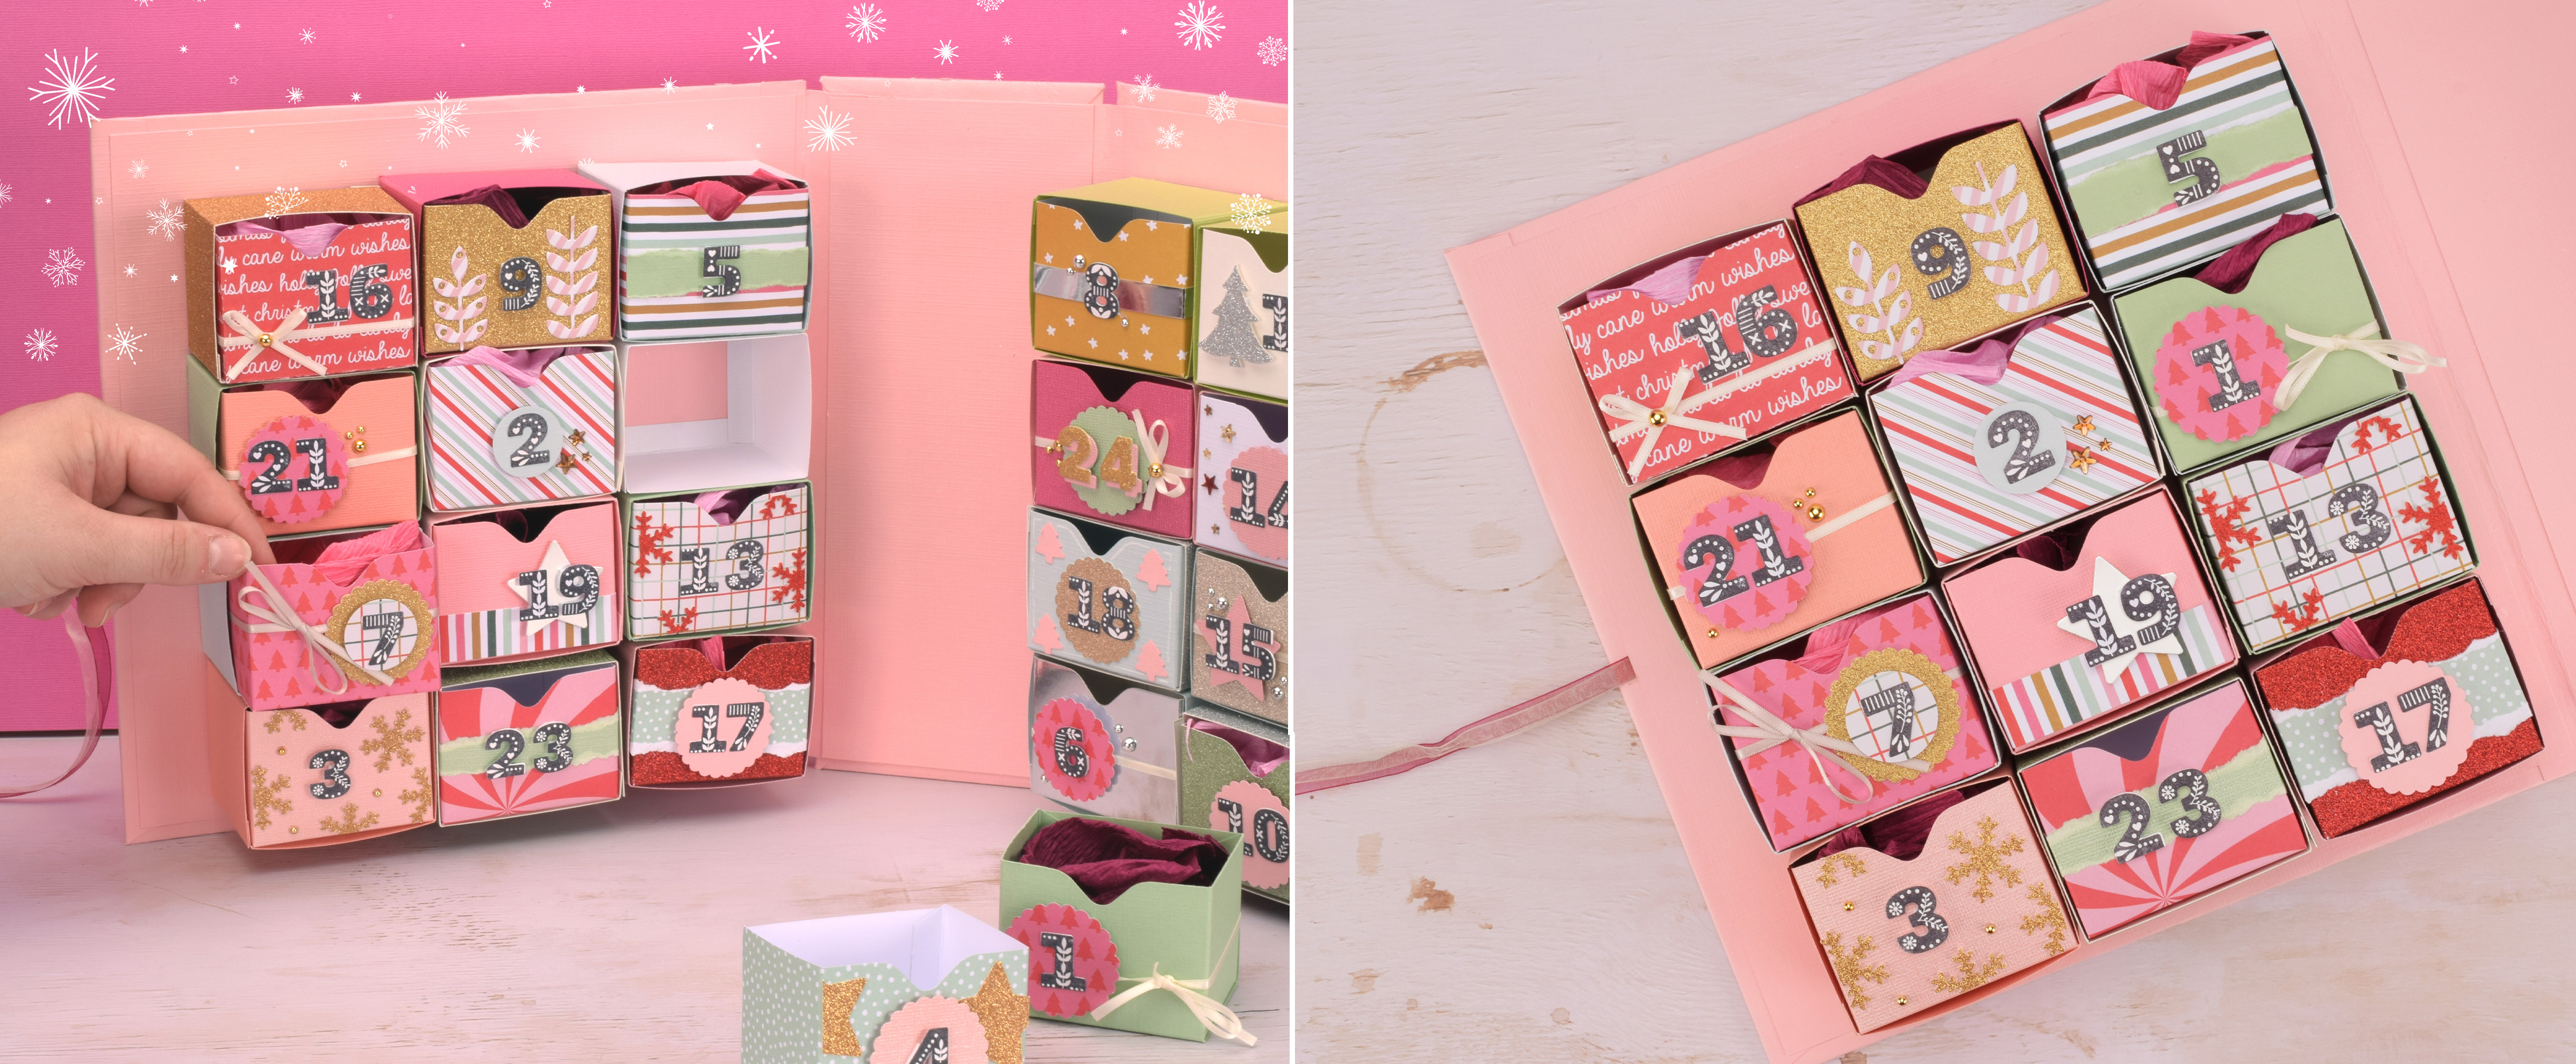
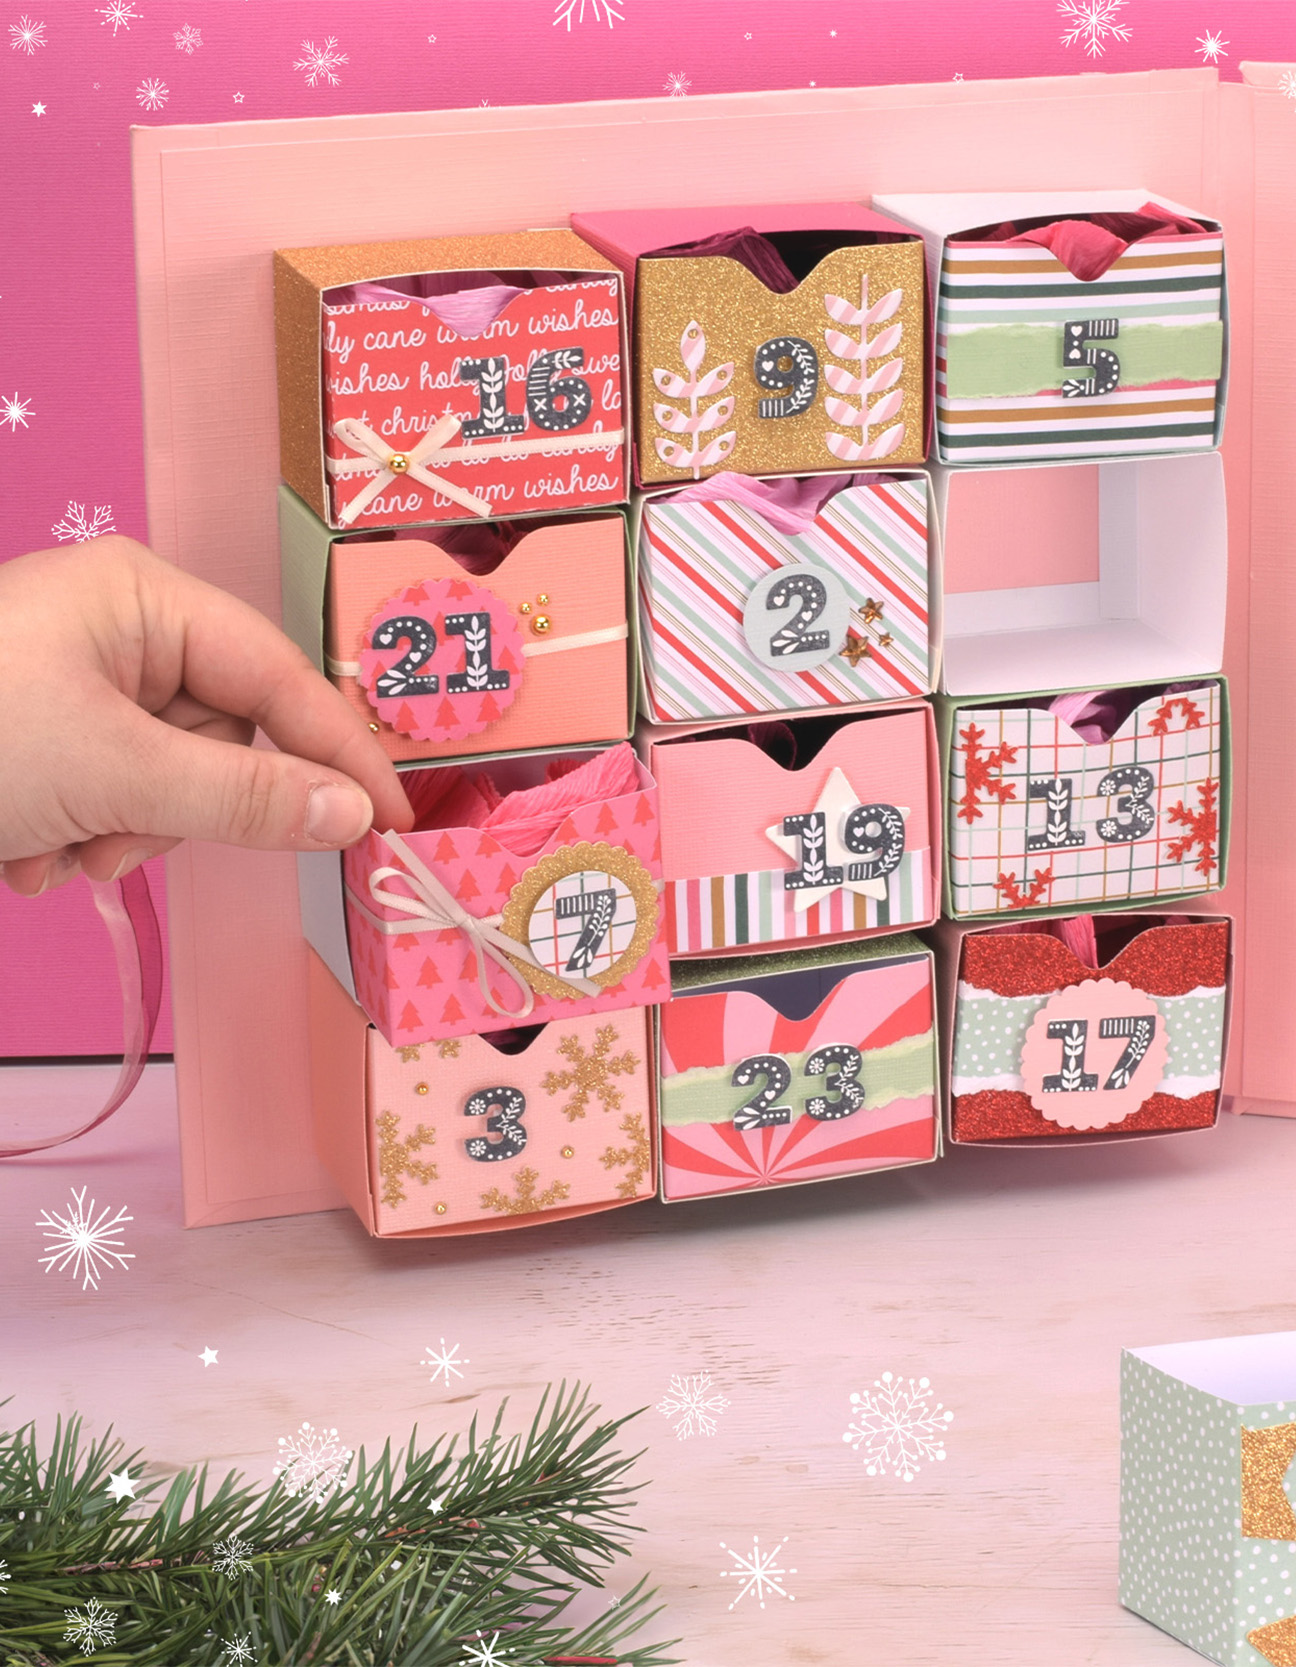
Attach the sleeves to both sides of the covers, placing 12 sleeves on each cover.
26
Insert the boxes into the sleeves. For a playful effect, mix up the order of the boxes.