Passer au contenu principal


Woodburning a wood slice
Turn your favourite design or drawing into a lasting piece of art on wood! With a
few simple steps, you can learn the basics of woodburning and bring your design
to life on a wood slice.
1
Print out a design of your choice, sized to fit your wood. You can find the design for this project in the PDF on this page.
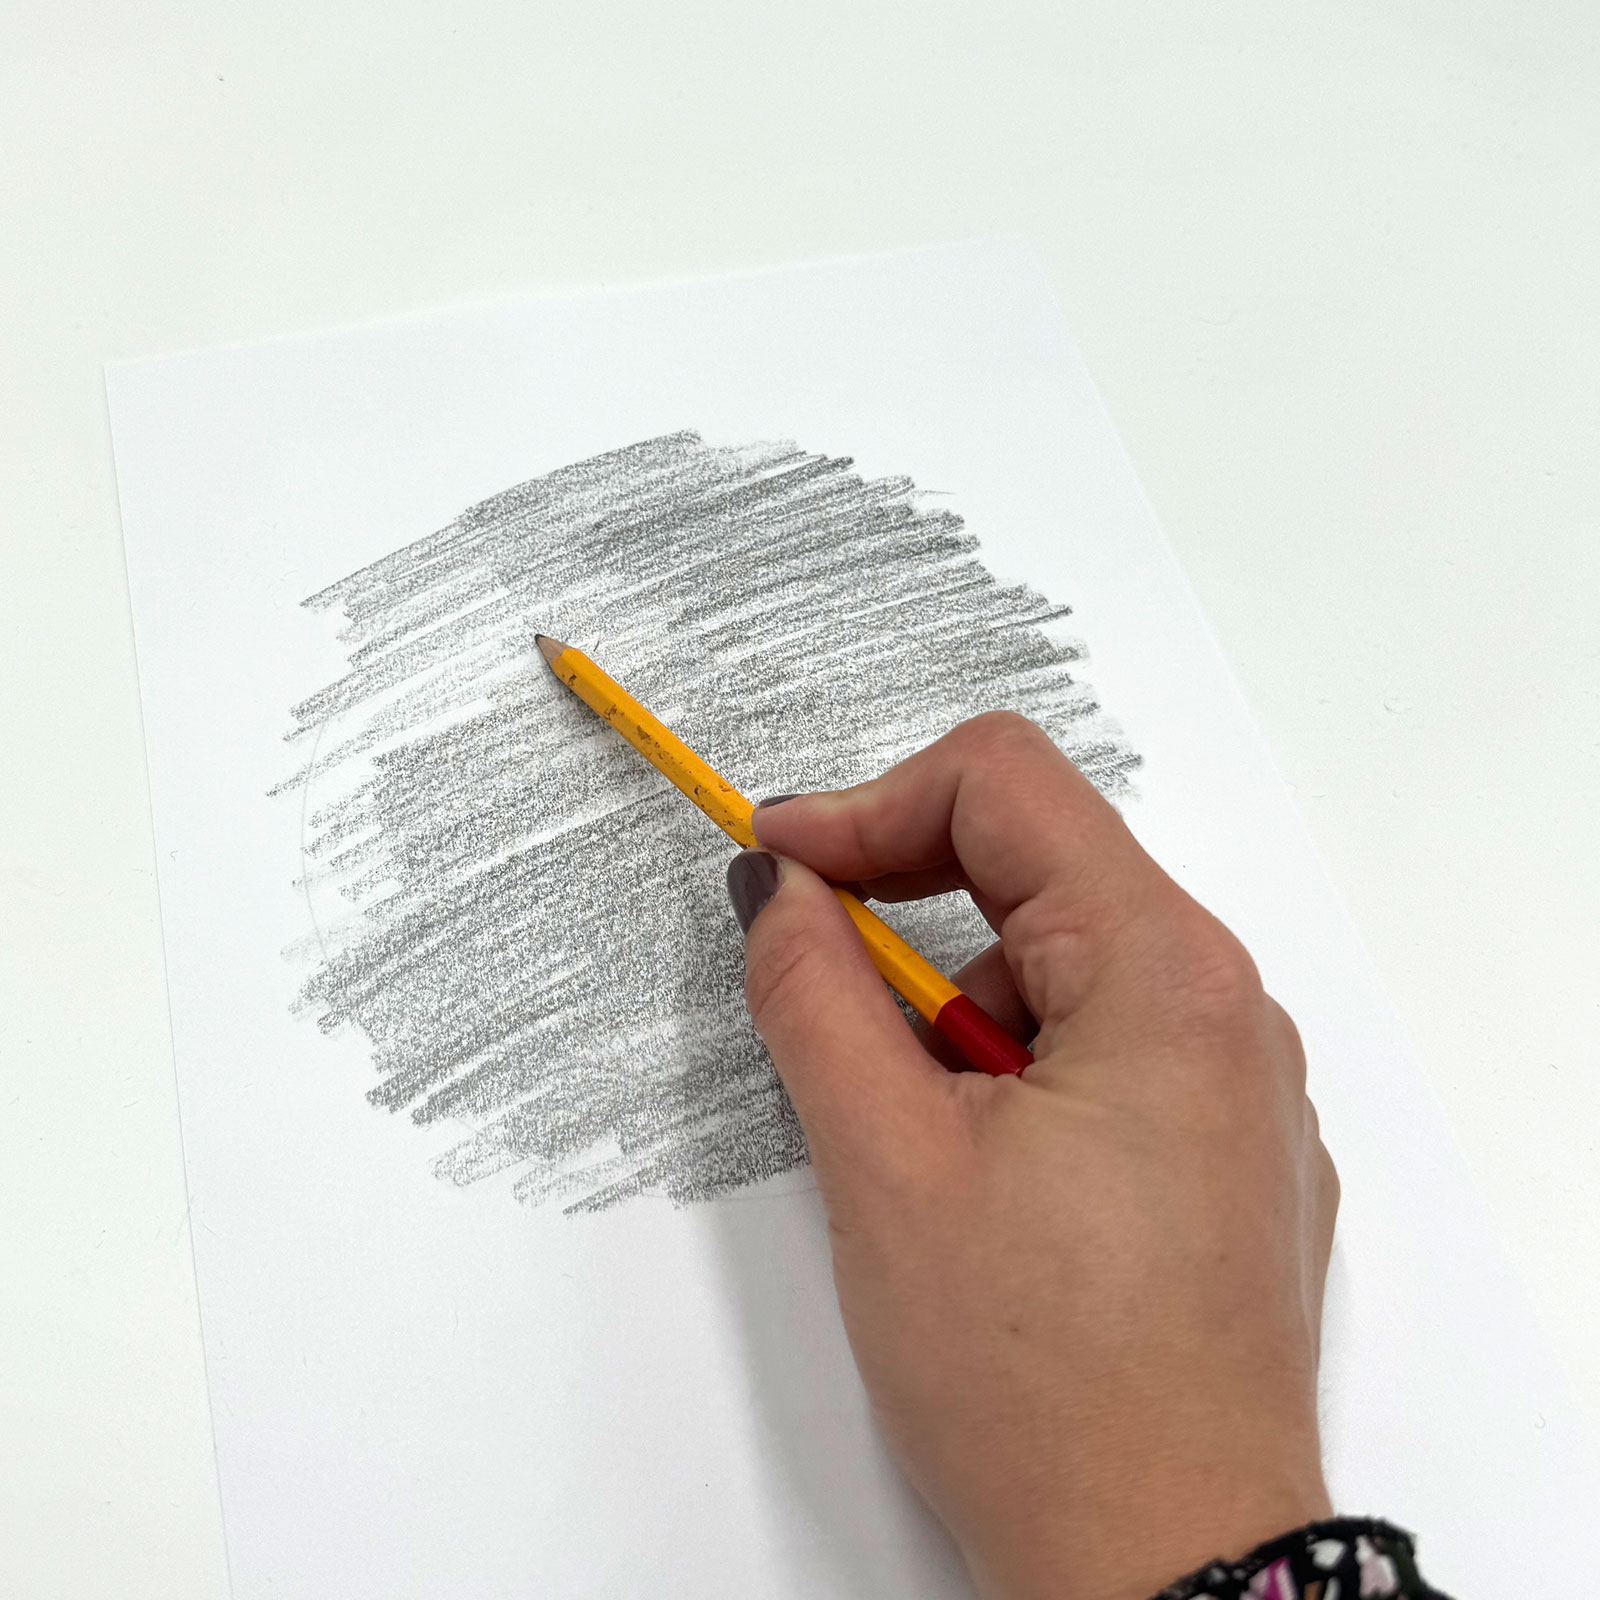
2
Flip the paper over and shade the back with a soft or graphite pencil, ensuring the entire back is covered with graphite.
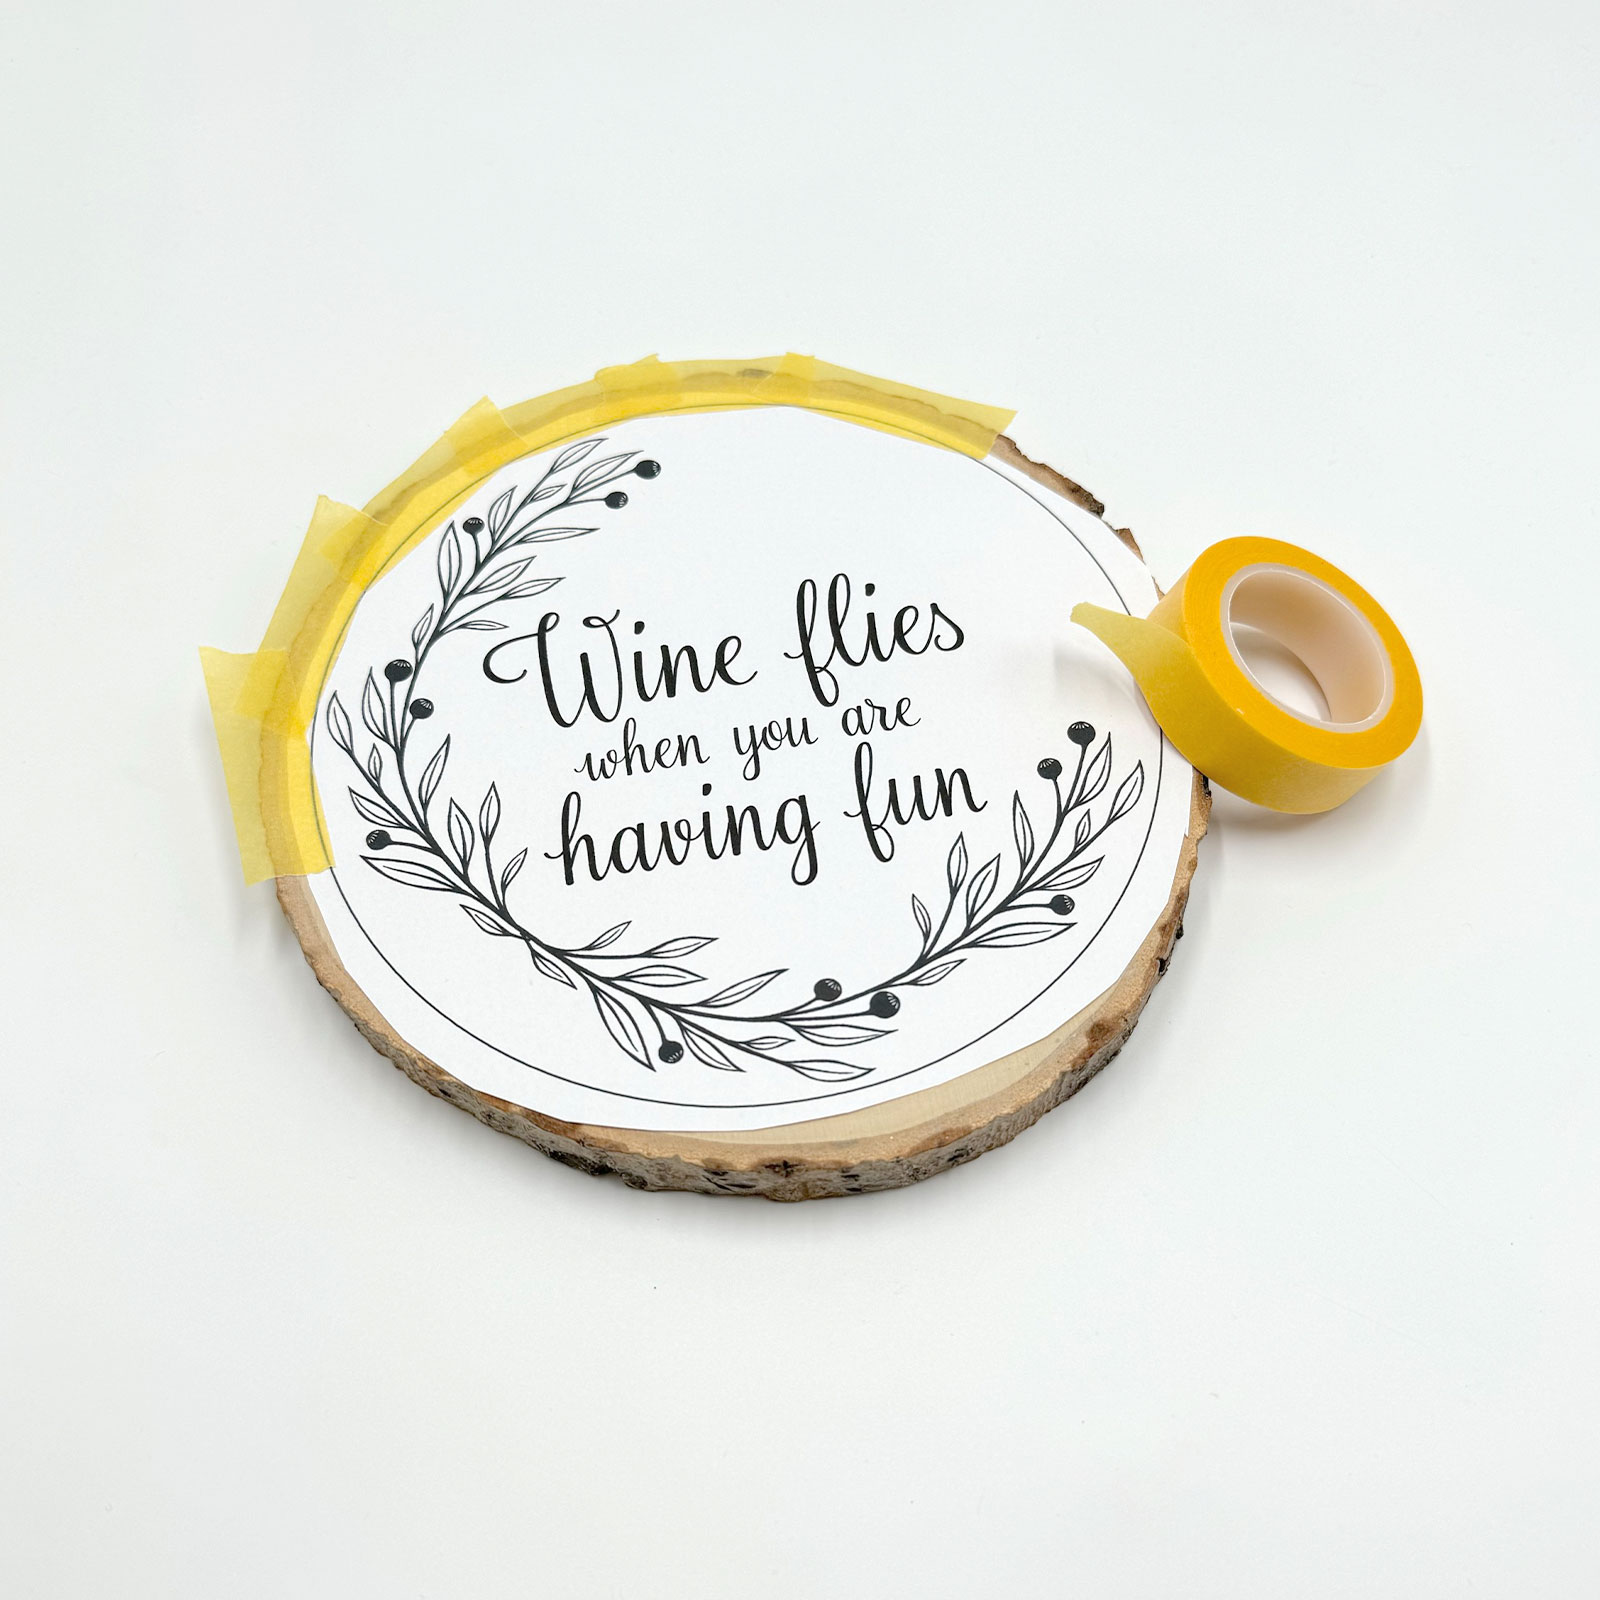
3
Cut the design to fit the wood, and secure the paper with masking tape.
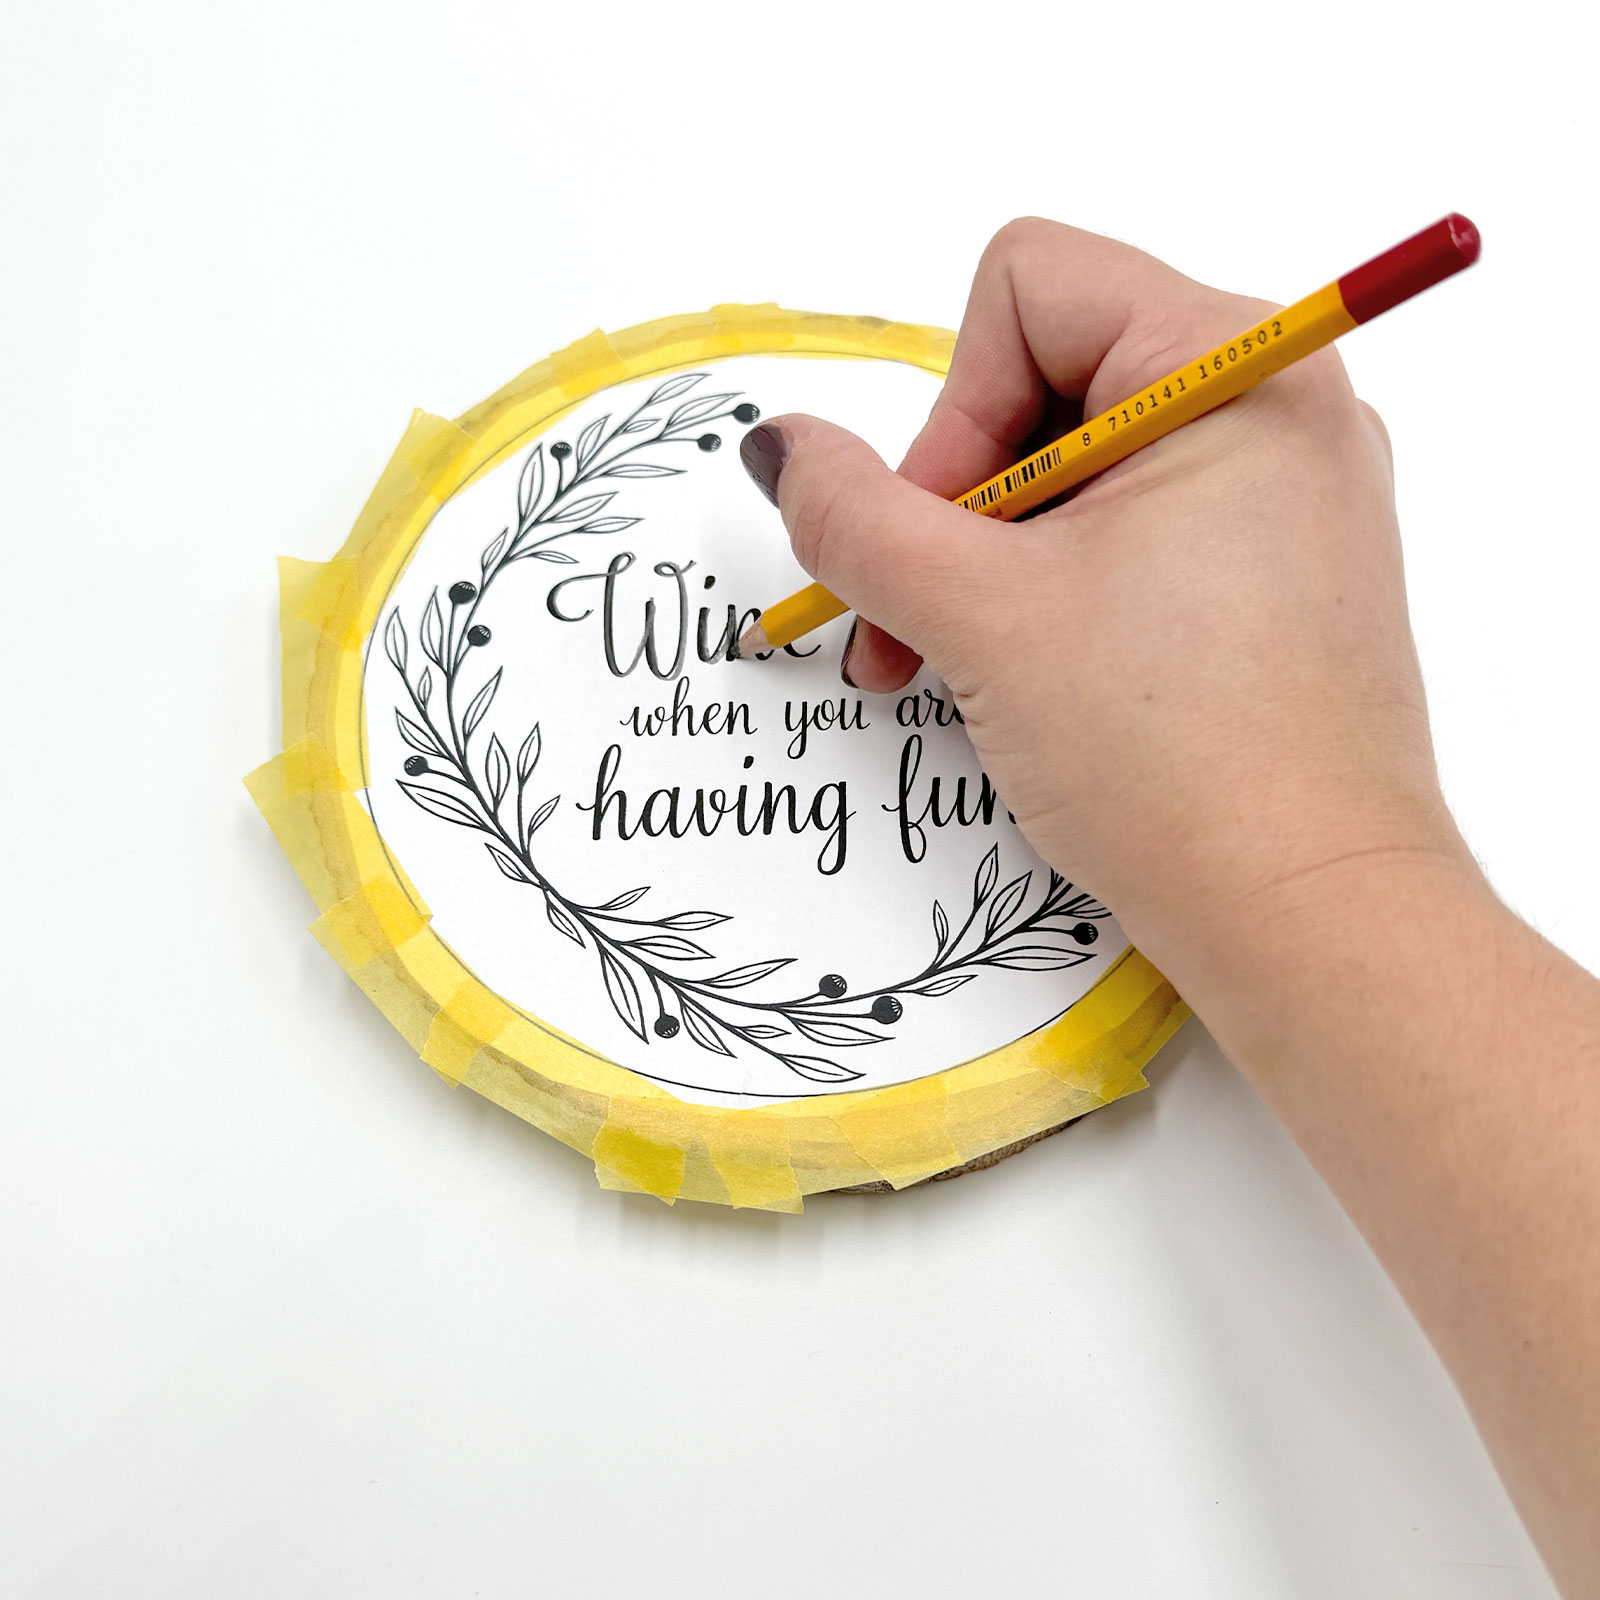
4
Trace over the design with a harder pencil, applying enough pressure to transfer the lines.
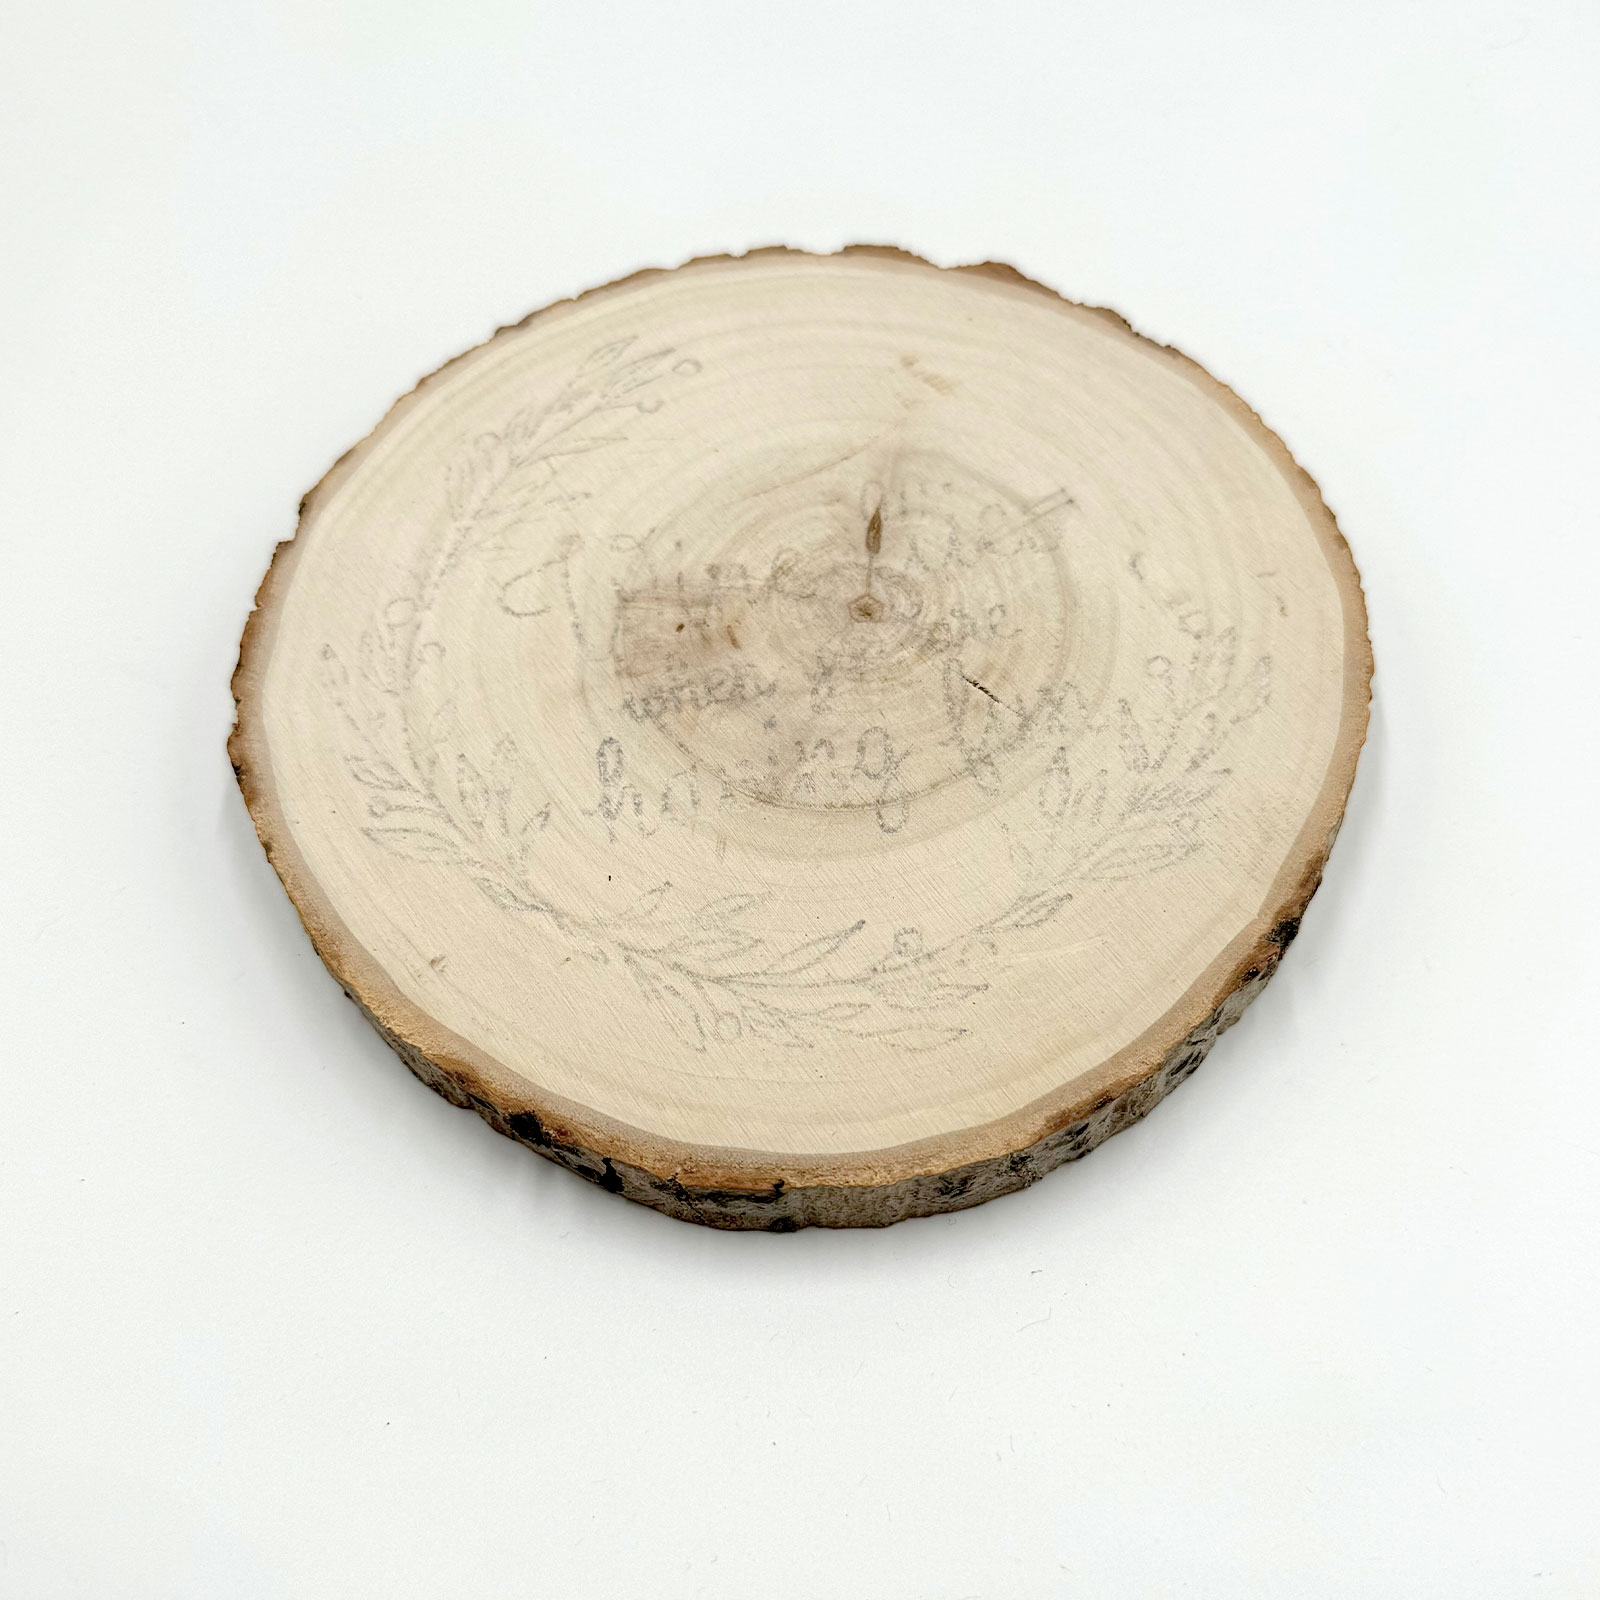
5
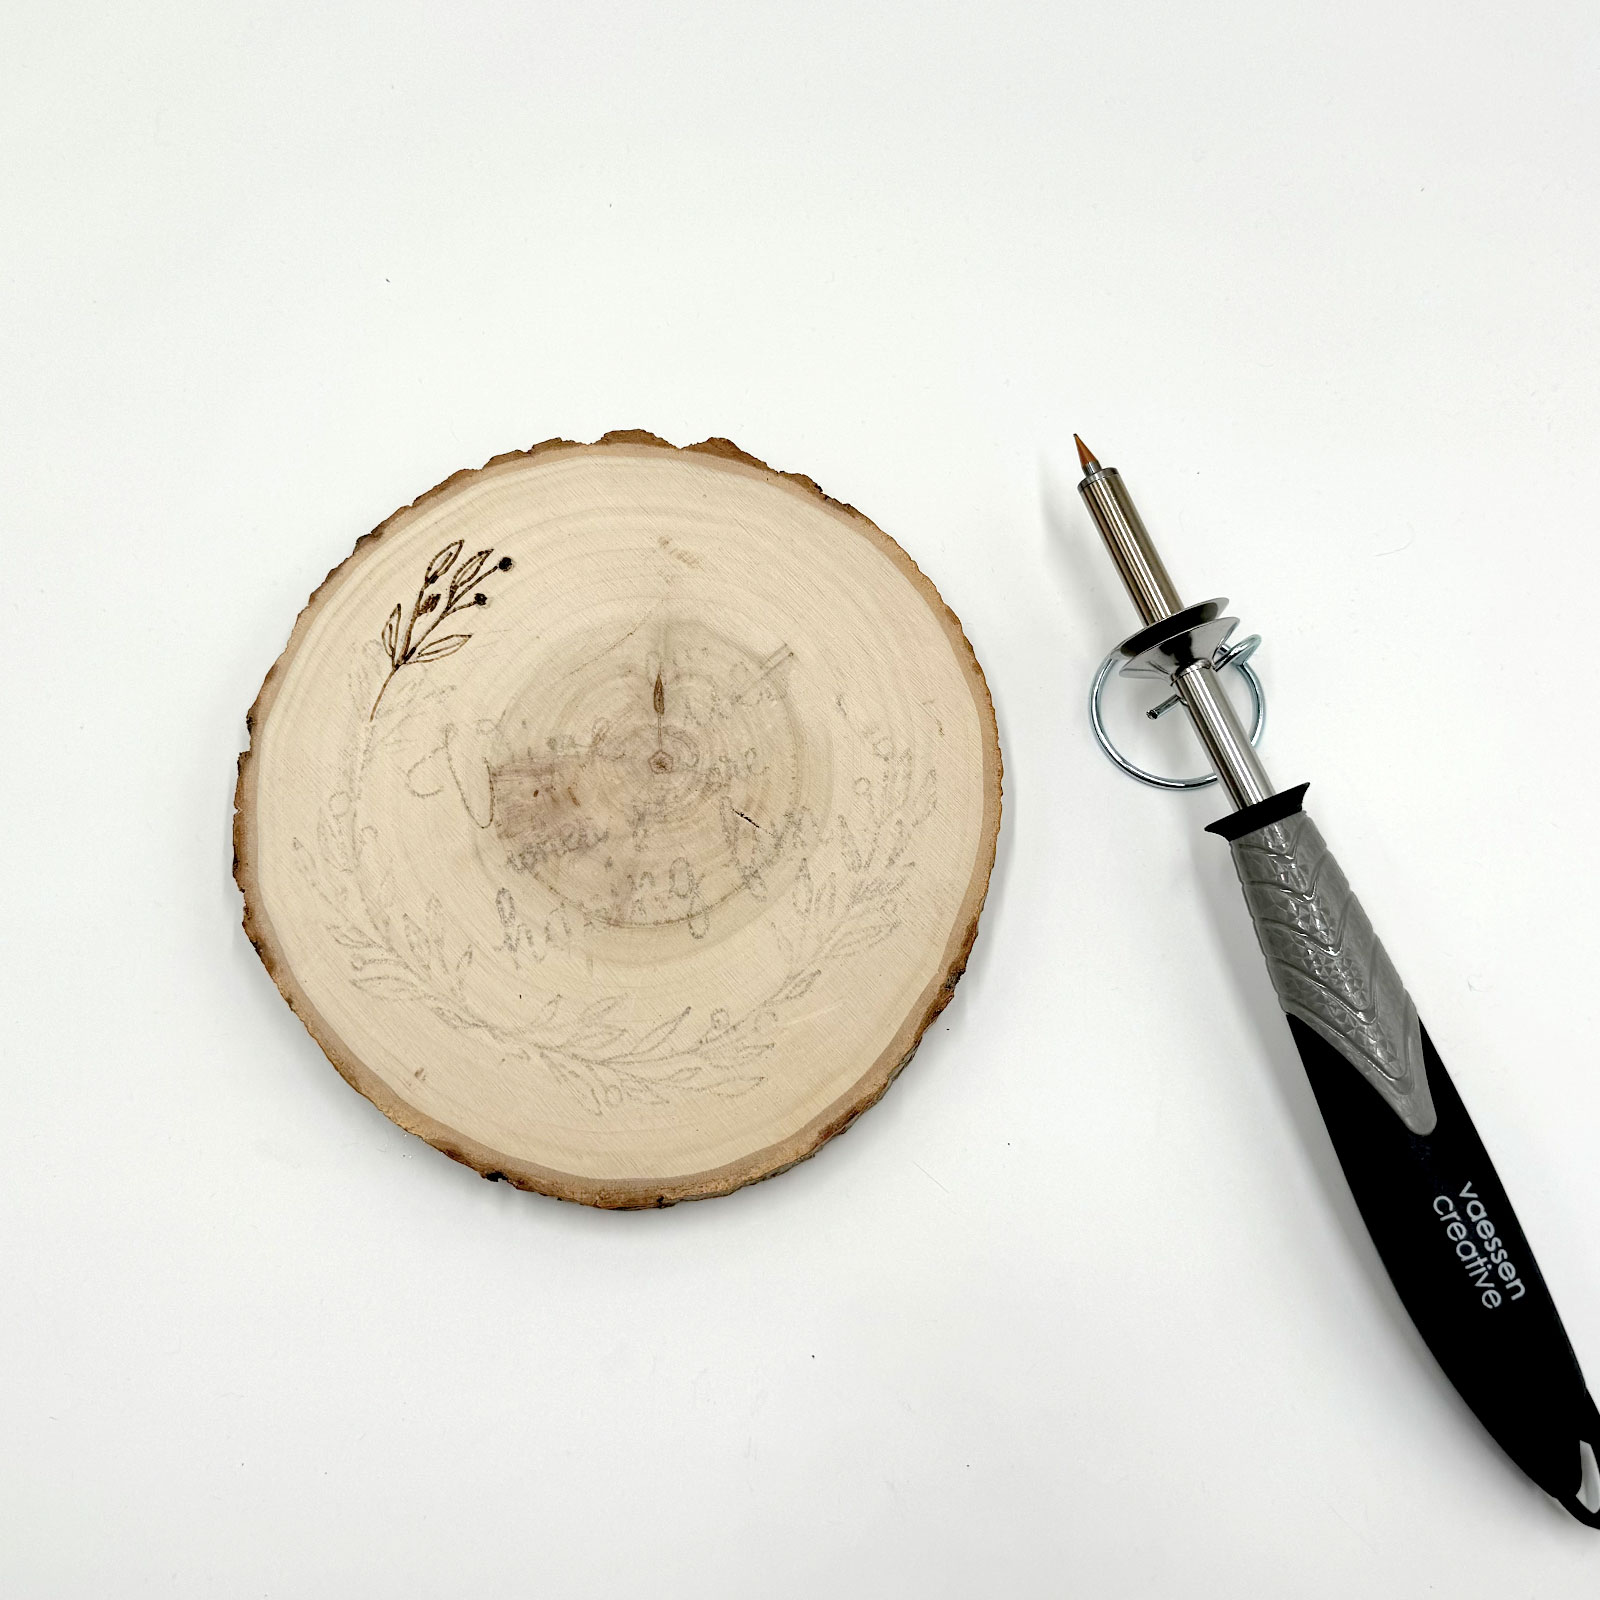
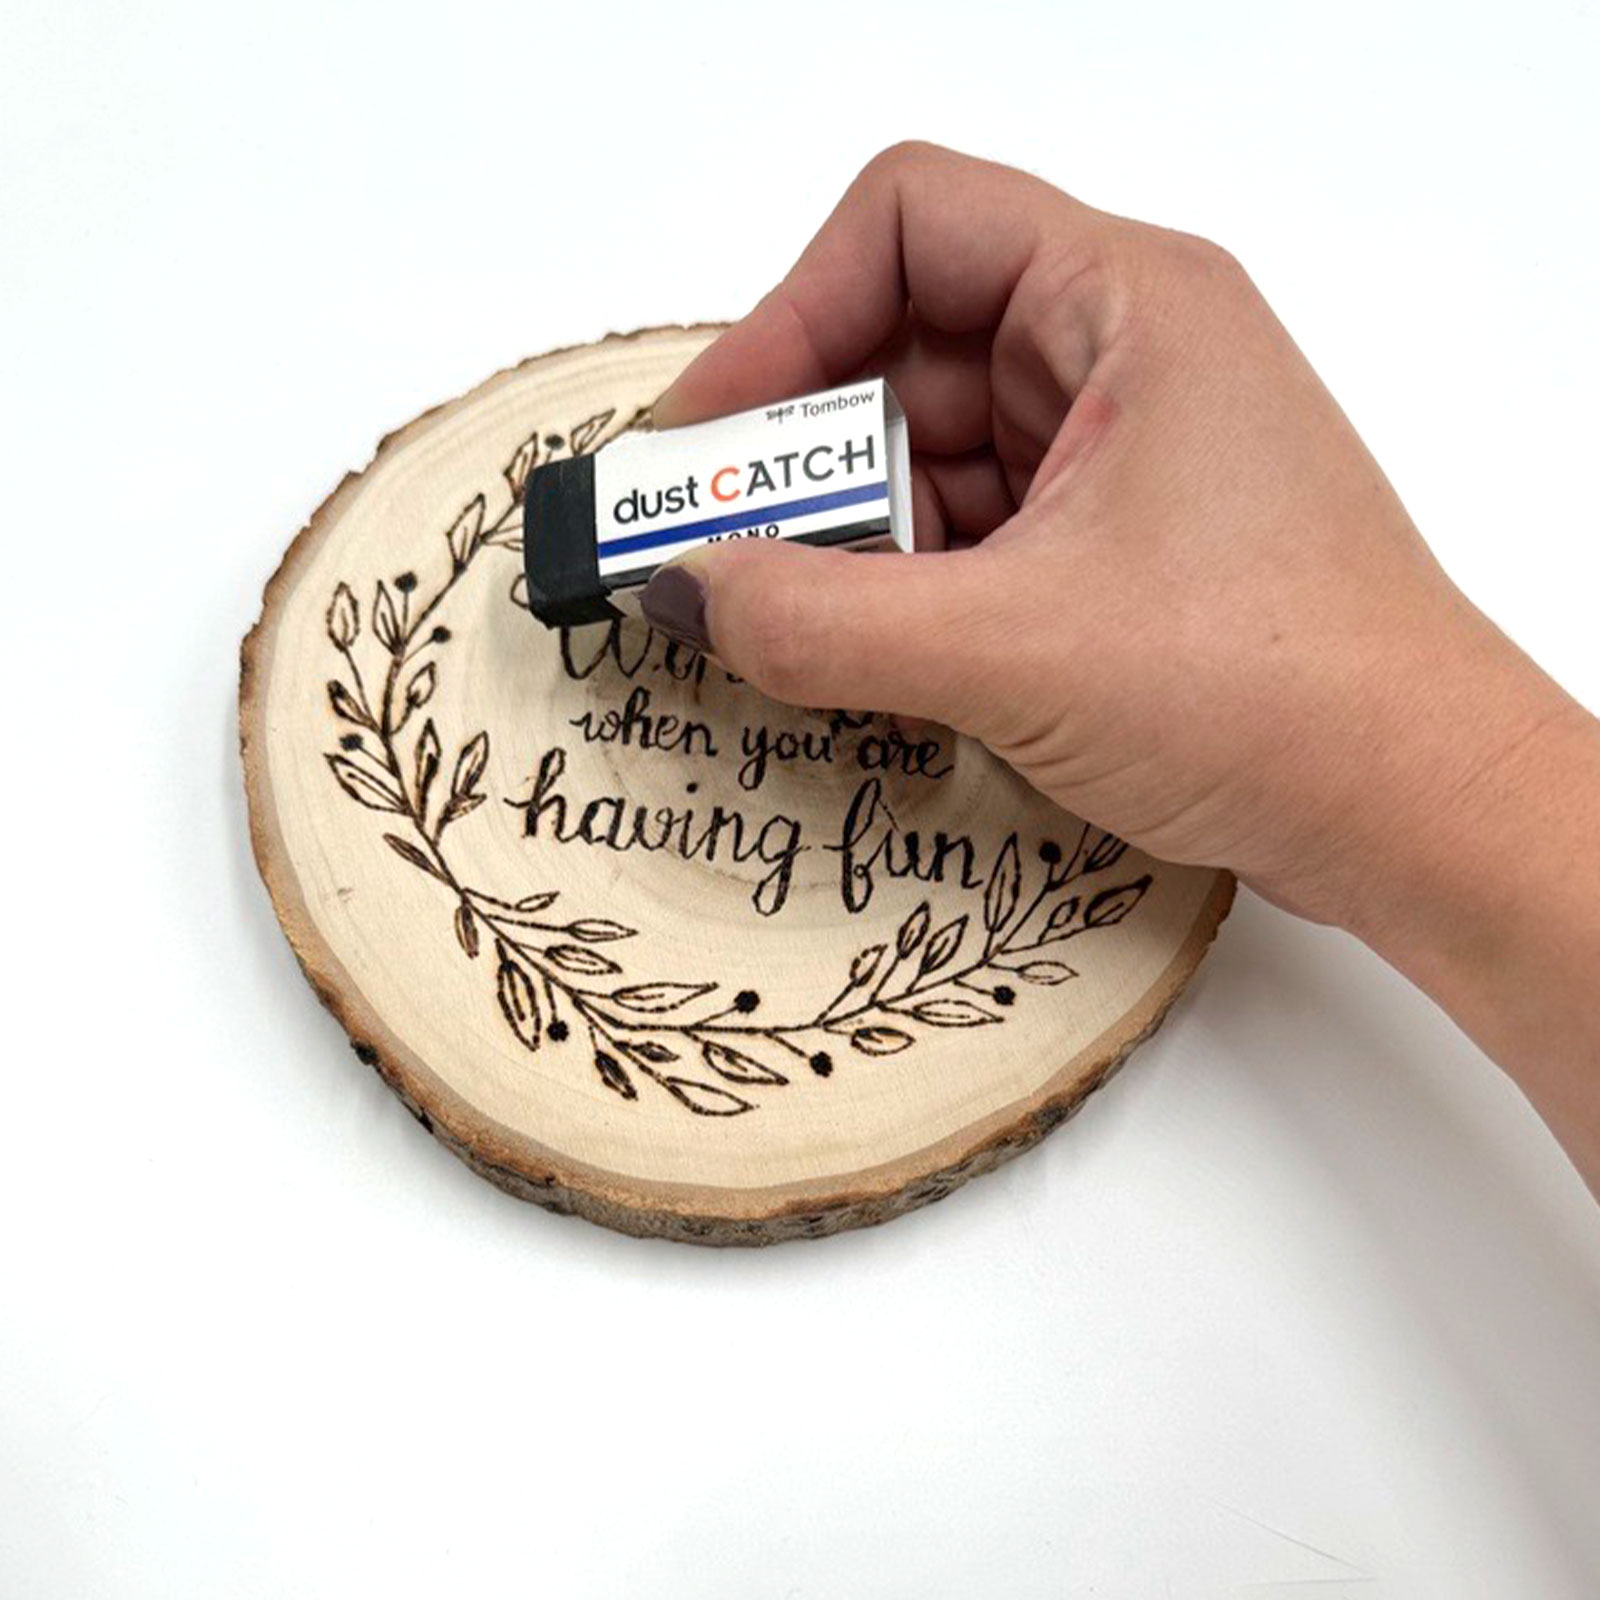
Remove the paper from the wood. The design should now be transferred onto the wood. If any lines are faint, go over them lightly with pencil.
6
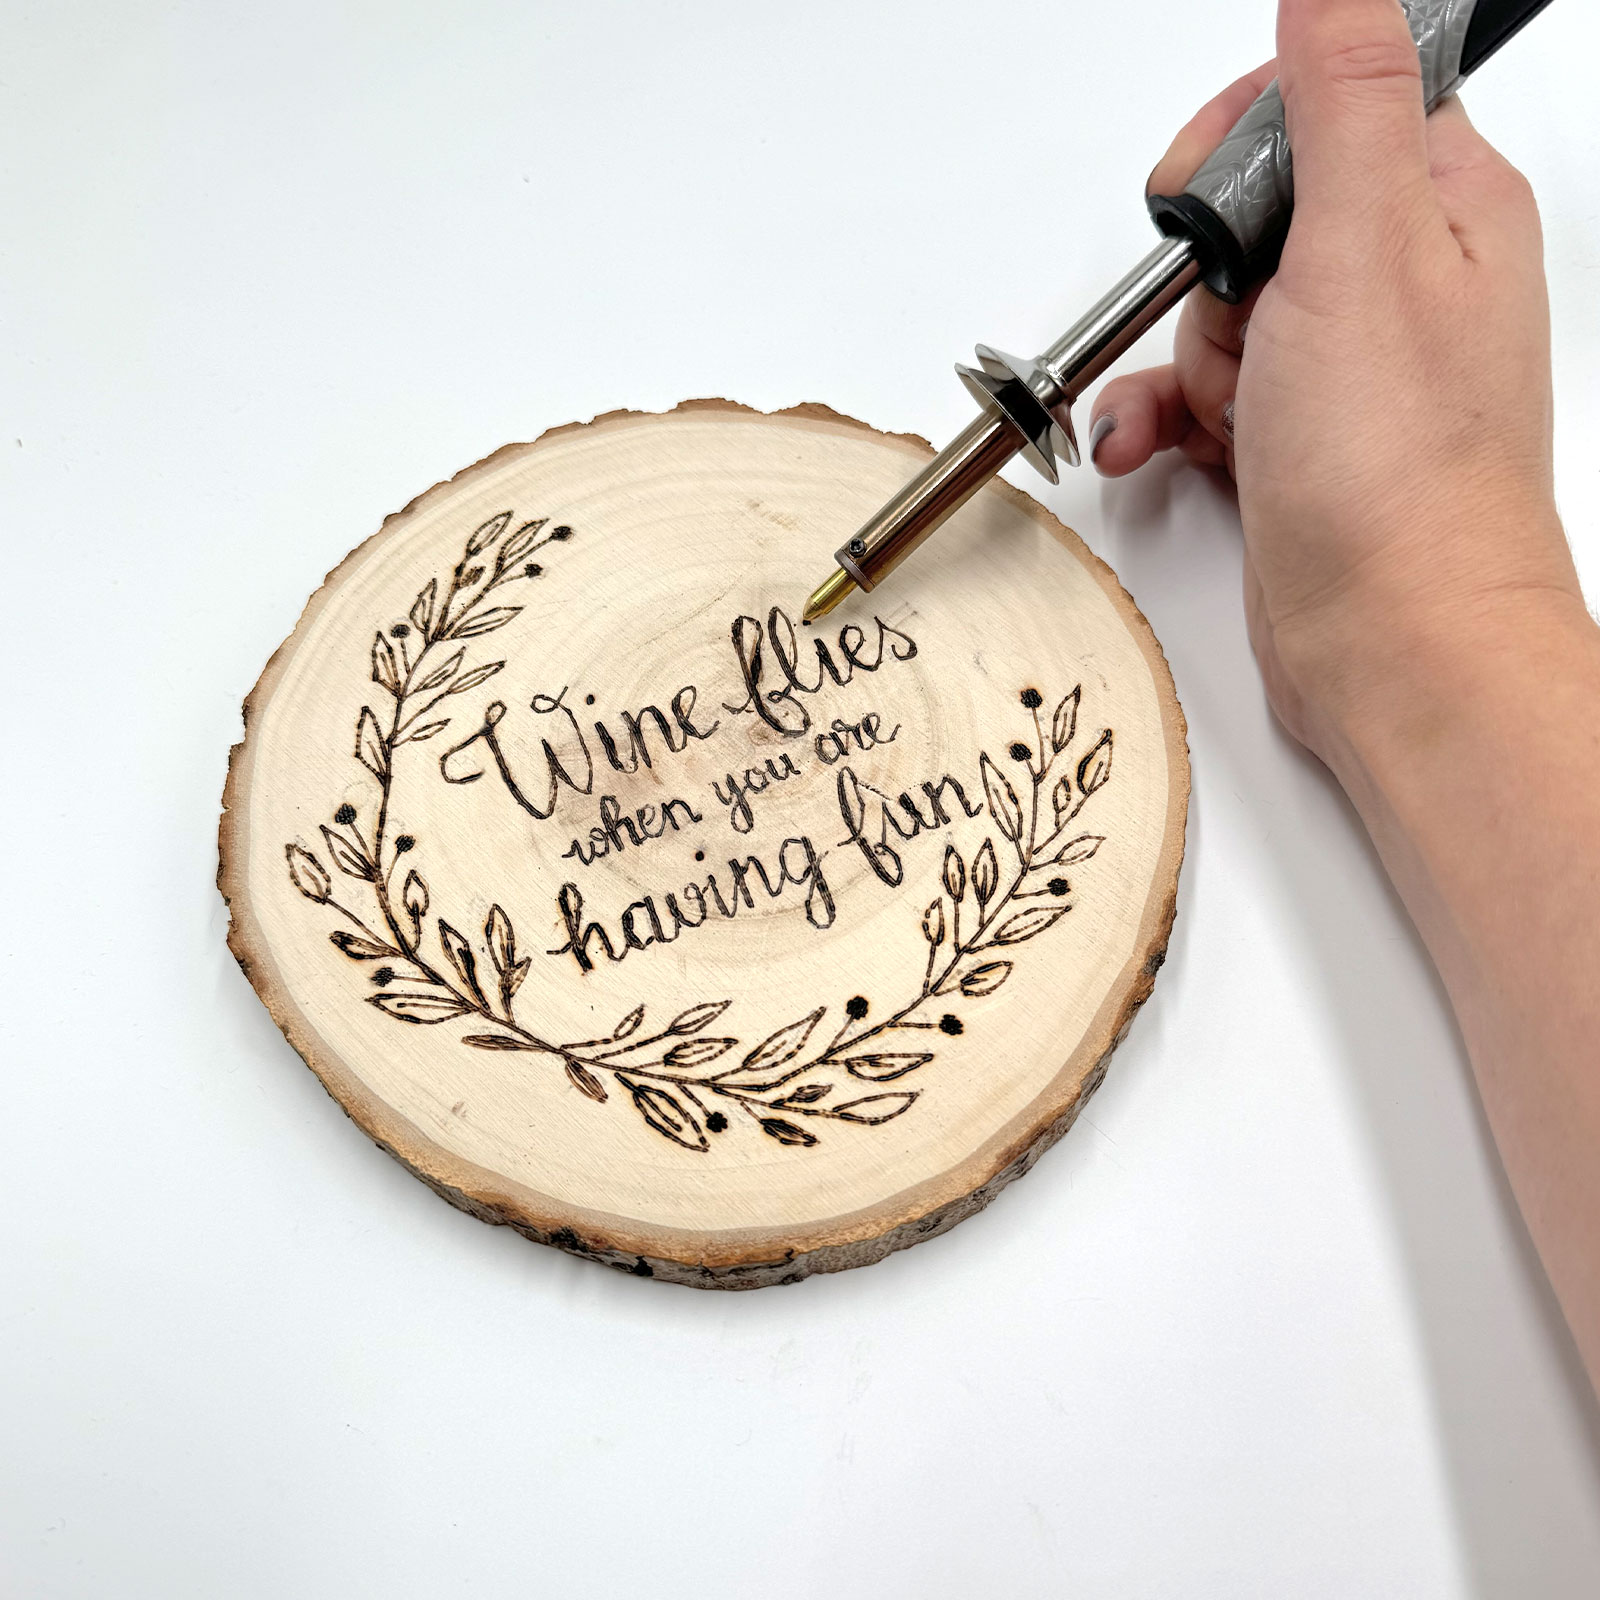
Prepare your workspace and allow the woodburner to heat up fully. Use the fine tip to start burning the thinner lines or outlining larger areas.
7
For broader lines or larger areas, you can switch to a wider tip. Let the woodburner cool completely before changing the tip.
8
