Do you want more structure in your day? Organize your life creatively with your own DIY planner! With just a few materials and 7 easy steps, you'll create a personal planner that is not only practical but also looks great and is completely tailored to your needs. So grab your crafting supplies and start this fun and useful project today!
1
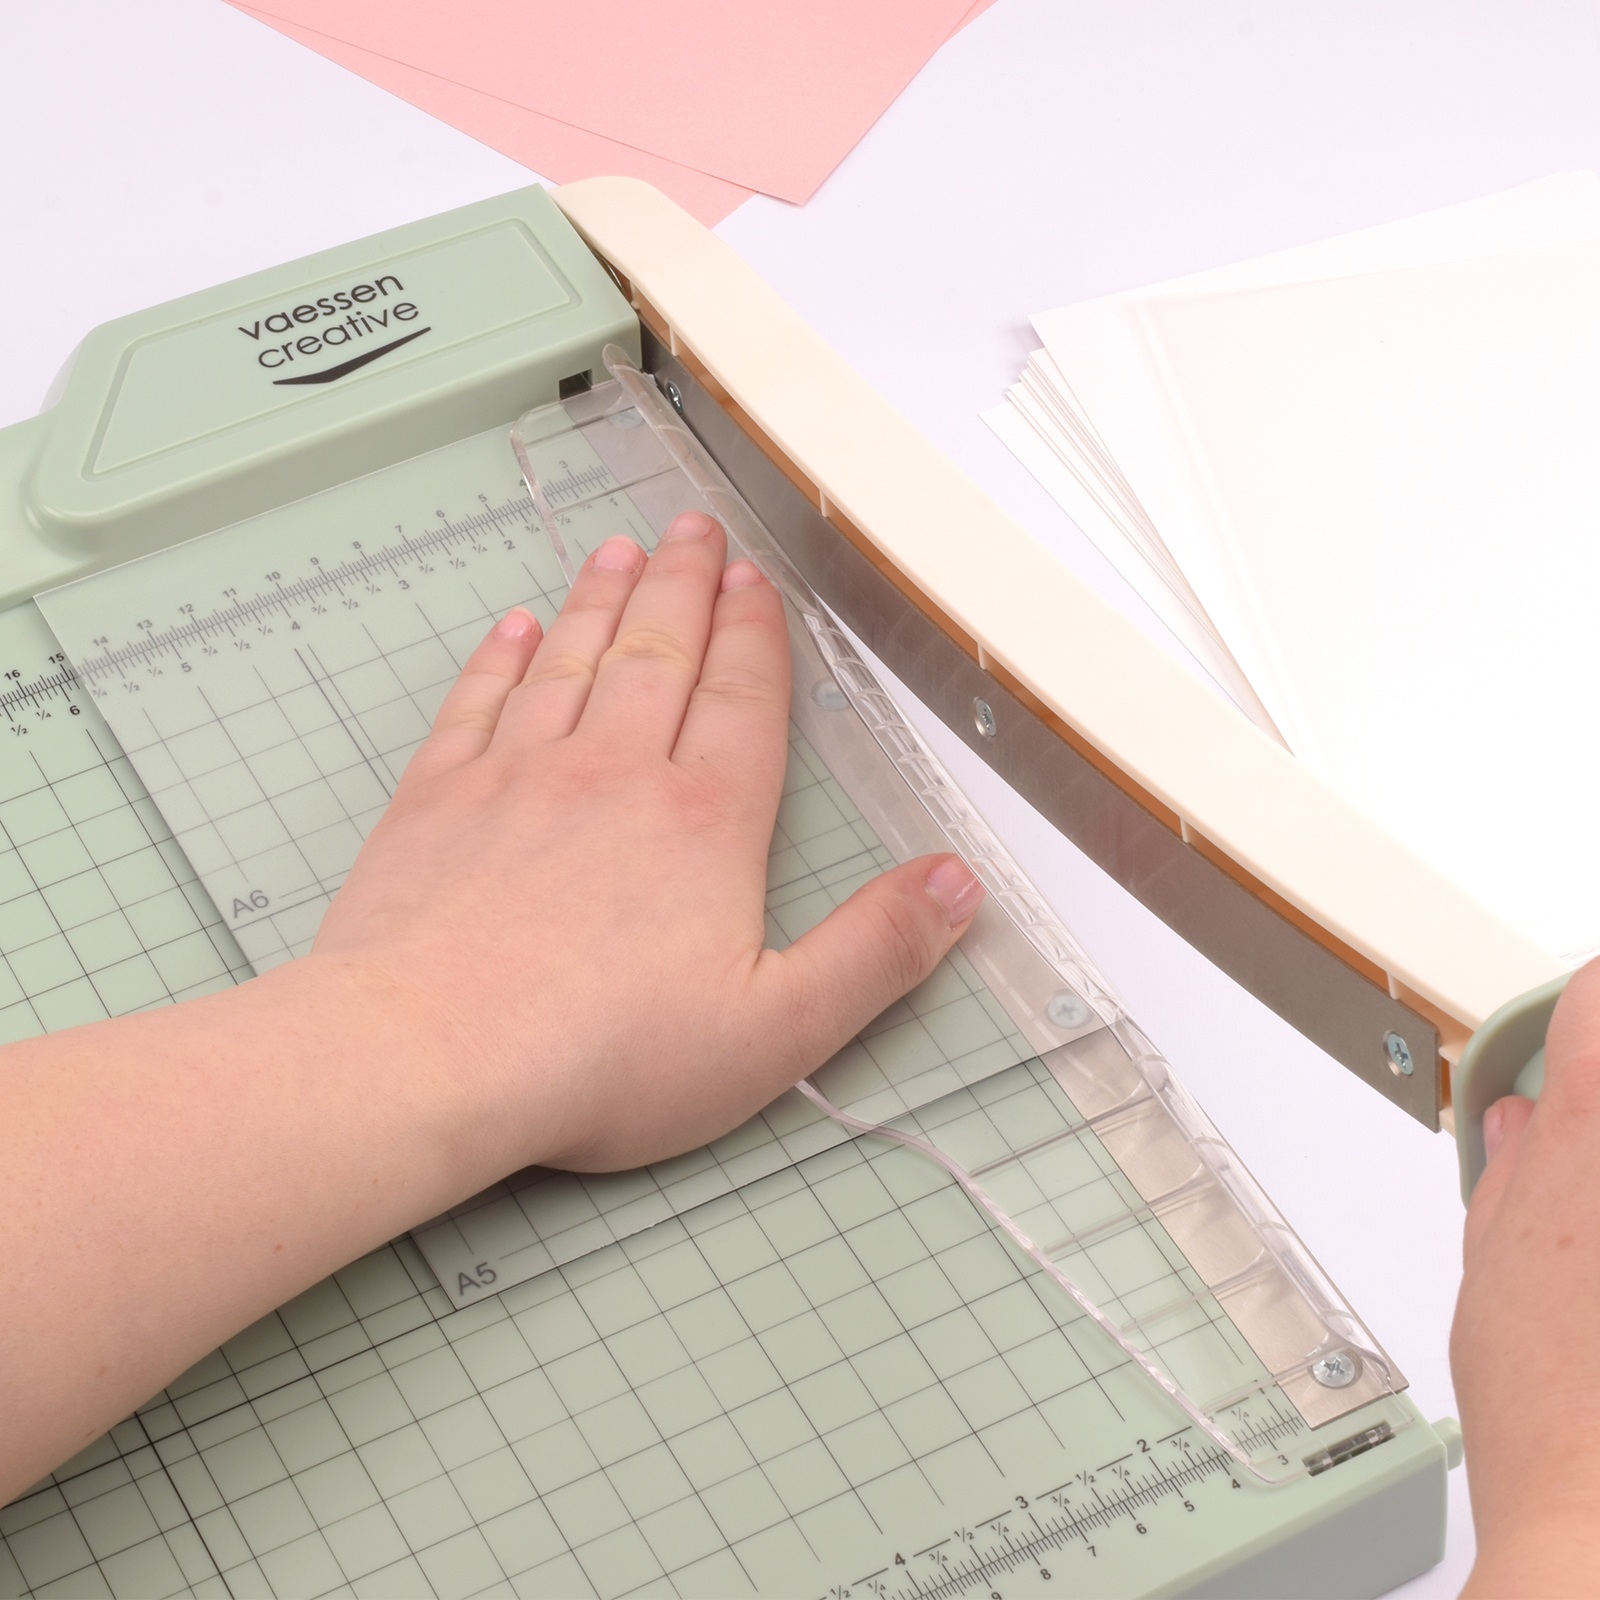
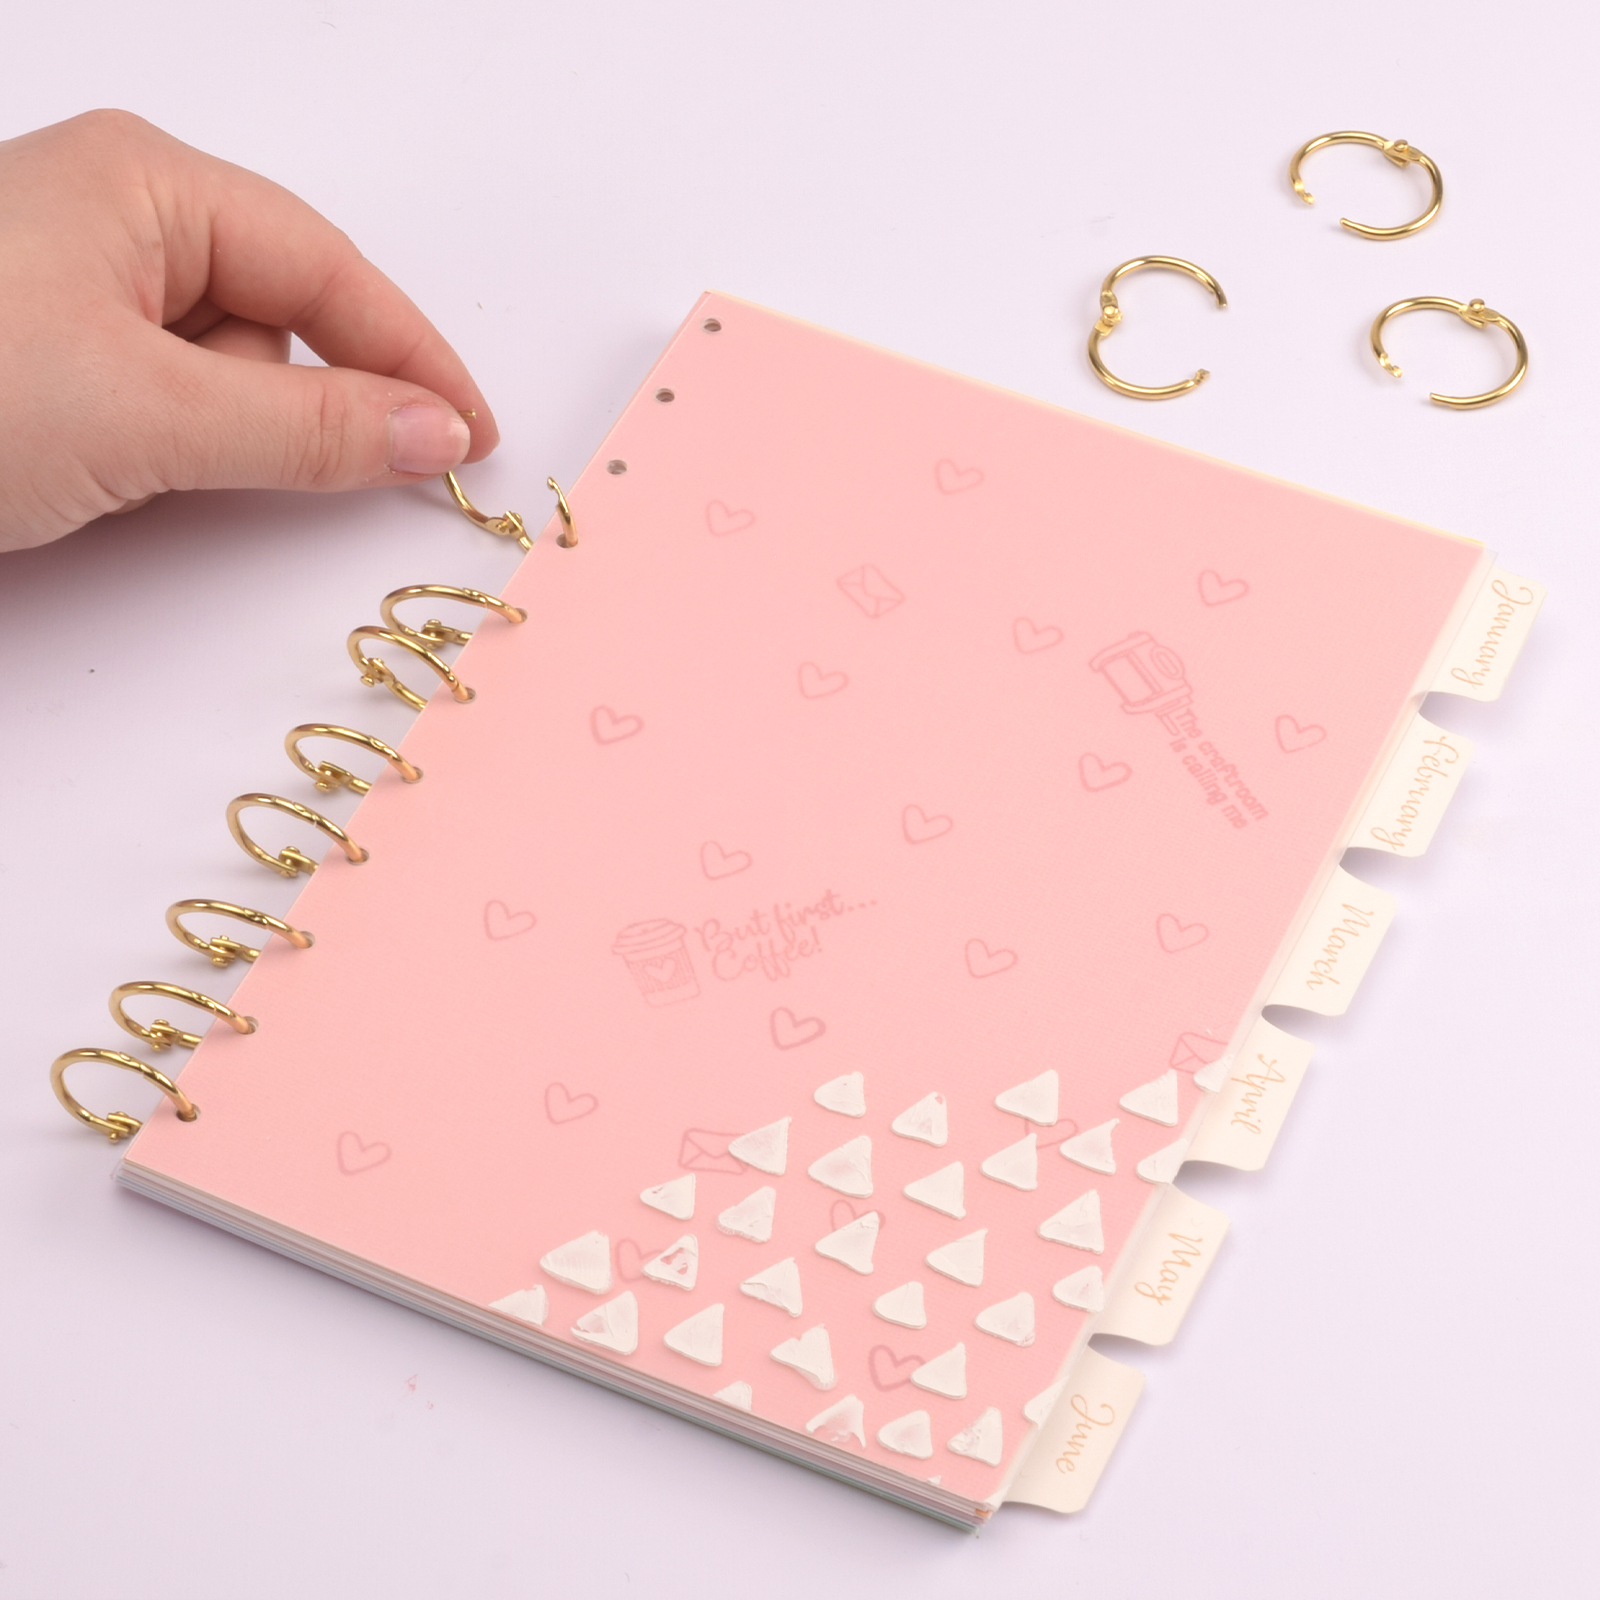
Cut several sheets of white cardstock, two sheets of coloured cardstock, and one sheet of matte foil into A5 size.
2
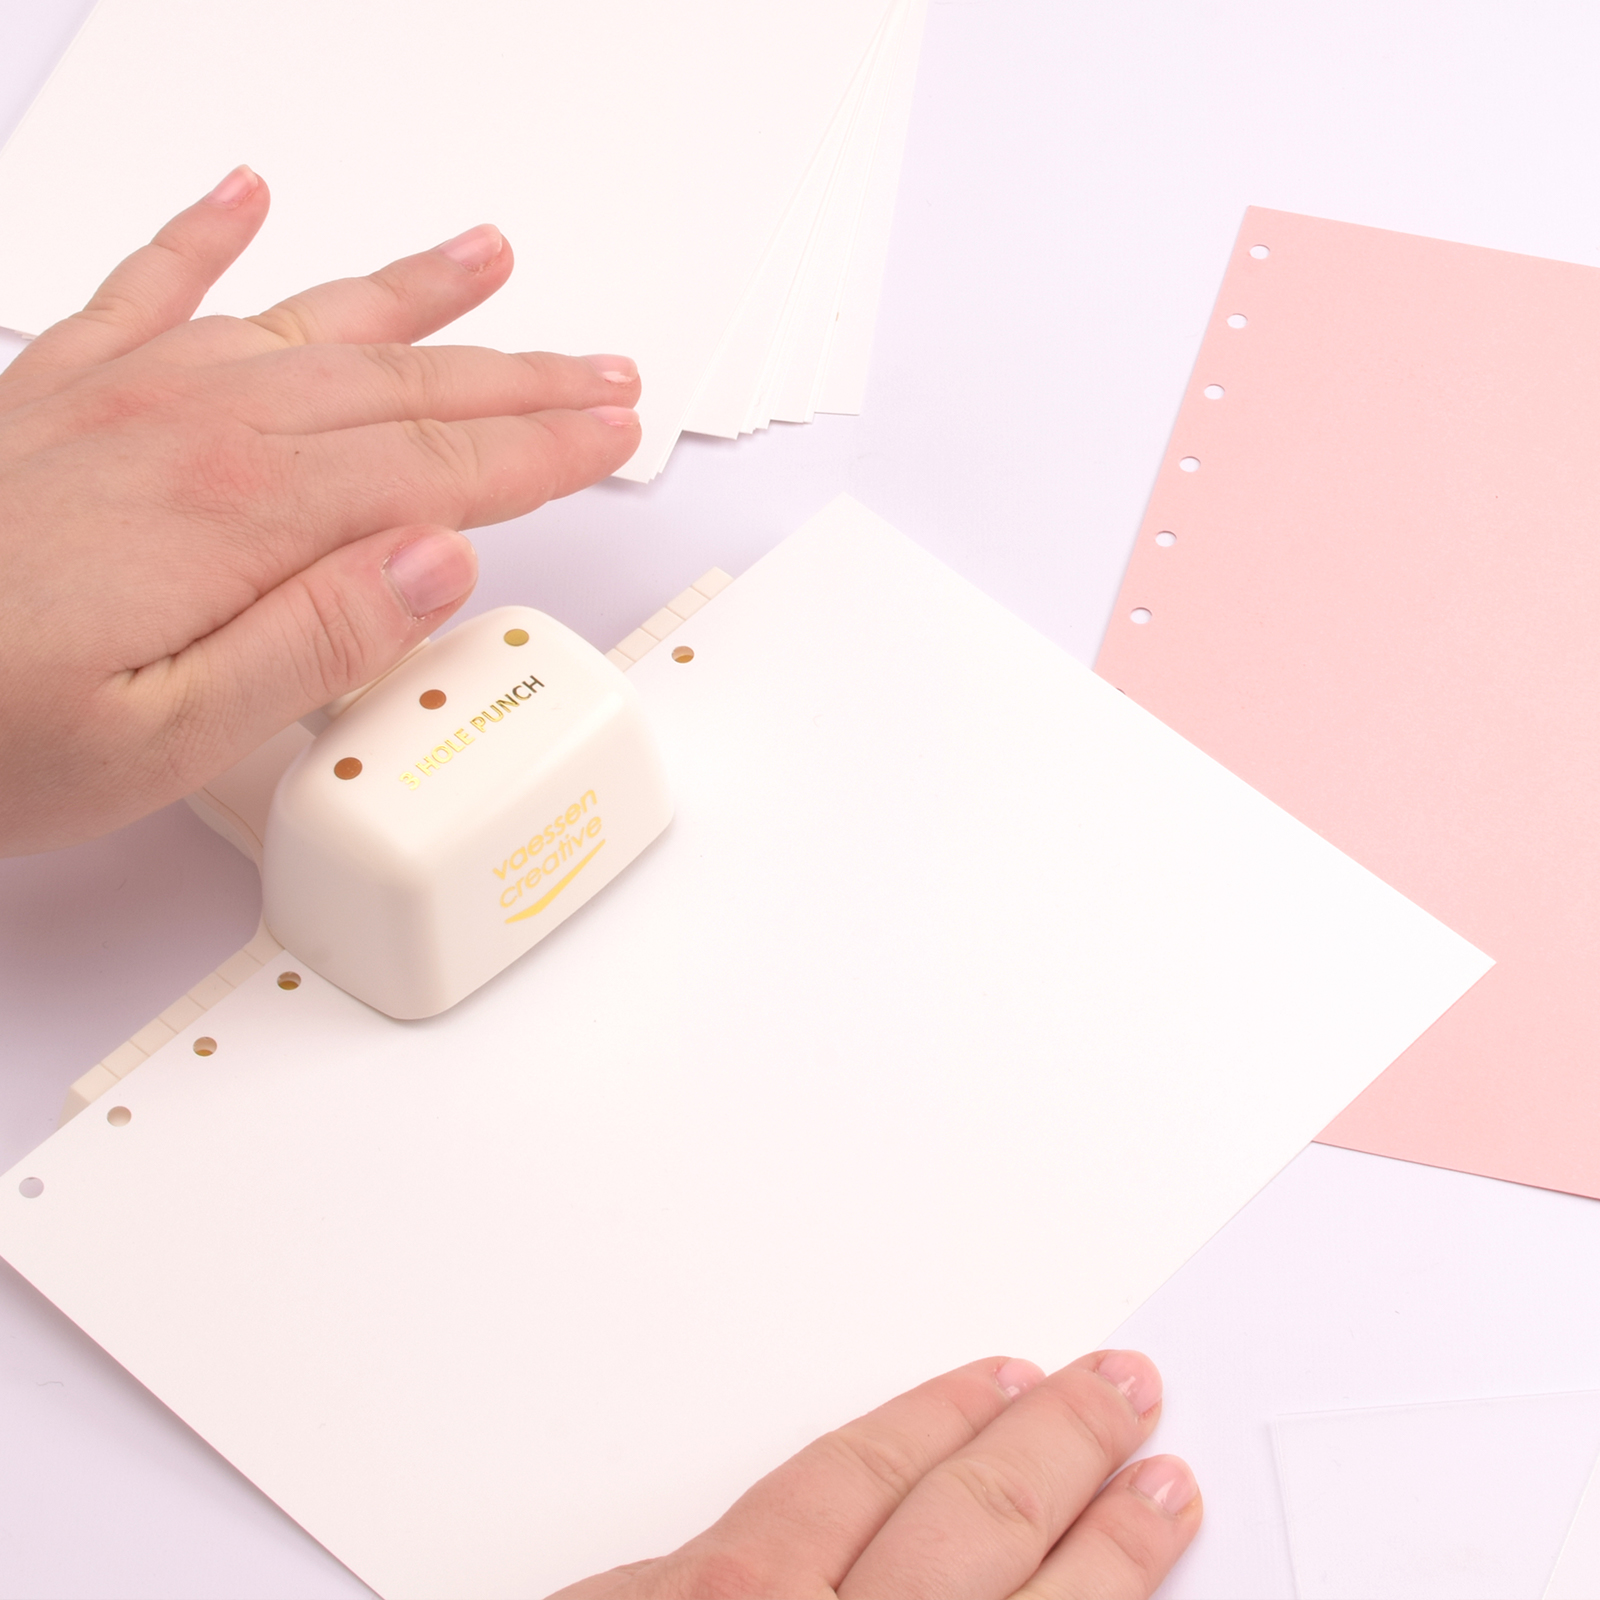
Punch holes in all the sheets so they can be bundled with book bindings later.
3
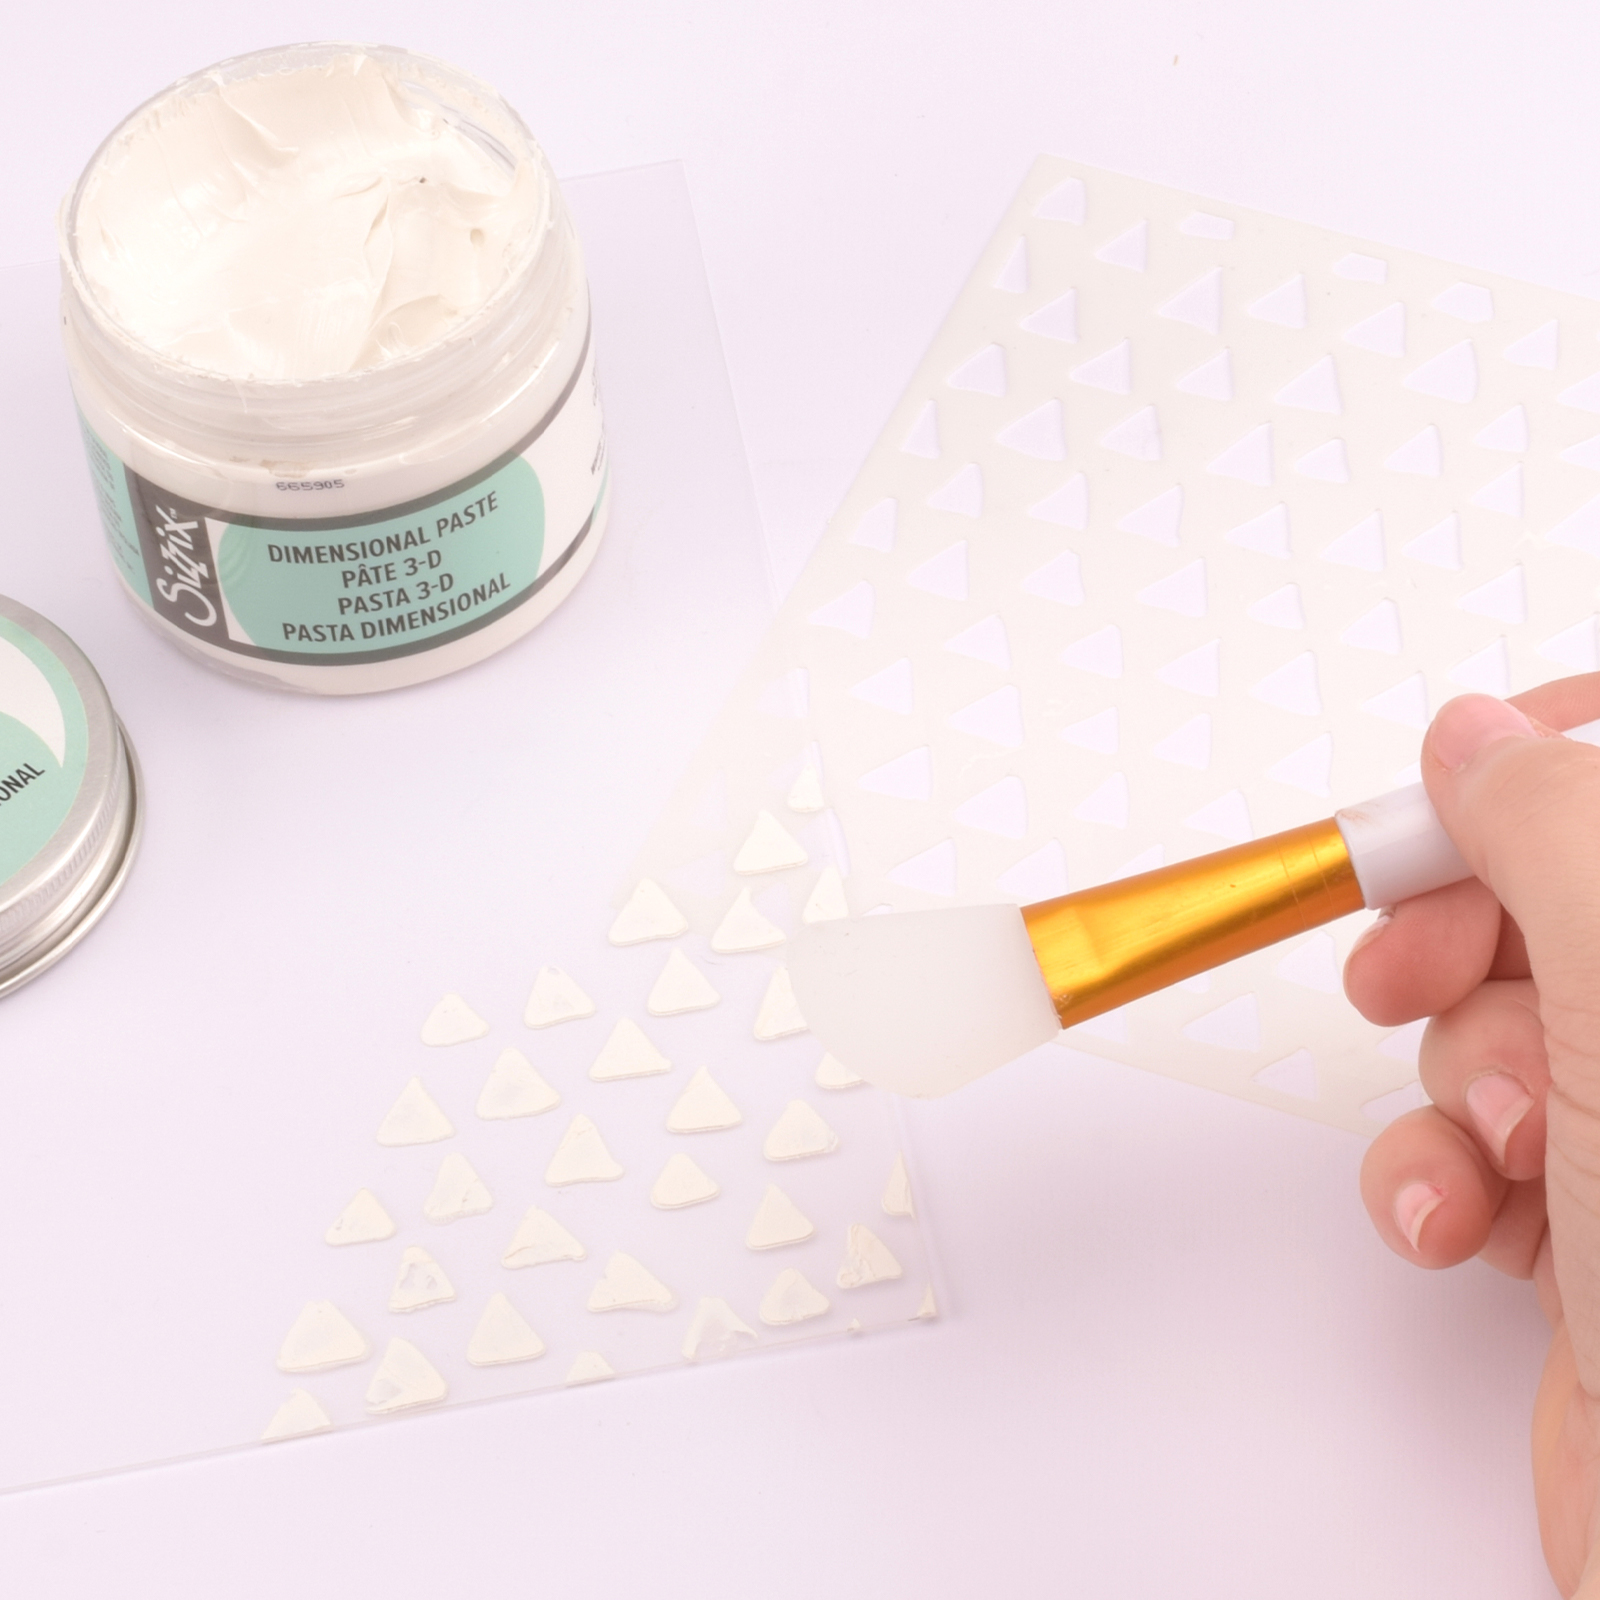
Use a stencil and texture paste on the foil sheet to decorate it. Let it dry thoroughly.
4
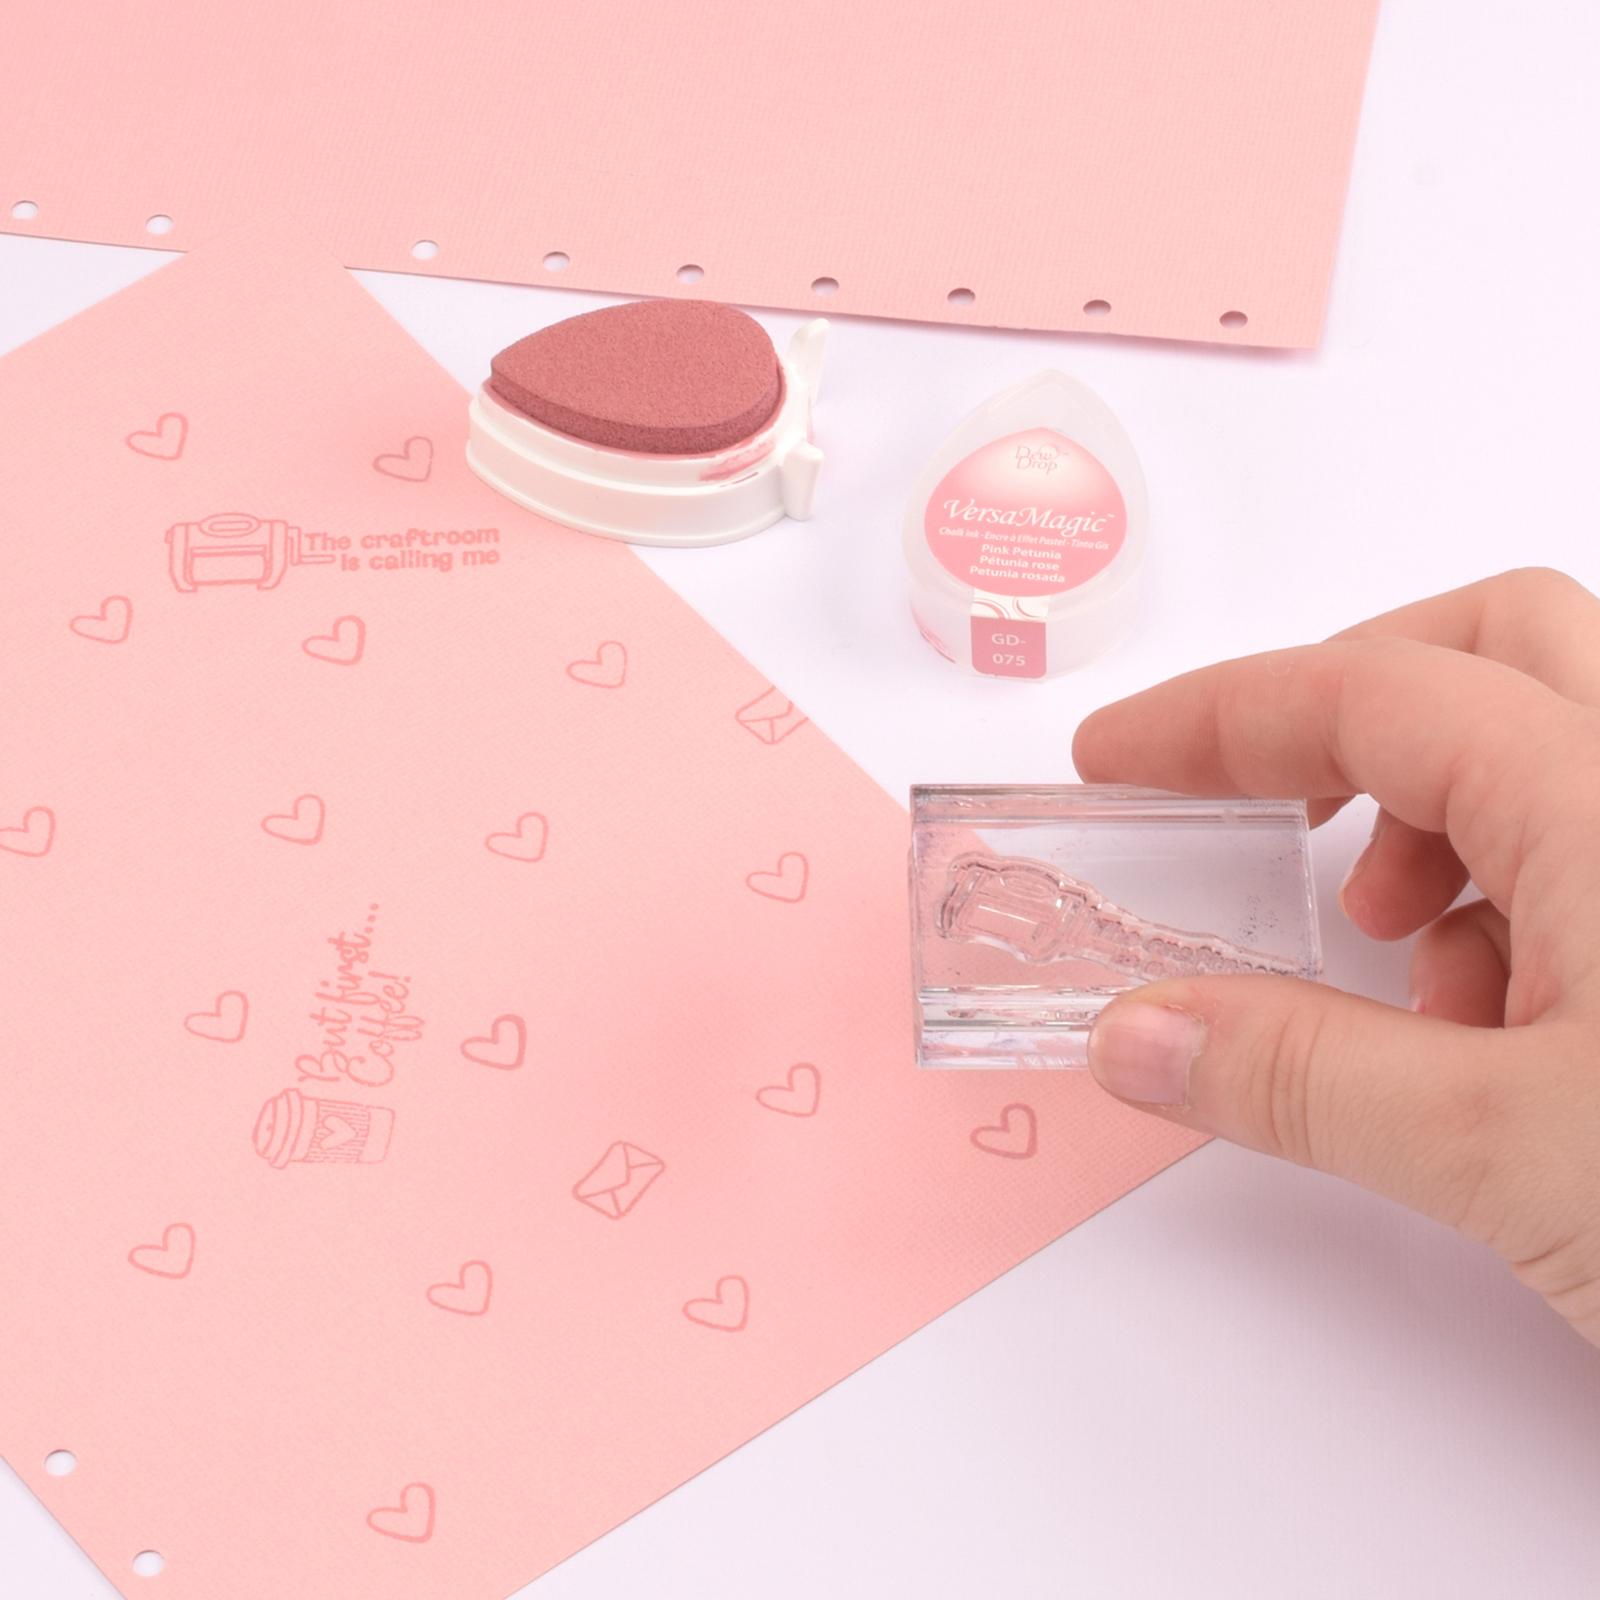
Decorate the coloured cardstock with stamps.
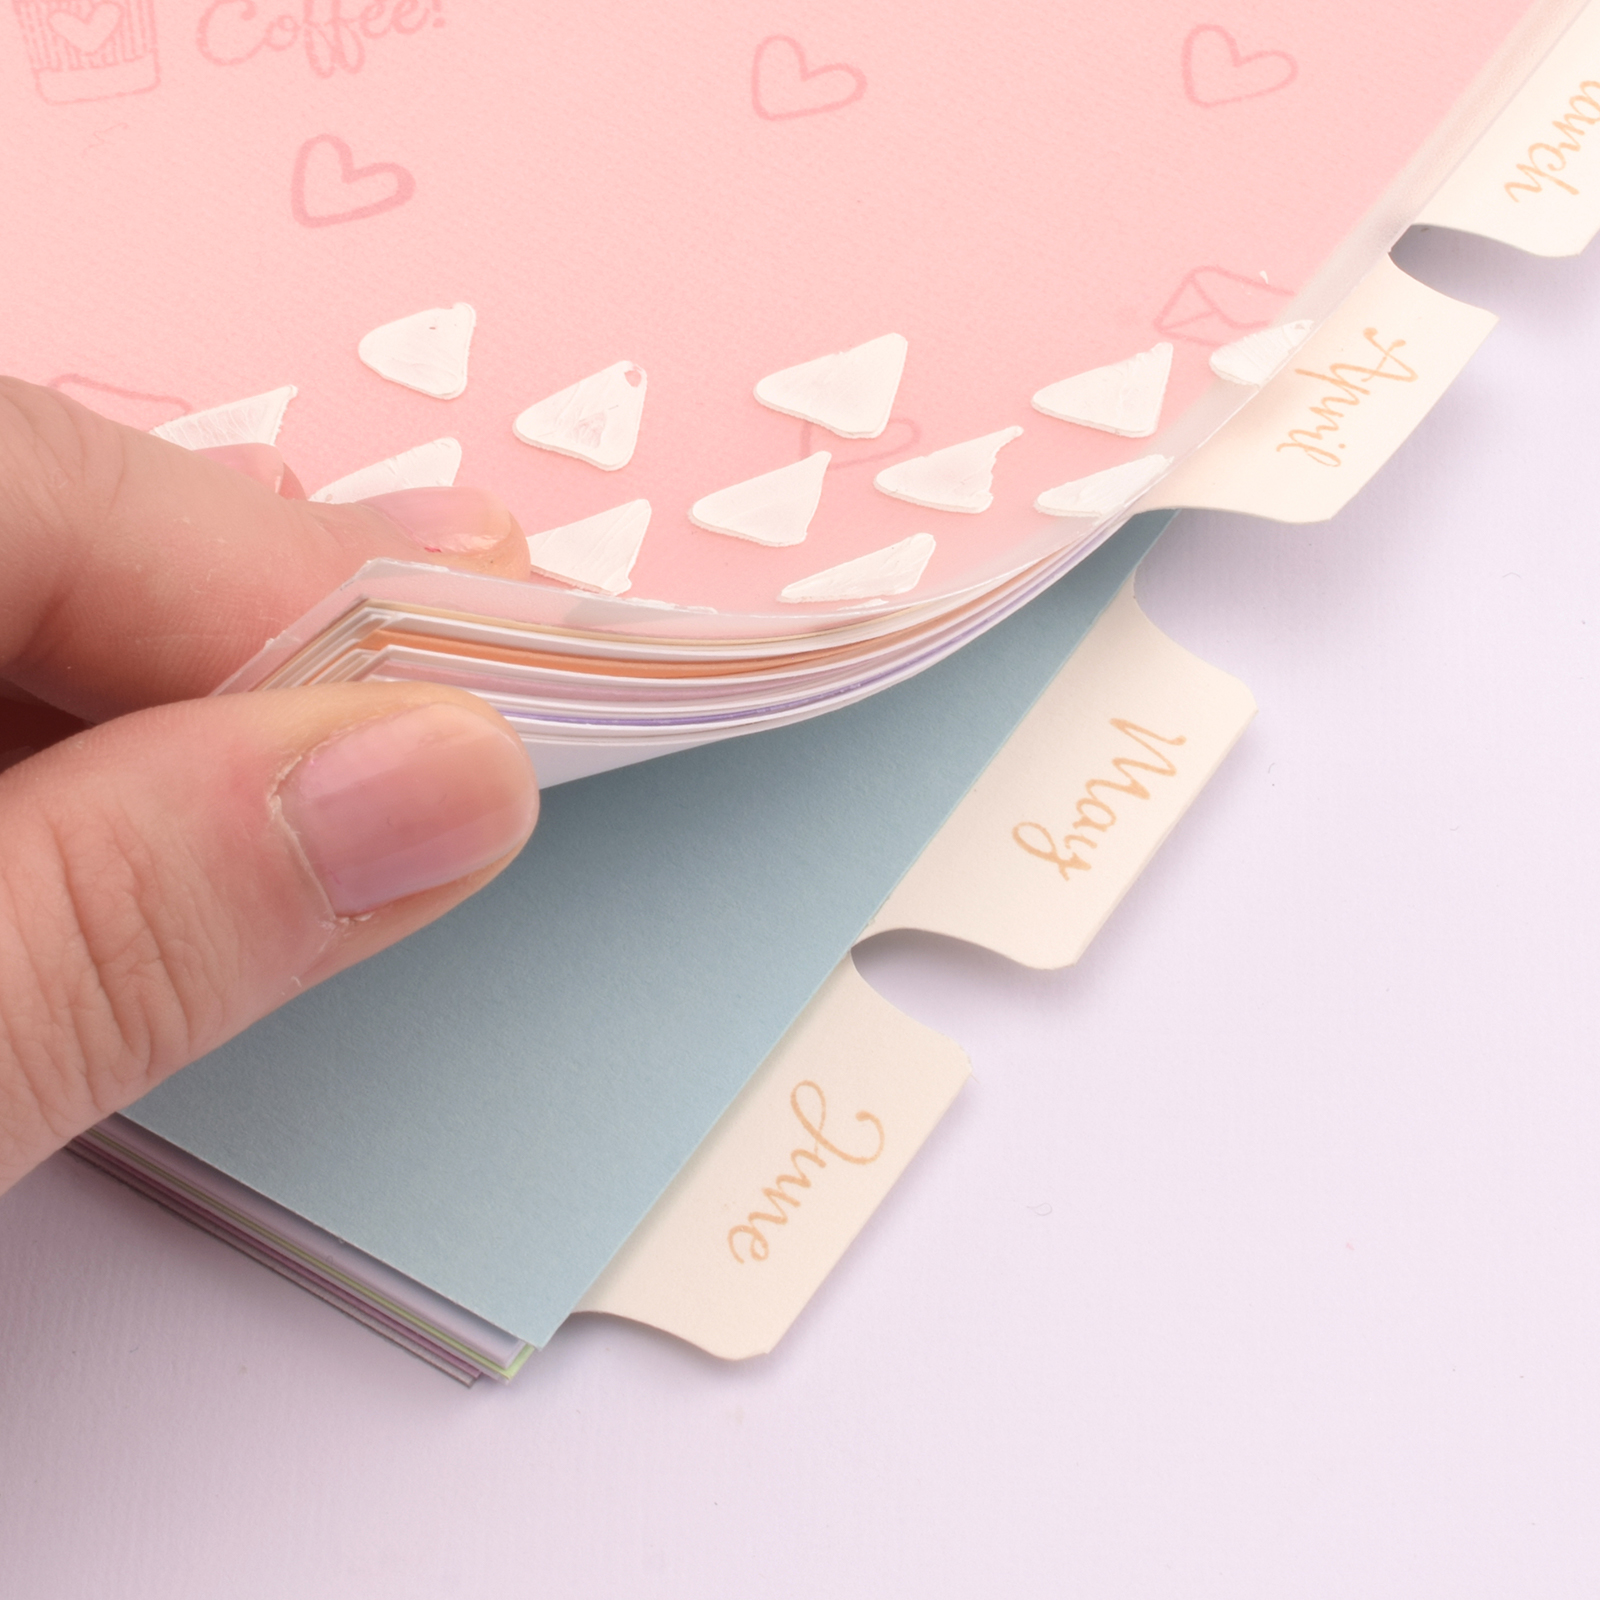
5
Use the whale-tail tab punch to make tabs and stamp them with the names of the months.
6
Tape the tabs to the white cardstock (or make coloured tabs and pages to distinguish the months from each other).